2 Display basics Data transfer
1. Turn off the display manually by holding the power button down for about two seconds.
2. Tap Shutdown. The display powers off and saves a backup of the database.
3. Power on the display by holding down the power button briefly (about one half of a second).
4. Insert the USB drive into one of the USB sockets on the display.
5.
Tap on the Home or Run screen.
6.
Tap .
7. The display notifies you that an upgrade is available.
8. Choose the version you want to upgrade to.
9. Tap the checkmark to continue the firmware upgrade.
USB data transfer
The following steps explain how to transfer your data from a TMX-2050 display to a USB drive.
Note – Make sure your USB drive has the AgGPS folder on the root.
1. Insert the USB drive into one of the USB sockets on the display.
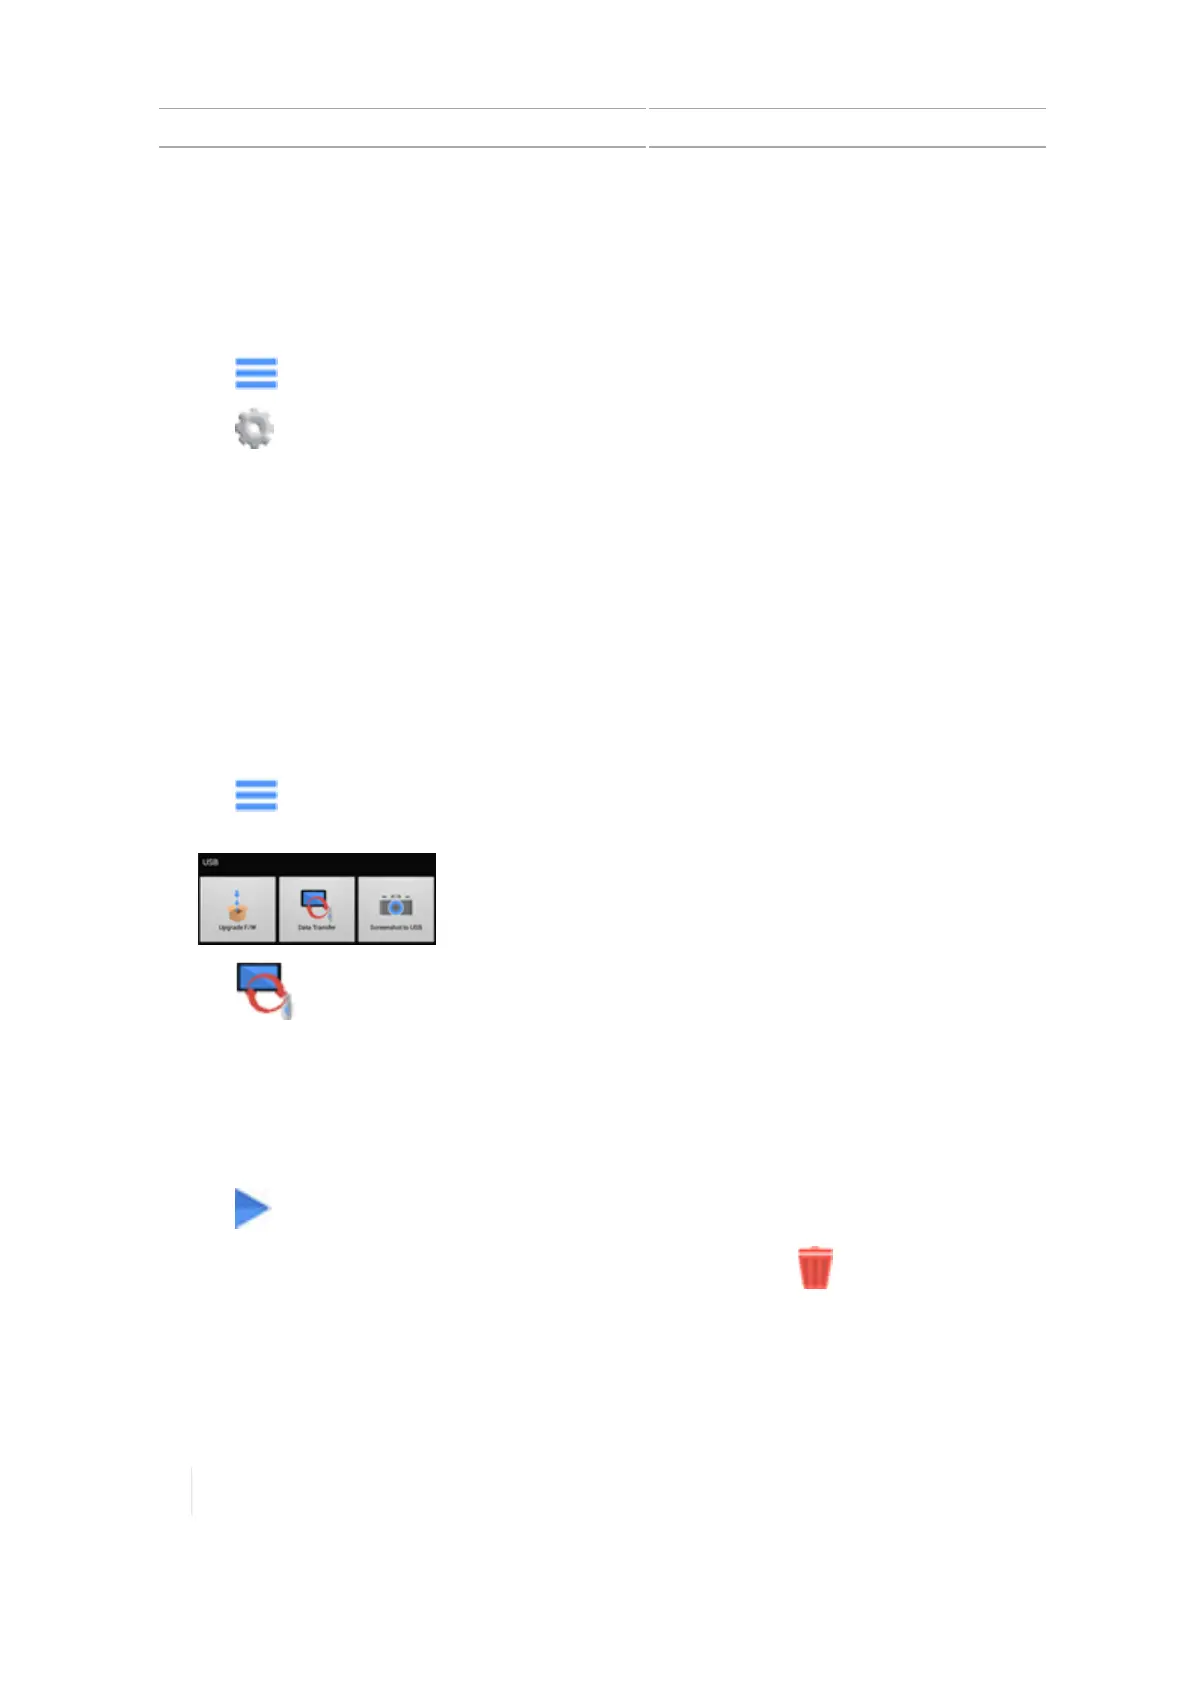
2.
Tap on the Home or Run screen, or on the notification list. (For instructions on how to
display the notification list, see Display bar, 51.) The USB menu displays:
3.
Tap . The Data Transfer panel displays.
4. To expand an item on either list, tap a category name.
5. To select all files in a category, tap the box beside the category name. A check mark displays.
6. To deselect all files in a category, tap the box beside the name.
7. To select an individual file, tap the box beside the file name.
8.
Tap to move the item to the USB drive.
9.
To delete an item, tap the box next to the item in either list and tap .
Note – You cannot delete an item that is actively selected or currently being transferred.
68 TMX-2050 Display User Guide Version 1.075, Revision C