MAINTENANCE AND SERVICING
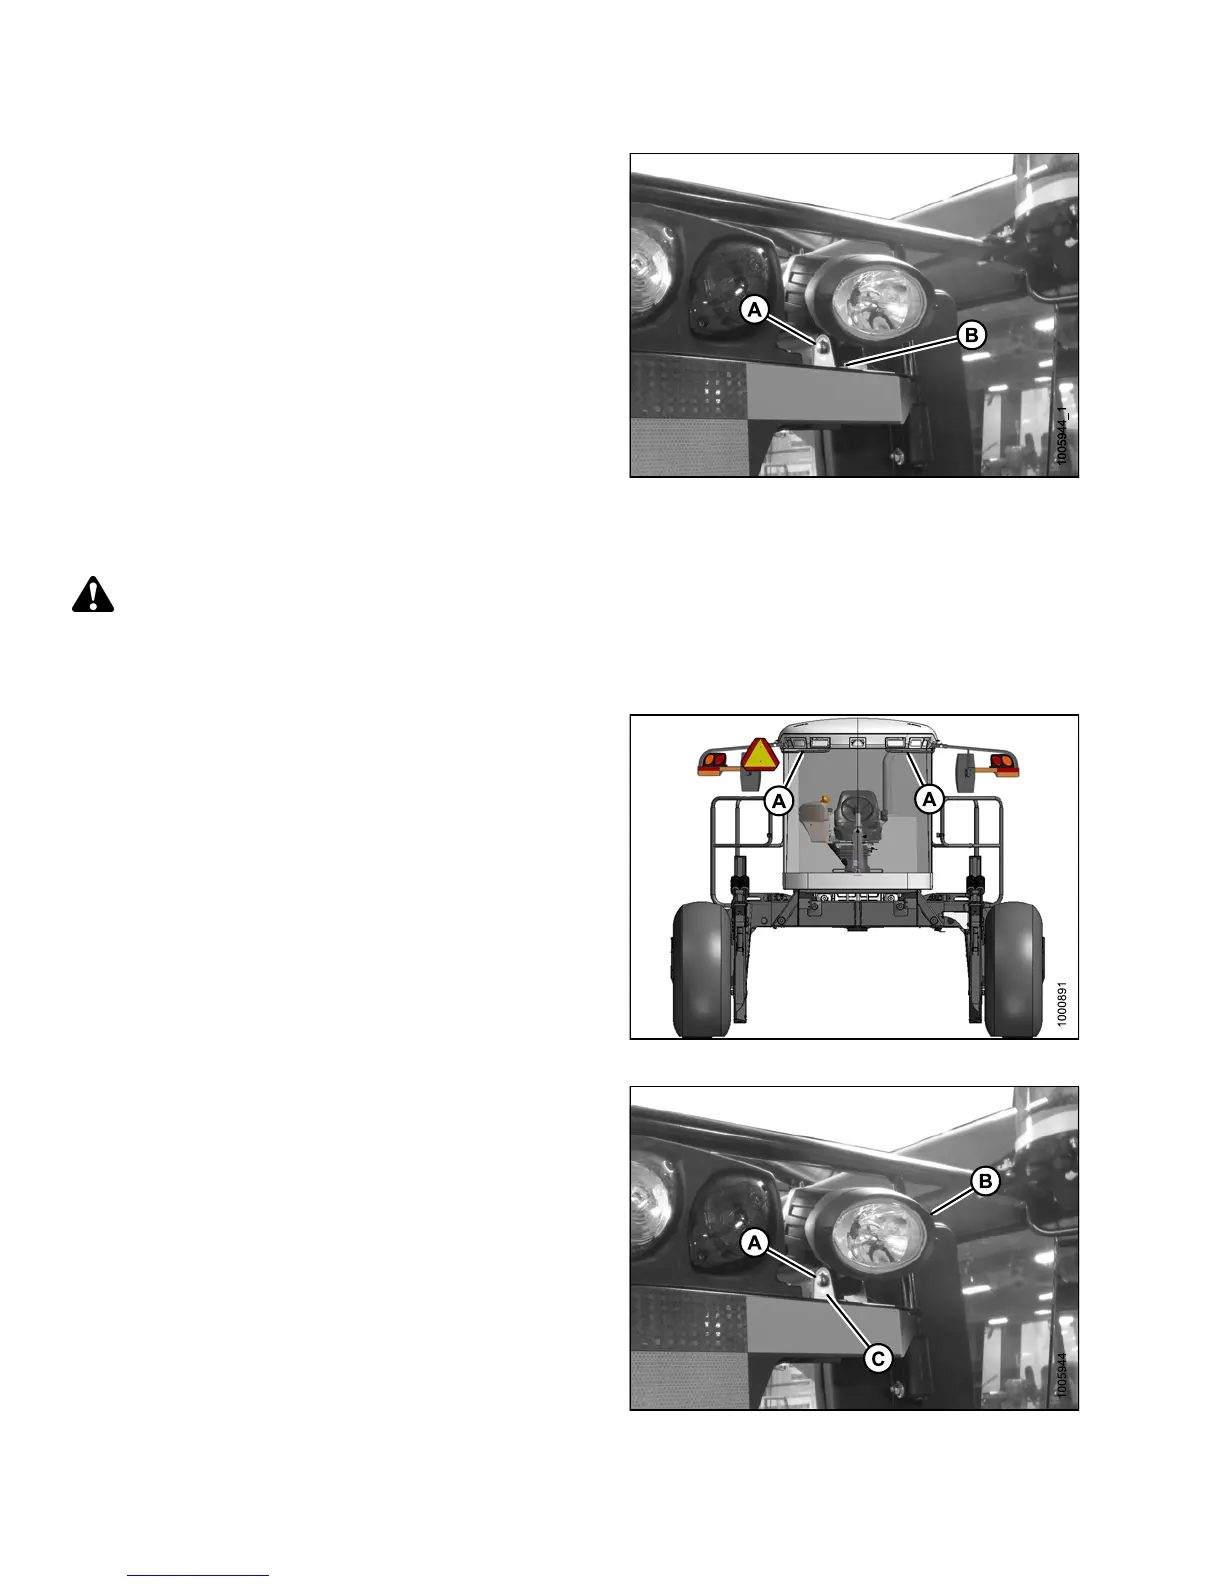
1. Shut down engine and remove key. Turn lights ON.
2. Loosen bolt (A) and nut (B) (located inside light /
mirror support).
3. Position light to desired position.
4. Tighten bolt (A) and nut (B).
Figure 5.148: HID Auxiliary Lights
Replacing High-Intensity Discharge (HID) Lamp (if Installed)
DANGER
To avoid bodily injury or death from unexpected startup of the machine, always stop the engine and remove
the key from the ignition before leaving the operator’s seat for any reason.
To remove an d replace the lamp only, follow these steps:
1. Shut down engine and remove key. Turn lights OFF.
NOTE:
Hold onto the handholds (A) on the cab front
corners and stand on the header anti-slip strips,
or stand on the maintenance platform when
accessing the HID auxiliary ligh ts.
Figure 5.149: Cab Handholds
2. Remove the nut, spring washer, and bolt (A) that
secure the lamp (B) to lamp bracket (C).
3. Remove lamp (B).
4. Position the new lamp (B) in lamp bracket (C) and
secure with bolt (A), spring washer, and nut.
5. Adjust lamp (B) to desired p o s itio n and tighte n bolt (A).
Figure 5.150: HID Auxiliary Lights
147649 384 Revision A