Boom height control 8 Implements
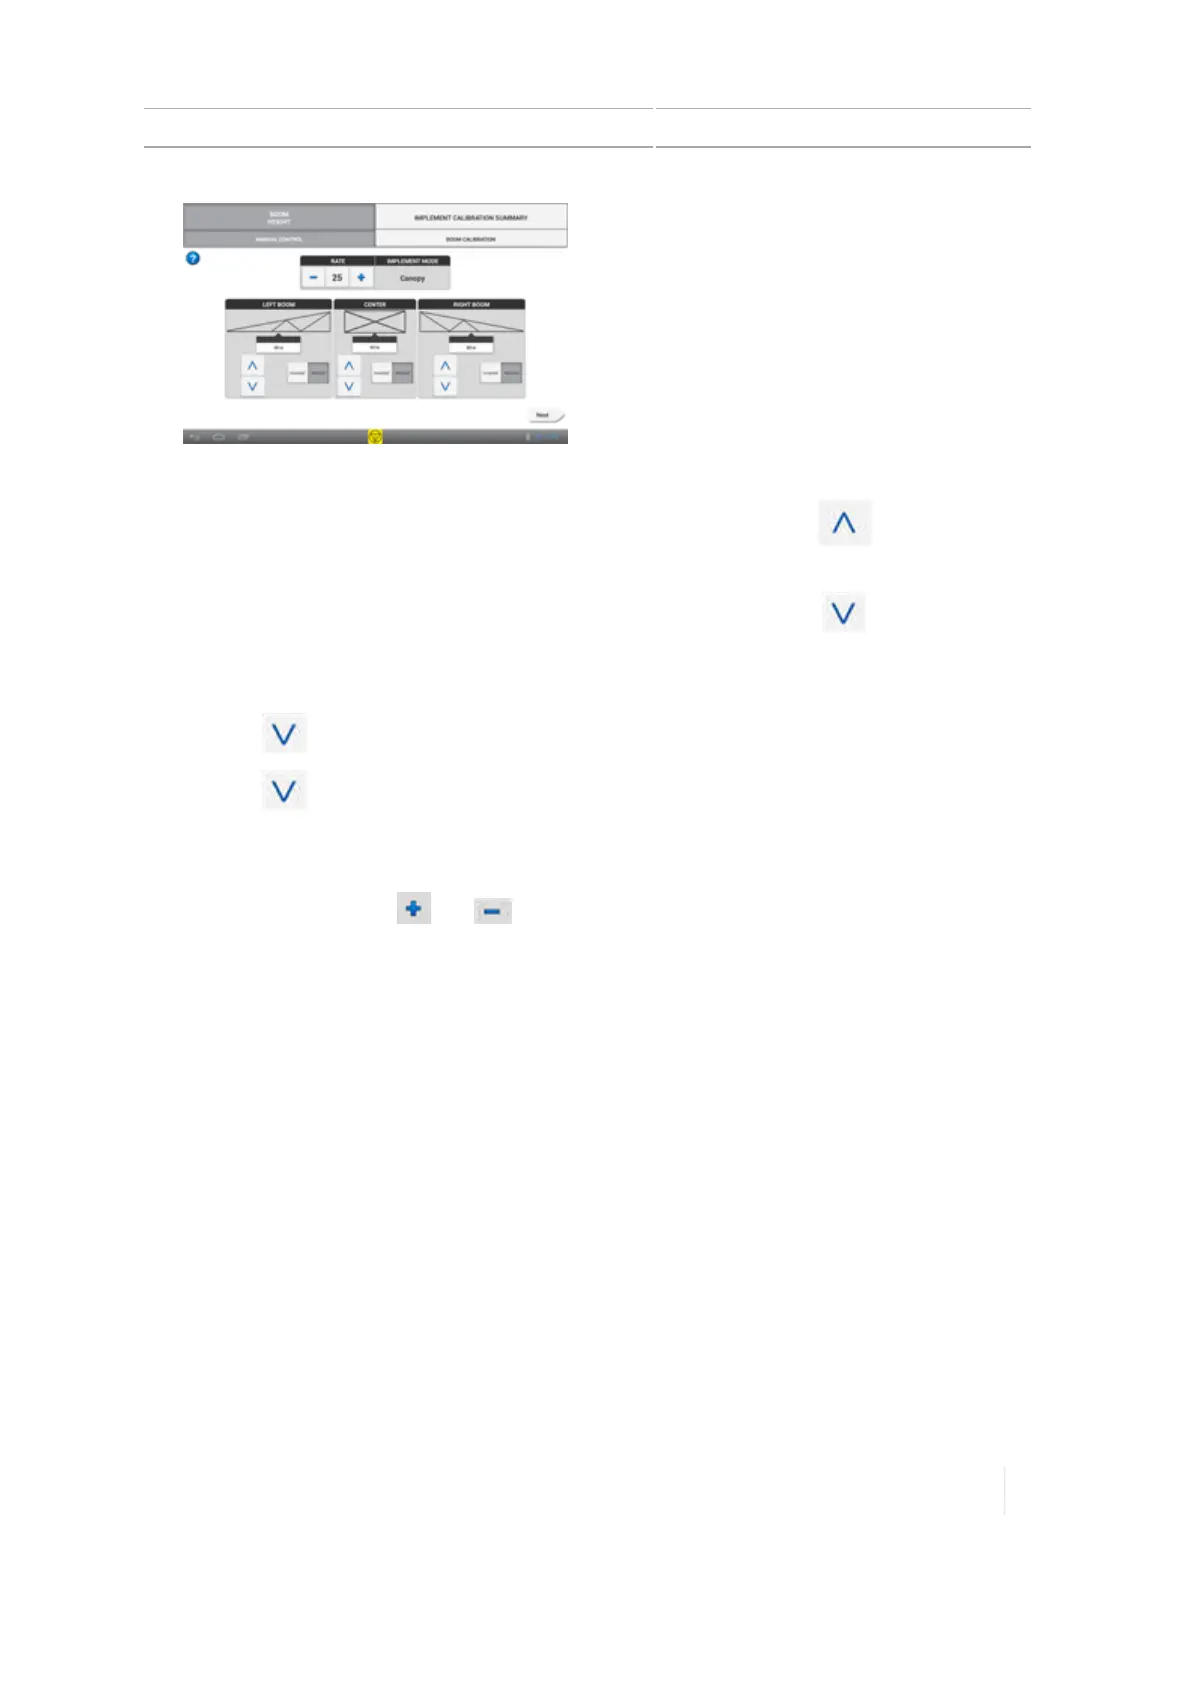
3. If you have a SIMmodule, for each boom:
a.
Set the switch in the cab to the Raise position. Make sure that the button for the
boom you are working with is lighted. If the wrong button lights up, check the wiring.
b.
Set the switch in the cab to the Lower position. Make sure that the button for the
boom you are working with is lighted. If the wrong button lights up, check the wiring.
4. If you do not have a SIMmodule:
a.
Tap for each boom you are working with. Make sure that the boom goes up.
b.
Tap for each boom you are working with. Make sure that the boom goes down.
c. If the boom moves in the wrong direction, tap the Inverted button for the boom and then
repeat steps 3a and 3b.
d.
Optionally, tap the and buttons to adjust the Rate, and then repeat Step 2. This
raises and lowers the boom more quickly or more slowly for testing only. The Rate on this
screen does not affect boom height functions on the Run screen.
5.
Each control has an up and down button for manual control. Use Rate to adjust the actuator
output speed. If the boom moves too quickly, adjust the rate value down and vice versa. Each
zone has:
ll A canopy height readout for each sensor associated with that zone
l A status indicator for the manual height control switches associated with the zone (if
enabled)
Refer to the installation guide for troubleshooting assistance.
6.
For each boom section:
a. Press and hold the up button.
b. Verify that the appropriate section of boom moved up.
c. Verify that the height readings for each sensor on that boom increased.
d. Press and hold the down button.
Version 1.075, Revision C TMX-2050 Display User Guide 217