April 2017
4-229
Xerox® VersaLink® B7025/B7030/B7035 Multifunction Printer
ADJ 5.3
Repairs and Adjustments
Launch Issue
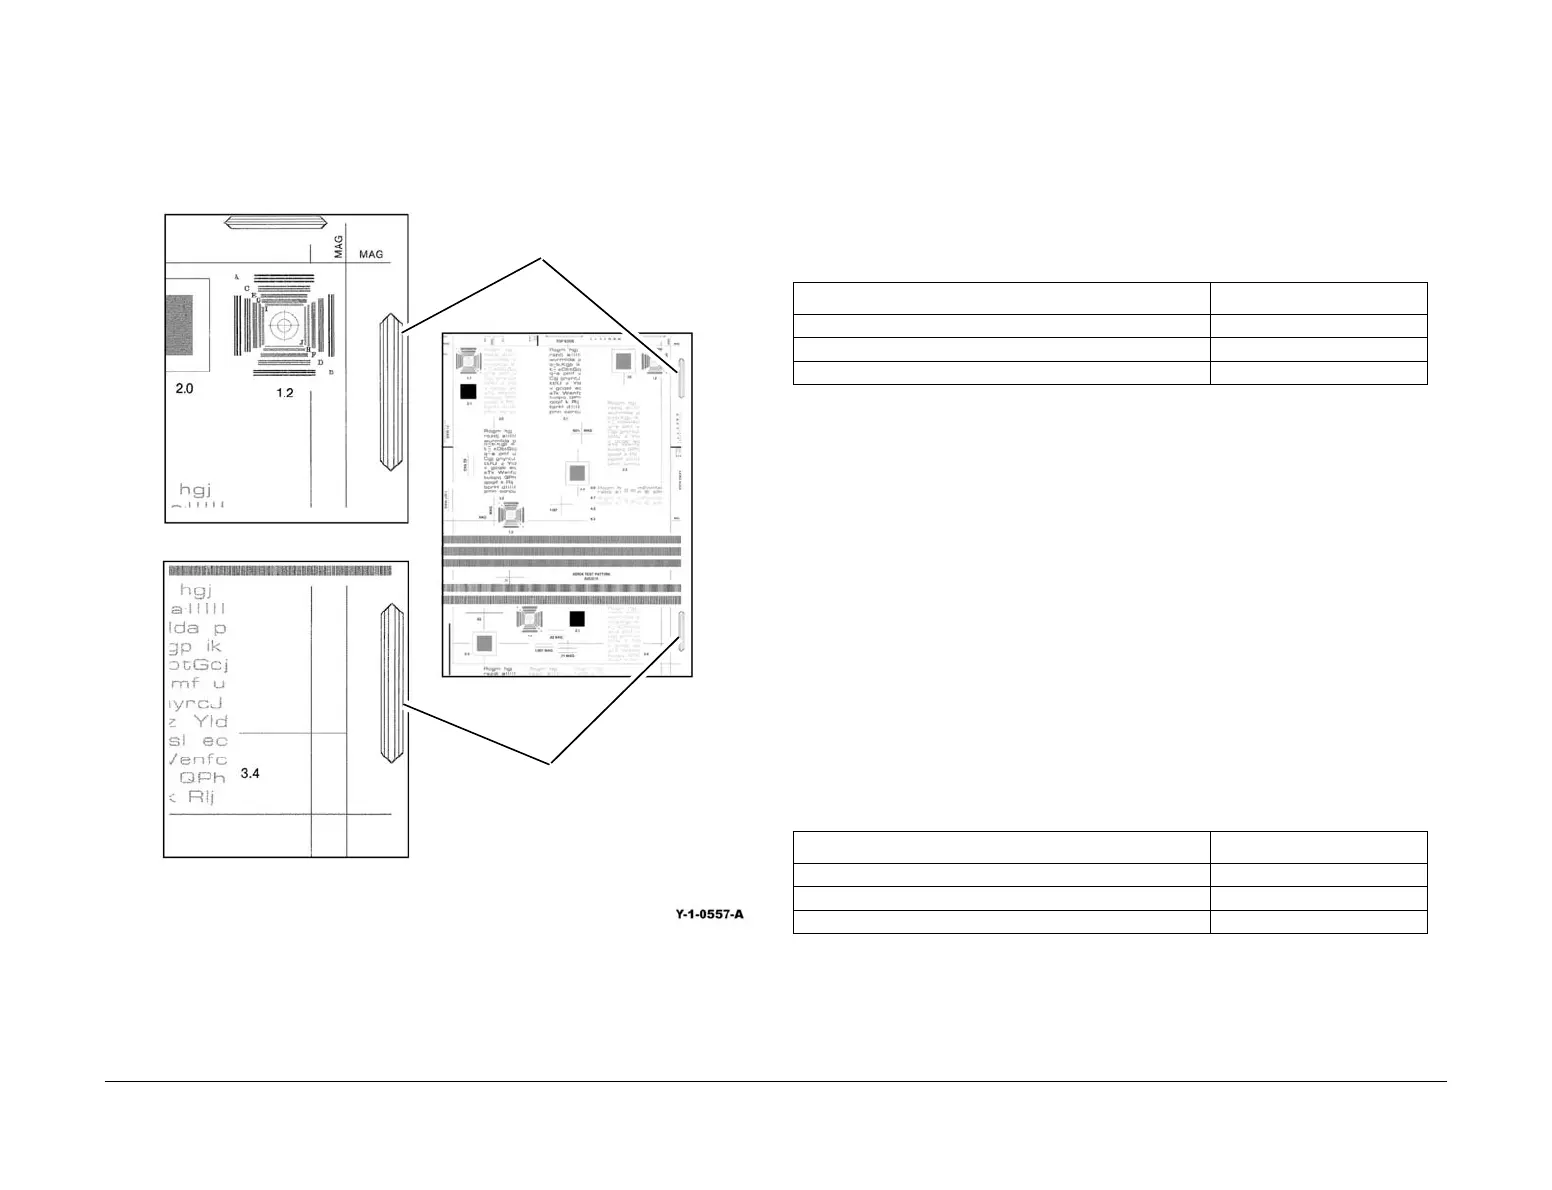
NOTE: Grid A and grid B of test patterns 82E2010, 82E2020 are small areas of parallel
lines 1mm apart. These can be used to directly measure the registration displacement.
NOTE: If a there is a difference between measurements at A and B, refer to IQS 5 Skew.
Figure 1 Test pattern
4. If the measurement is not within the specified range, perform the Side 1 Adjustment. If the
measurement is within the specified range go to the Side 2 Check.
Side 1 Adjustment
1. Enter dC131. Change NVM value 711-140 to correct side 1 lead edge registration. If the
measurement is:
• Too large, increase the NVM value.
• Too small, decrease the NVM value.
NOTE: An increment of 1 in NVM = 0.1mm (0.004 inch).
2. Repeat the Side 1 Check. If the side 1 lead edge registration is good, apply the same
change to the NVM values listed in Table 1
3. Perform the Side 2 Check.
Side 2 Check
1. Place the test pattern 82E2010 (A4) or 82E2020 (8.5 x11inch) face down in the DADF
input tray. Ensure that the document guides are correctly adjusted.
2. Make two duplex (2 to 1 sided) copies.
3. Use the grids A and B on the copy, Figure 1, measure the lead edge displacement. Check
that the lead edge registration error is within +/- 2.0 mm (0.079 inch).
4. If the measurement is not within the specified range, perform the Side 2 Adjustment.
Side 2 Adjustment
1. Enter dC131. Change NVM value 711-141 to correct side 2 lead edge registration. If the
measurement is:
• Too large, increase the NVM value.
• too small, decrease the NVM value.
NOTE: An increment of 1 in NVM = 0.1mm (0.004 inch).
2. Repeat the Side 2 Check. If the side 2 lead edge registration is good, apply the same
change to the NVM values listed in Table 2.
Grid A
Grid B
Table 1 Side 1 NVM values
NVM Machine Speed (ppm)
711-002 DADF lead registration adjustment (side 1) 35
711-003 DADF lead registration adjustment (side 1) 30
711-004 DADF lead registration adjustment (side 1) 25
Table 2 Side 2 NVM values
NVM Machine Speed (ppm)
711-022 DADF lead registration adjustment (side 2) 35
711-023 DADF lead registration adjustment (side 2) 30
711-024 DADF lead registration adjustment (side 2) 25

 Loading...


