e-STUDIO5540C/6540C/6550C/5560C/6560C/6570C © 2011 - 2015 TOSHIBA TEC CORPORATION All rights reserved
FIRMWARE UPDATING
11 - 46
11.4.6 Converter Firmware (MJ-1103/1104)
Important:
• Be sure to shut down the equipment before installing and removing the download jig.
• Do not shut down the equipment during the update. The data could be damaged and not be
able to be operated properly.
[A] Update Procedure
(1) Install the ROM to the download jig (K-PWA-DLM-320).
Make sure the direction is correct.
(2) Press the [ON/OFF] button on the control panel to shut down the equipment.
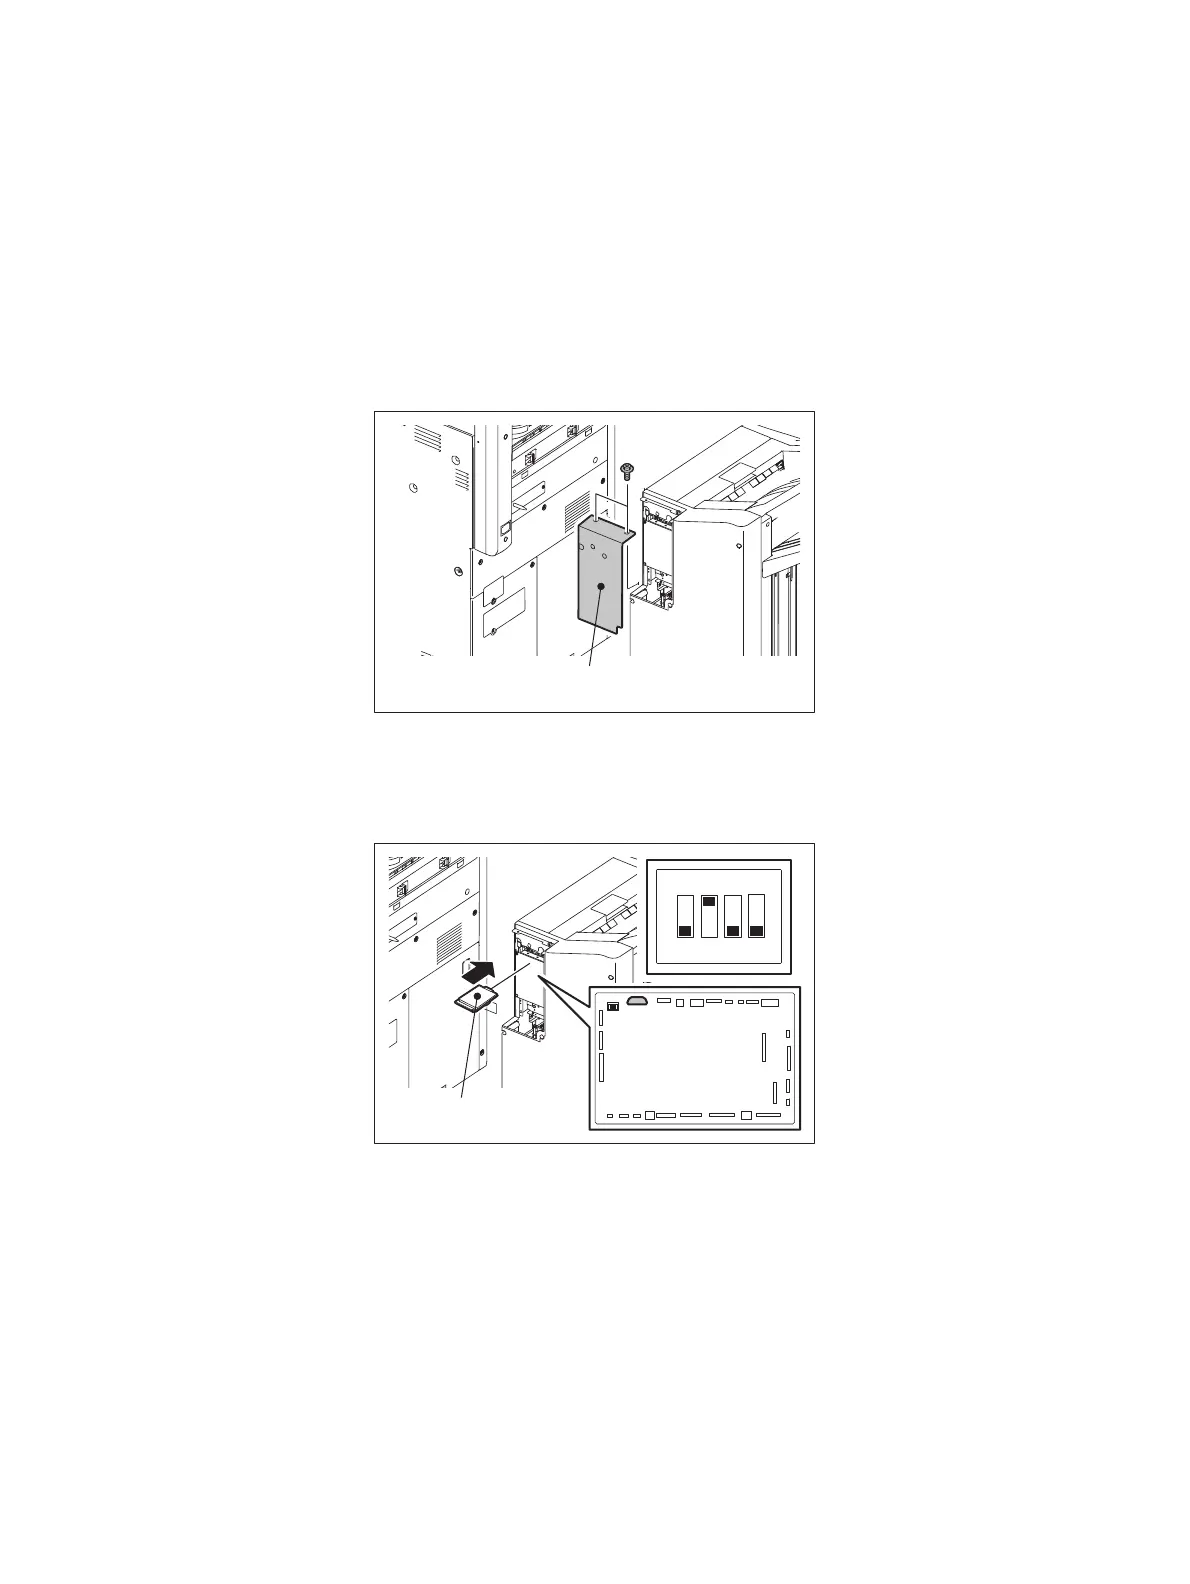
(3) Remove 2 screws and take off the board access cover.
Fig.11-38
(4) Set the SW1 on the Finisher control board as shown in the figures below.
(5) Connect the download jig with the jig connector (CN28) on the Finisher control board.
Fig.11-39
(6) Press the [ON/OFF] button while simultaneously holding down the [0] and [8] buttons.
Updating starts and the LED on the download jig lights.
Board access cover
ON
1
234
Download jig
 Loading...

