4
© 2011 - 2015 TOSHIBA TEC CORPORATION All rights reserved e-STUDIO5540C/6540C/6550C/5560C/6560C/6570C
DISASSEMBLY and REPLACEMENT
4 - 15
4.3 Scanner
4.3.1 Original glass
(1) Open the RADF.
(2) Take off the top front cover.
P. 4-2"4.1.5 Top front cover"
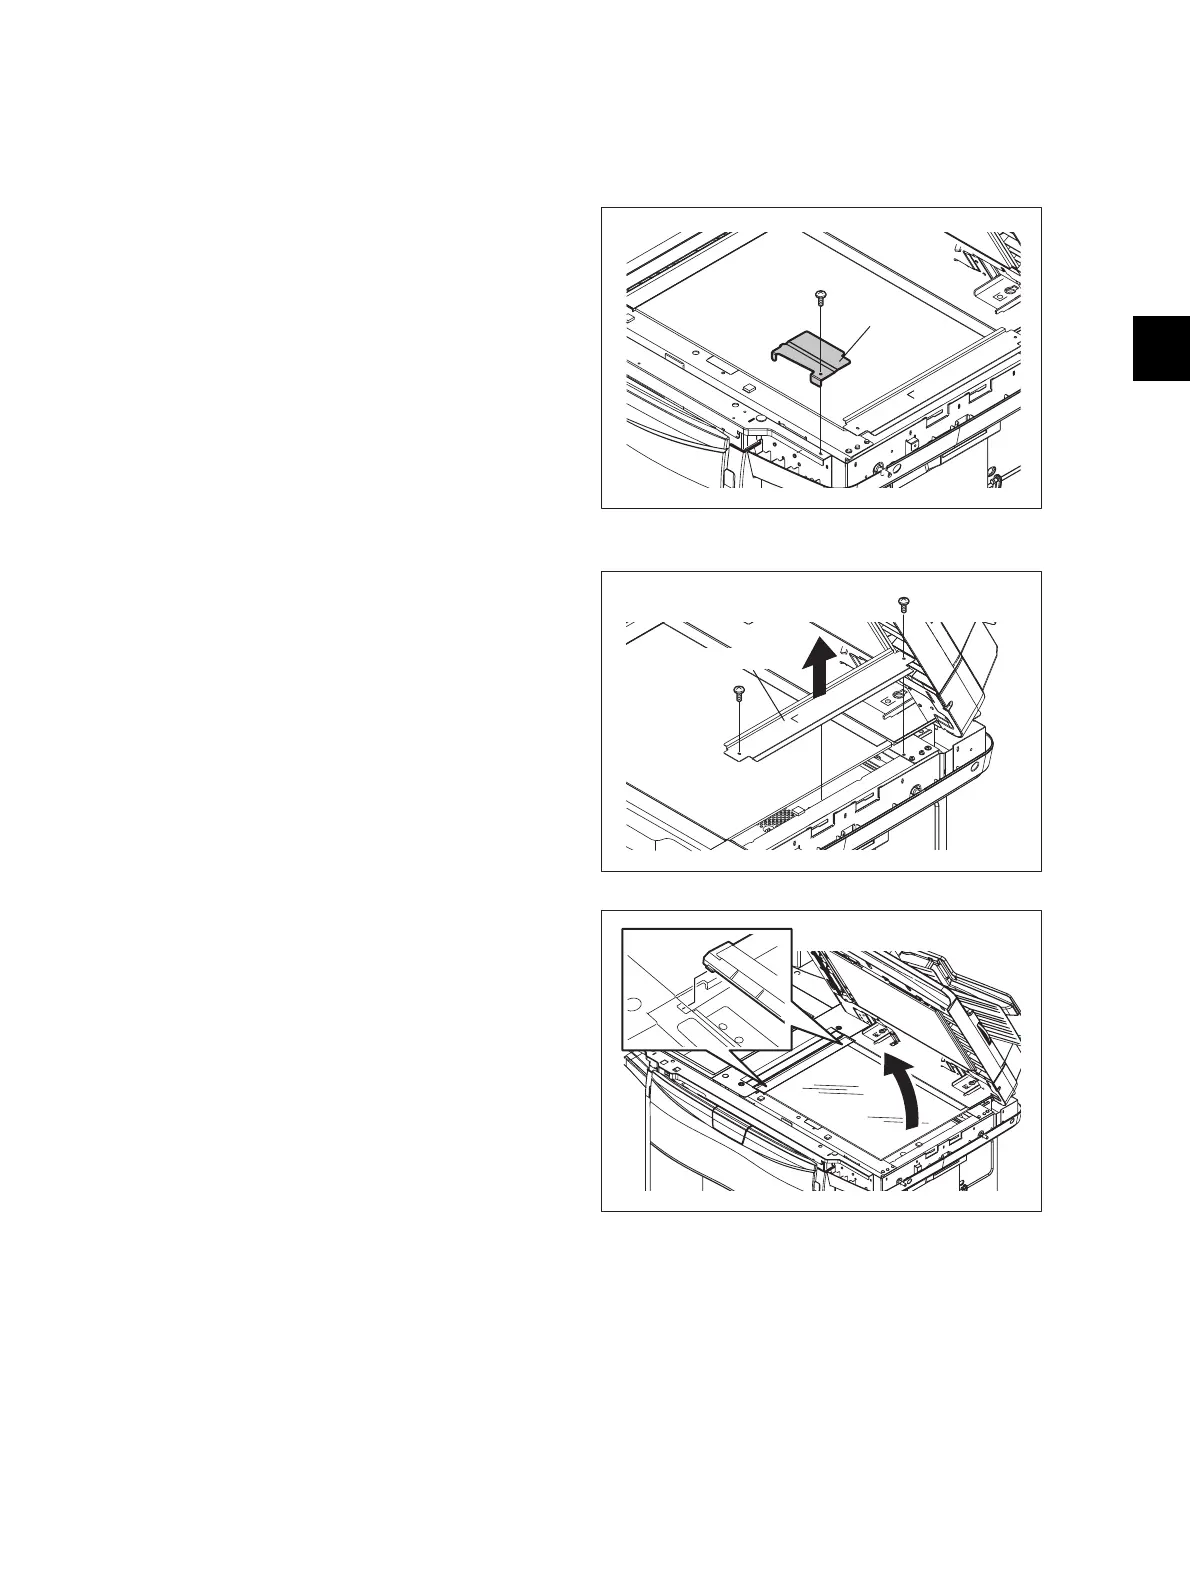
(3) Remove 1 screw and take off the bracket.
Fig. 4-39
(4) Remove 2 screws and take off the fixing
bracket.
Fig. 4-40
(5) Take off the original glass.
Notes:
When installing, fit 2 small protrusions of the
original glass in the groove of the equipment
and fix the original glass with the fixing
bracket by pushing it to the left rear direction.
Fig. 4-41
 Loading...

