EasyManuals Logo

Toshiba e-STUDIO 6550C e-STUDIO 5560C User Manual

Toshiba e-STUDIO 6550C
e-STUDIO 5560C
1499 pages
To Next Page IconTo Next Page
To Previous Page IconTo Previous Page
Page #462 background imageLoading...
Page #462 background image
e-STUDIO5540C/6540C/6550C/5560C/6560C/6570C © 2011 - 2015 TOSHIBA TEC CORPORATION All rights reserved
DISASSEMBLY and REPLACEMENT
4 - 288
4.11.33 Original exit solenoid (SOLR3)
(1) Take off the RADF board bracket.
P. 4-258"4.11.3 RADF rear cover"
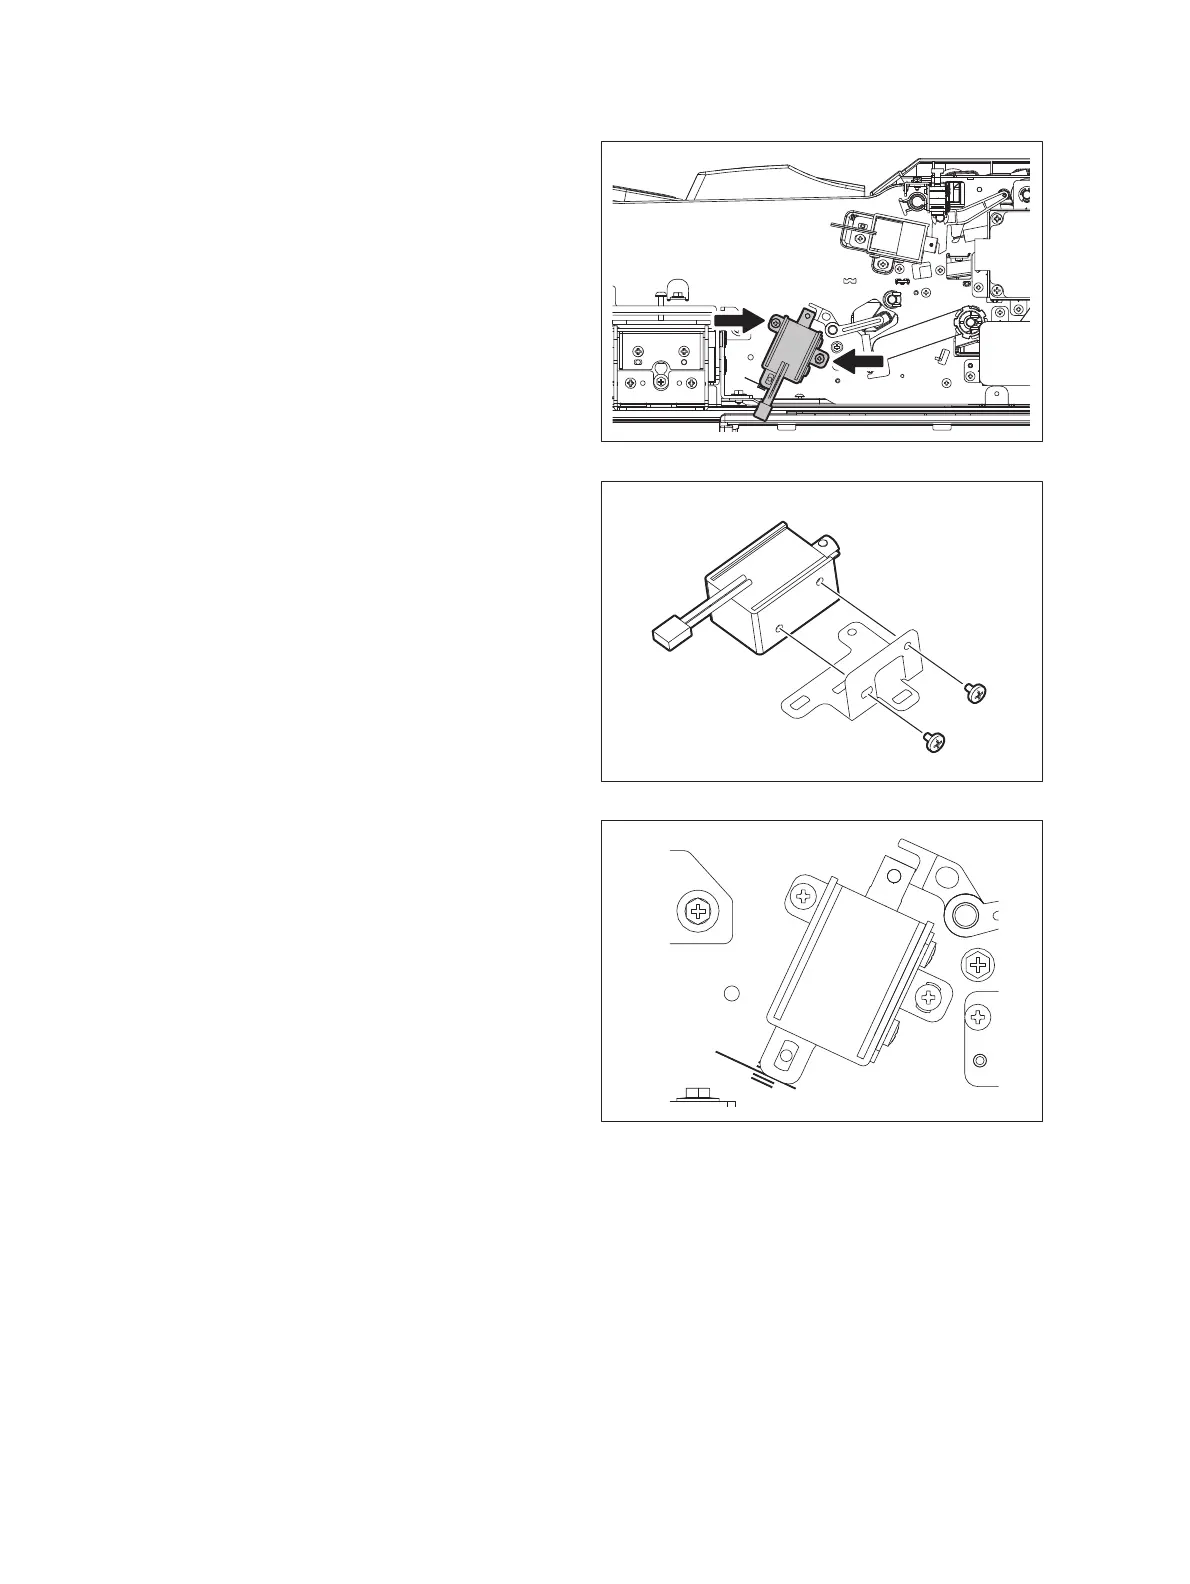
(2) Disconnect 1 connector.
(3) Remove 2 screws and take off the original
exit solenoid with the bracket.
Fig. 4-839
(4) Remove 2 screws and take off the bracket
from the original exit solenoid.
Fig. 4-840
Notes:
Before taking off the solenoid, read the scale.
When reinstalling, align it with the
corresponding position on the scale.
Fig. 4-841

Table of Contents

Questions and Answers:

Question and Answer IconNeed help?

Do you have a question about the Toshiba e-STUDIO 6550C e-STUDIO 5560C and is the answer not in the manual?

Toshiba e-STUDIO 6550C e-STUDIO 5560C Specifications

General IconGeneral
BrandToshiba
Modele-STUDIO 6550C e-STUDIO 5560C
CategoryAll in One Printer
LanguageEnglish

Related product manuals