4
© 2011 - 2015 TOSHIBA TEC CORPORATION All rights reserved e-STUDIO5540C/6540C/6550C/5560C/6560C/6570C
DISASSEMBLY and REPLACEMENT
4 - 117
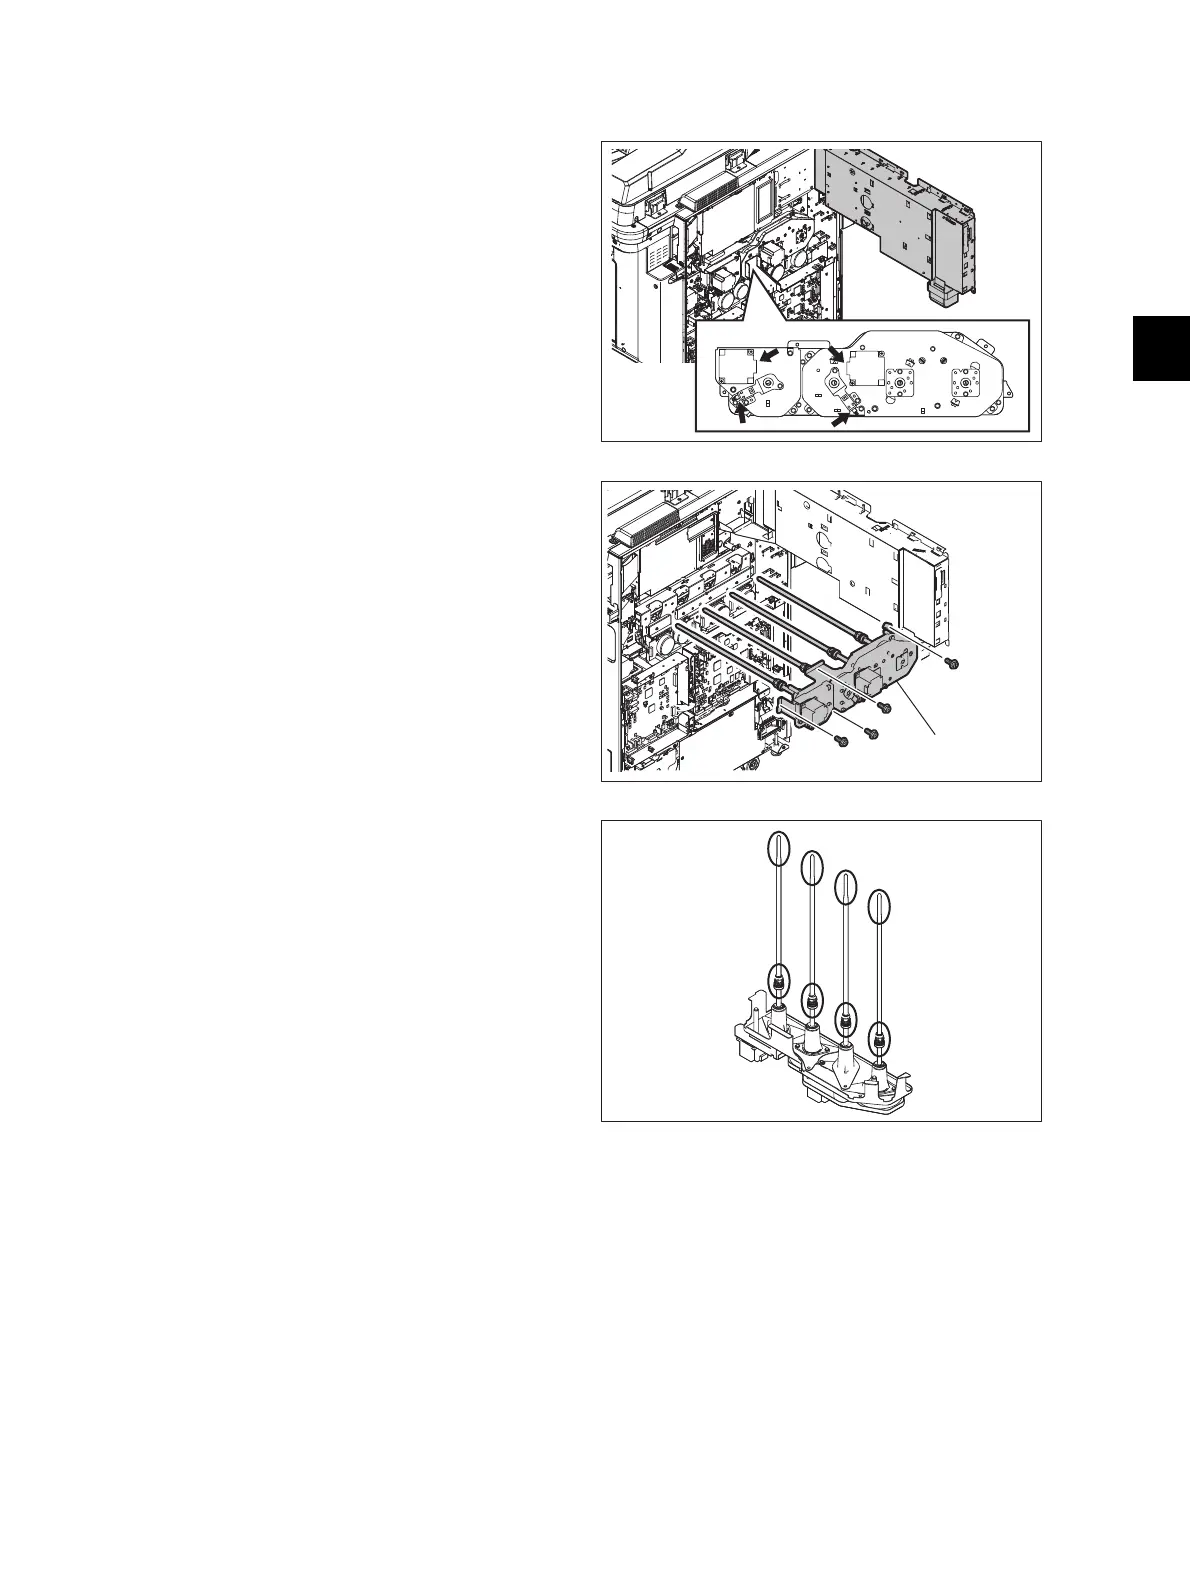
4.6.29 Drum drive unit
(1) Pull out the process unit.
P. 4-91"4.6.1 Pulling out the process unit
(EPU tray)"
(2) Open the SYS board case.
P. 9-2"9.1.3 SYS board case"
(3) Disconnect 4 connectors and then release
the harness from the clamp.
Fig. 4-343
(4) Remove 4 screws and then take off the drum
drive unit [1].
Fig. 4-344
Notes:
1. Be careful not to hit the edge and the
coupling (circled in the figure) of the drum
drive unit. When you place the unit, set it
up as shown in the figure.
2. Do not disassemble the drum drive unit
because it is assembled using a jig very
precisely.
Fig. 4-345
 Loading...

