4
© 2011 - 2015 TOSHIBA TEC CORPORATION All rights reserved e-STUDIO5540C/6540C/6550C/5560C/6560C/6570C
DISASSEMBLY and REPLACEMENT
4 - 35
4.4 Laser Optical Unit
4.4.1 Laser optical unit
(1) Take off the front lower cover.
P. 4-1"4.1.1 Front lower cover"
(2) Take off the left middle cover.
P. 4-4"4.1.9 Left middle cover"
Notes:
When installing the laser optical unit, attach
the left middle cover before the rear cover
since the former may catch the flat cable.
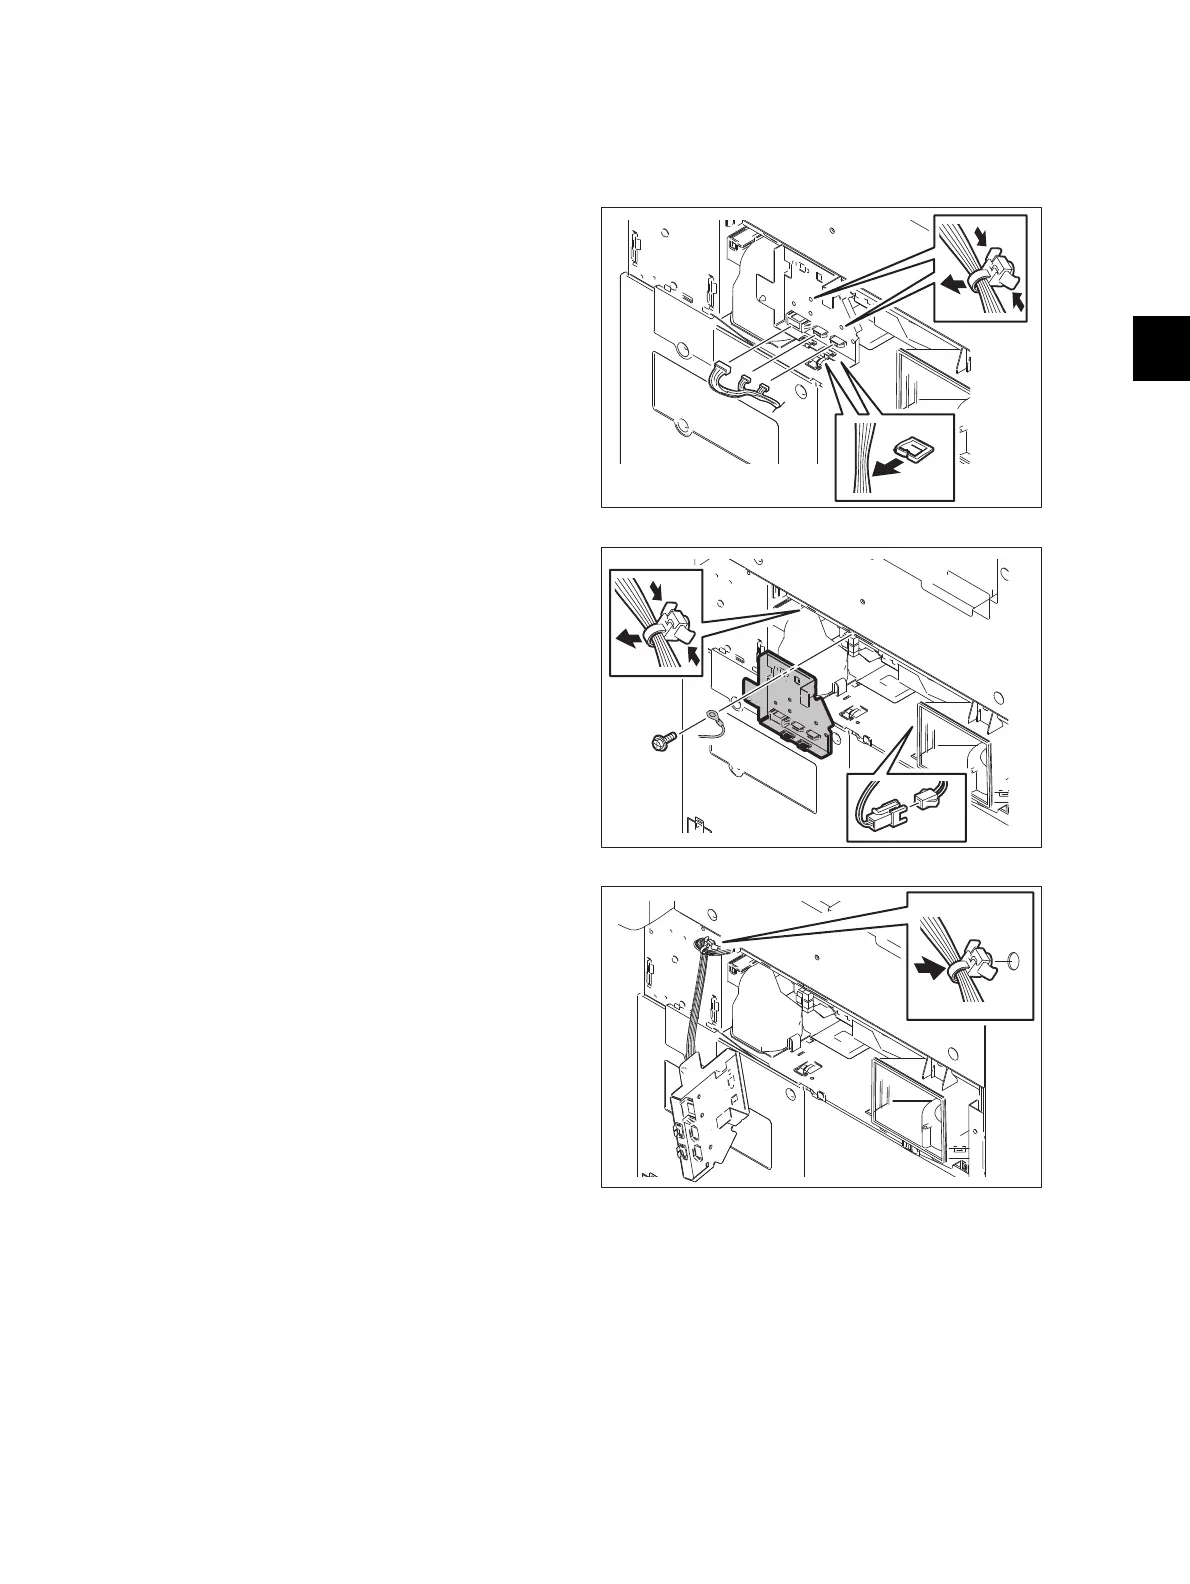
(3) Disconnect 3 connectors and release the
harness from 2 harness clamps.
(4) Remove 2 harness clamps.
Fig. 4-96
(5) Disconnect 1 connector and remove 1
harness clamp. Then remove 1 screw and a
grounding terminal to take off the bracket.
Fig. 4-97
(6) Install the removed harness clamp in the
hole of the frame.
Fig. 4-98
 Loading...

