6
© 2011 - 2015 TOSHIBA TEC CORPORATION All rights reserved e-STUDIO5540C/6540C/6550C/5560C/6560C/6570C
SETTING ADJUSTMENT
6 - 71
6.4.2 Density adjustment
Adjusts the center density and the variation of density adjustment buttons.
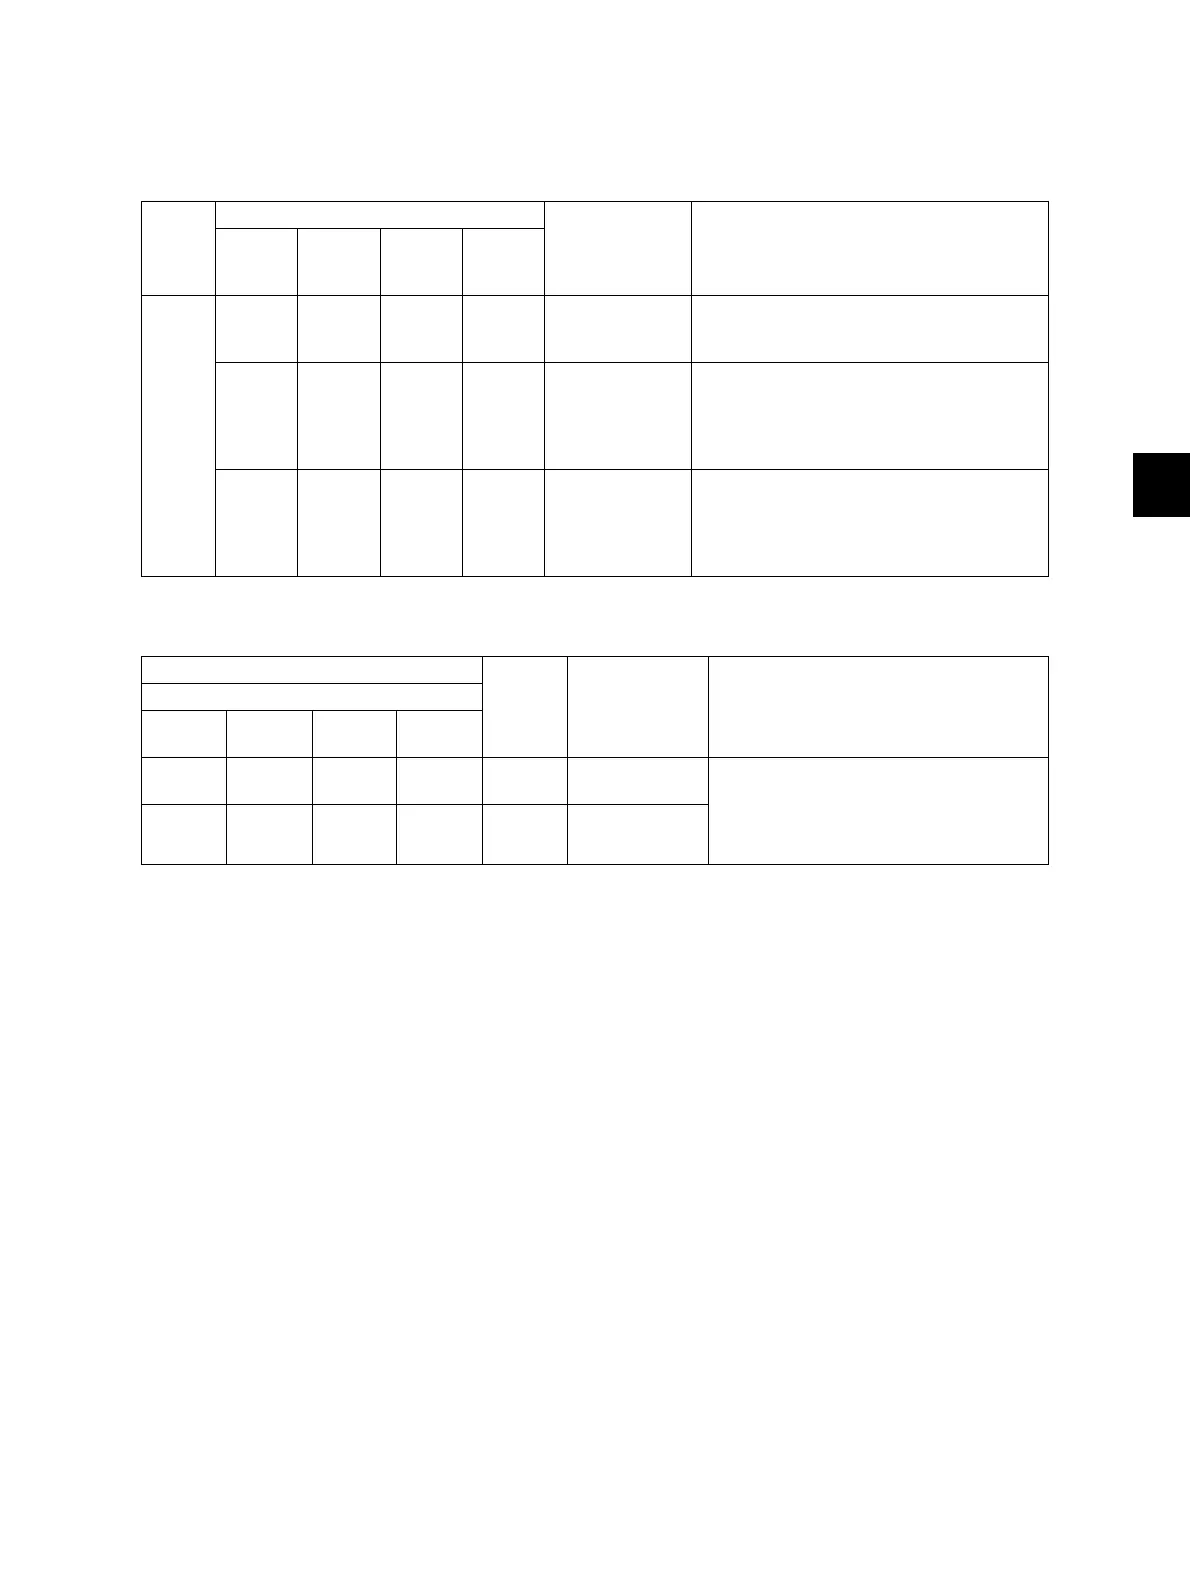
<Adjustment Mode (05)>
<Adjustment Mode (05)>
<Procedure>
(1) While pressing [0] and [5] simultaneously, turn the power ON.
(2) Key in a code and press the [START] button.
(3) Key in an adjustment value (acceptable values: 0 to 255).
(To correct a value once keyed in, press the [CLEAR] button.)
(4) Press the [OK] or [INTERRUPT] button to store the value in memory. The equipment goes
back to the ready state.
(5) Let the equipment restart and perform the scanning.
(6) If the desired image quality has not been attained, repeat step (1) to (5).
Color
Mode
Original mode
Item to be
adjusted
Remarks
Text
Printed
image
Photo
Custo
m
mode
Color 8340 8341 8342 8380 Manual density
center value
The larger the value is, the darker the
image becomes.
Acceptable values: 0 to 255 (Default: 128)
8344 8345 8346 8381 Manual density
light step value
Sets the changing amount by 1 step at the
density adjustment on the control panel.
The larger the value is, the lighter the light
side becomes.
Acceptable values: 0 to 255 (Default: 20)
8348 8349 8350 8382 Manual density
dark step value
Sets the changing amount by 1 step at the
density adjustment on the control panel.
The larger the value is, the darker the dark
side becomes.
Acceptable values: 0 to 255 (Default: 20)
Black
Gray
Scale
Item to be
adjusted
Remarks
Original mode
Text/
Photo
Text Photo
Custom
mode
7444 7445 7446 7475 7447 Manual density
center value
The larger the value is, the darker the
image
becomes.
Acceptable values: 0 to 255
(Default: 128)
7456 7457 7458 7478 7459 Automatic
density
 Loading...

