e-STUDIO5540C/6540C/6550C/5560C/6560C/6570C © 2011 - 2015 TOSHIBA TEC CORPORATION All rights reserved
SETTING ADJUSTMENT
6 - 104
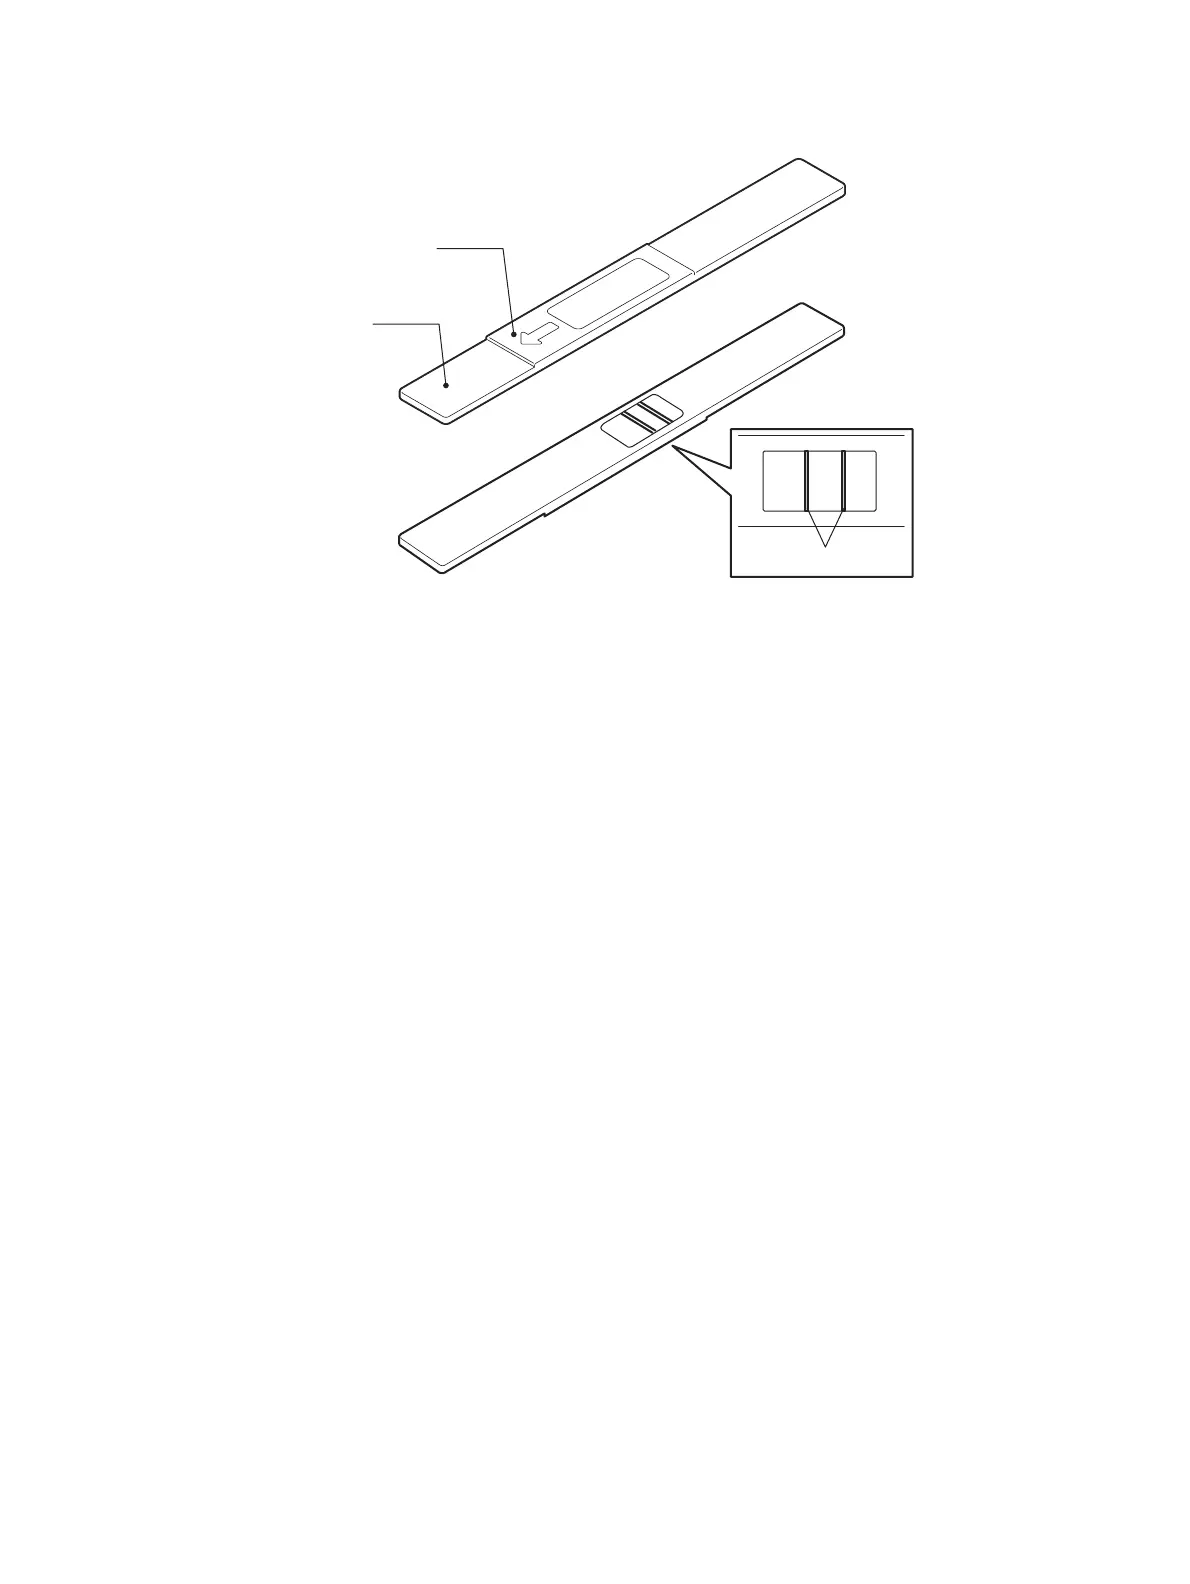
Gap confirmation jig
• Thermostat gap confirmation jig (JIG-FU-THRMST-BP)
Fig.6-70
<Adjustment procedure>
(1) Take off the pressure roller cover from the fuser unit.
P. 4-173"4.9.2 Pressure roller cover"
(2) Take off the entrance guide.
P. 4-175"4.9.5 Entrance guide cover"
(3) Insert the thermostat gap confirmation jig [1] at 2 points; the gap between the pressure roller
center thermostat and the pressure roller, and the gap between the pressure roller side
thermostat and the pressure roller. Insert it parallel to the thermostat surface.
(4) Confirm that the 1.6 mm section of the thermostat gap confirmation jig is inserted without
touching, but its 2.2 mm section contacts the thermostat surface. If this condition is met, end the
procedure because no adjustment is needed. If it is not, go to step (5).
Notes:
Align the scale mark [2] of the jig with the edge [3] of the thermostat bracket as shown below.
If they are not aligned, the gap adjustment is incorrect.
(5) Move the screw [4] of the thermostat bracket from the position (A) to the position (B) so that the
screw [4] will be loosened.
(6) Adjust the position of the bracket [5] by moving it up or down while you are screwing until you can
insert the 1.6 mm section of the jig without touching, but its 2.2 mm section contacts the
thermostat surface.
Notes:
Adjust the scale mark [2] of the jig to the position shown below. If not, it makes the gap
adjustment incorrect.
1.6mm
2.2mm
scale mark
<Front side>
<Back side>
 Loading...

