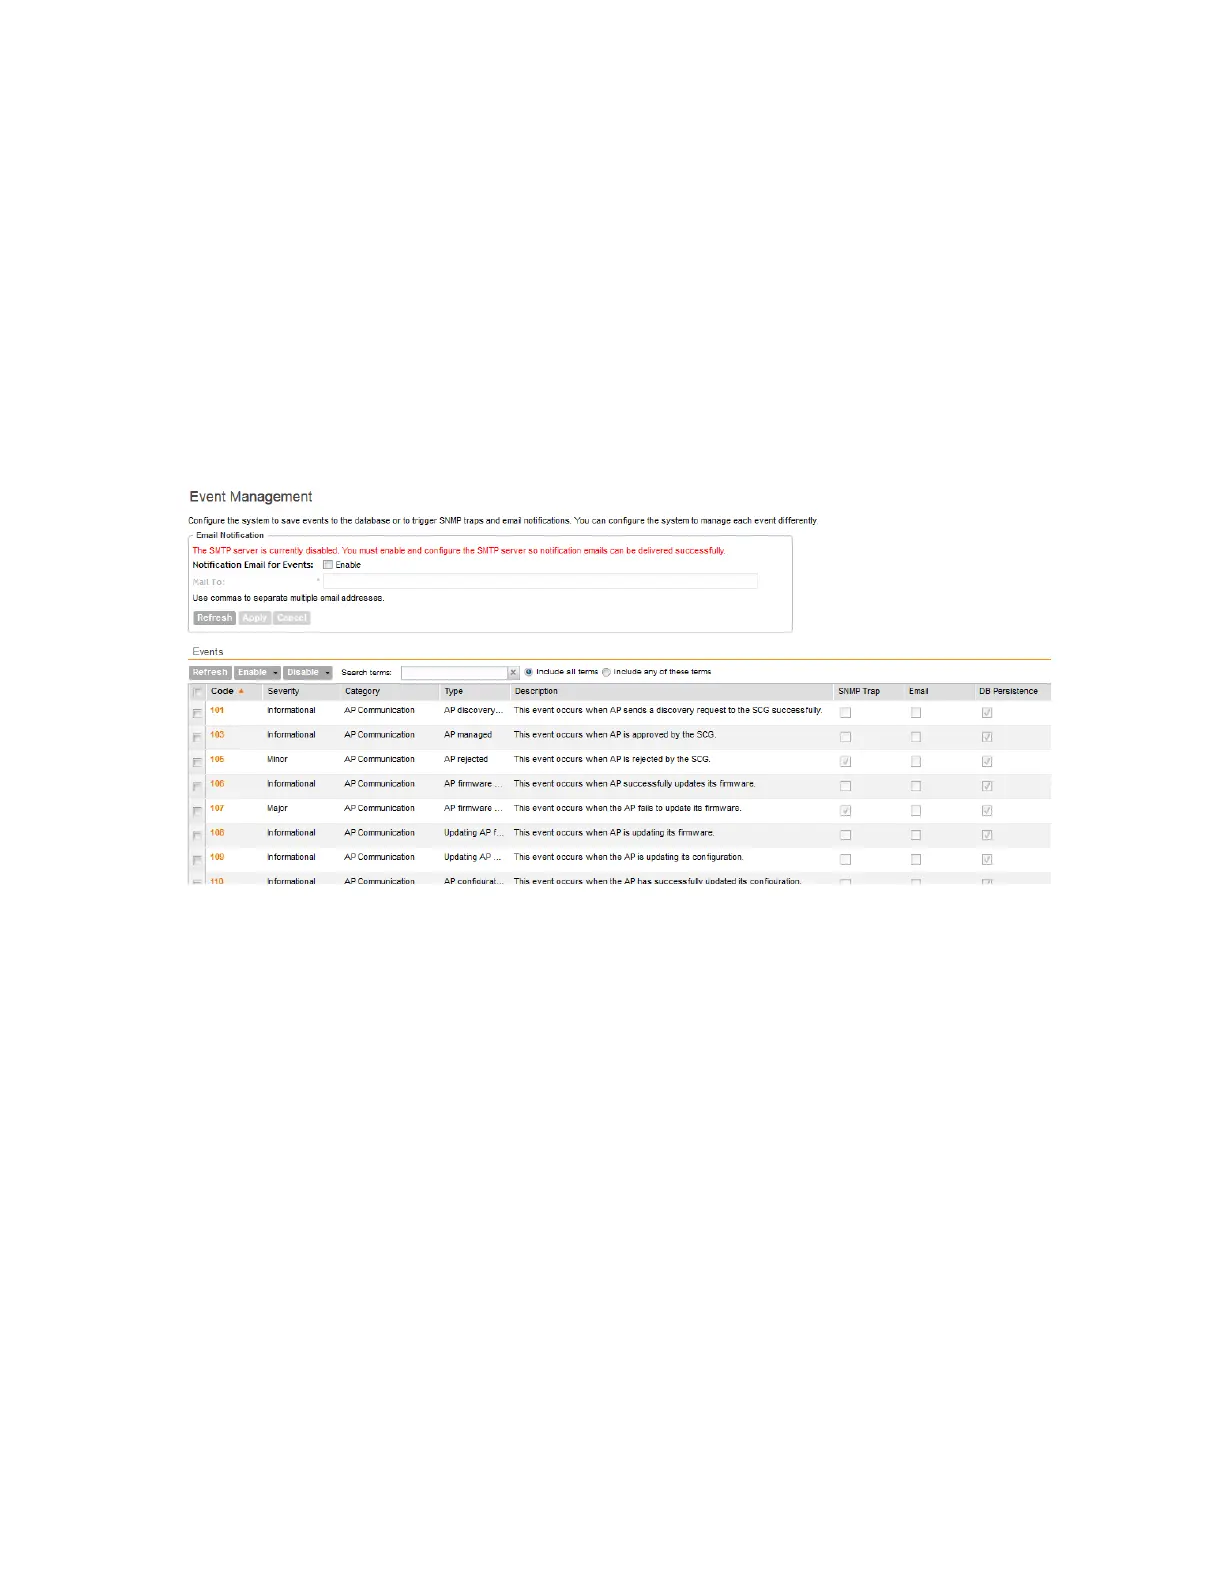
• Enable Email: Click this link to enable email notifications for all selected events.
• Enable DB Persistence: Click this link to enable saving of all selected events to the
controller database. If an event is already currently enabled, it will stay enabled after you
click this link.
A confirmation message appears.
6. Click Yes.
NOTE: You can only enable one of these three notification options at a time (for example, SNMP
trap notifications only). If you want to enable another option, repeat steps 5 and 6.
You have completed enabling a notification option for the selected events.
Figure 123: Selecting all events on the Event Management page
Enabling or Disabling Notifications for a Single Event
Follow these steps to enable or disable notifications for a single event.
1. Go to Configuration > System.
2. On the sidebar, click Event Management.
3. Under Events, locate the event for which you want to enable or disable notifications.
4. Click the event code.
The Edit Event [Event Code] form appears.
5. Select the check box for a notification type to enable it, or clear the check box to disable it.
Options include:
• SNMP Notification
• Email Notification
• DB Persistence
6. Click Apply.
You have completed enable or disabling notifications for a single event.
SmartCell Gateway 200/Virtual SmartZone High-Scale for Release 3.4.1 Administrator Guide
237
Configuring the System Settings
Configuring Network Management