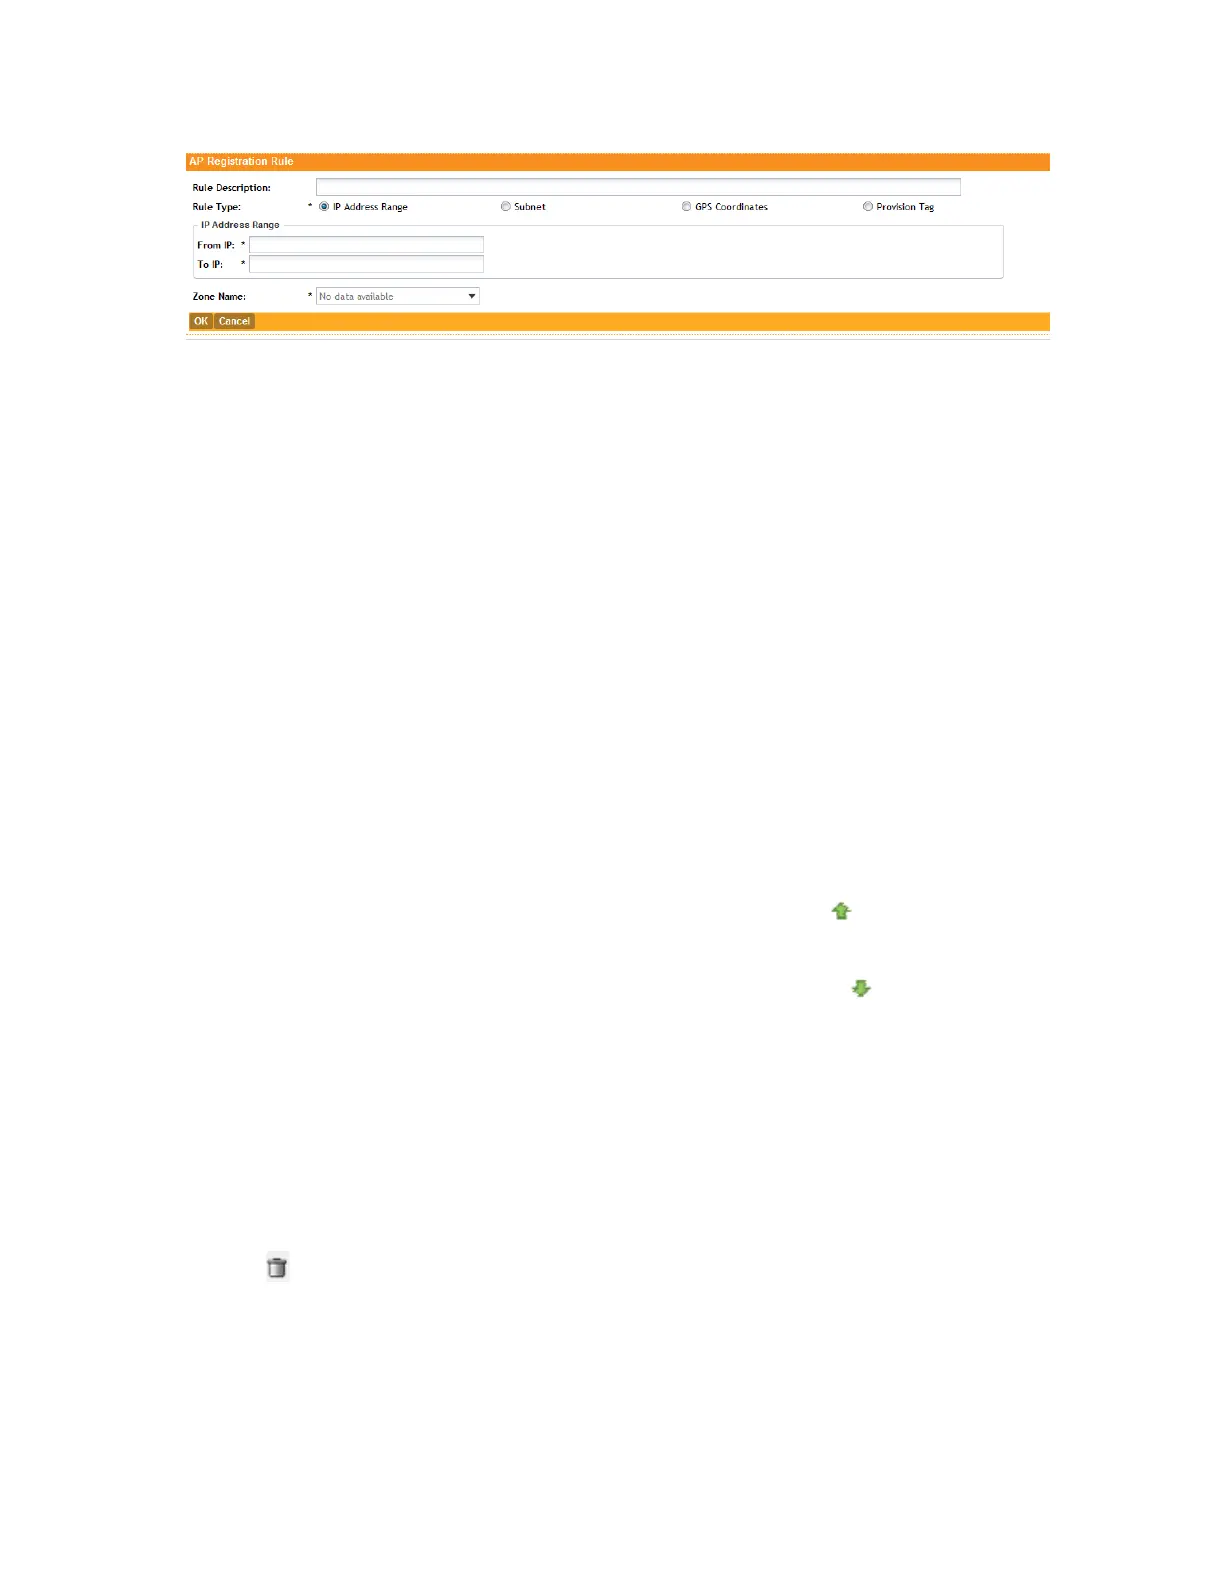
Figure 51: Creating an AP registration rule
To create another registration rule, repeat the preceding steps. You can create as many
registration rules as you need to manage the APs on the network.
Configuring Registration Rule Priorities
The controller applies registration rules in the same order as they appear in the AP Registration
Rules table (highest to lowest priority).
If you want a particular registration rule to have higher priority, you must move it up the table.
Once an AP matches a registration rule, the controller assigns the AP to the zone specified in
the rule and stops processing the remaining rules.
Follow these steps to configure the registration rule priorities.
1. Go to Configuration > AP Zones.
2. On the sidebar, click AP Registration Rules.
The AP Registration Rules page appears and displays the rules that you have created.
3. Change the priority of each registration rule as required.
4.
To give a rule higher priority, move it up the table by clicking the (up-arrow) icon that is
in the same row as the rule name.
5.
To give a rule lower priority, move it down the table by clicking the (down-arrow) icon
that is in the same row as the rule name.
When you finish configuring the rule priority, click Update Priorities to save your changes.
Deleting a Registration Rule
Follow these steps to delete a registration rule.
1. On the AP Registration Rules page, select the check box that is in the same row as the
registration rule that you want to delete.
2.
Click .
A confirmation message appears.
3. Click Yes to confirm that you want to delete the registration rule.
SmartCell Gateway 200/Virtual SmartZone High-Scale for Release 3.4.1 Administrator Guide
136
Managing Global Configuration, AP Tunnel Profiles, Templates, and AP Registration Rules
Working with Registration Rules