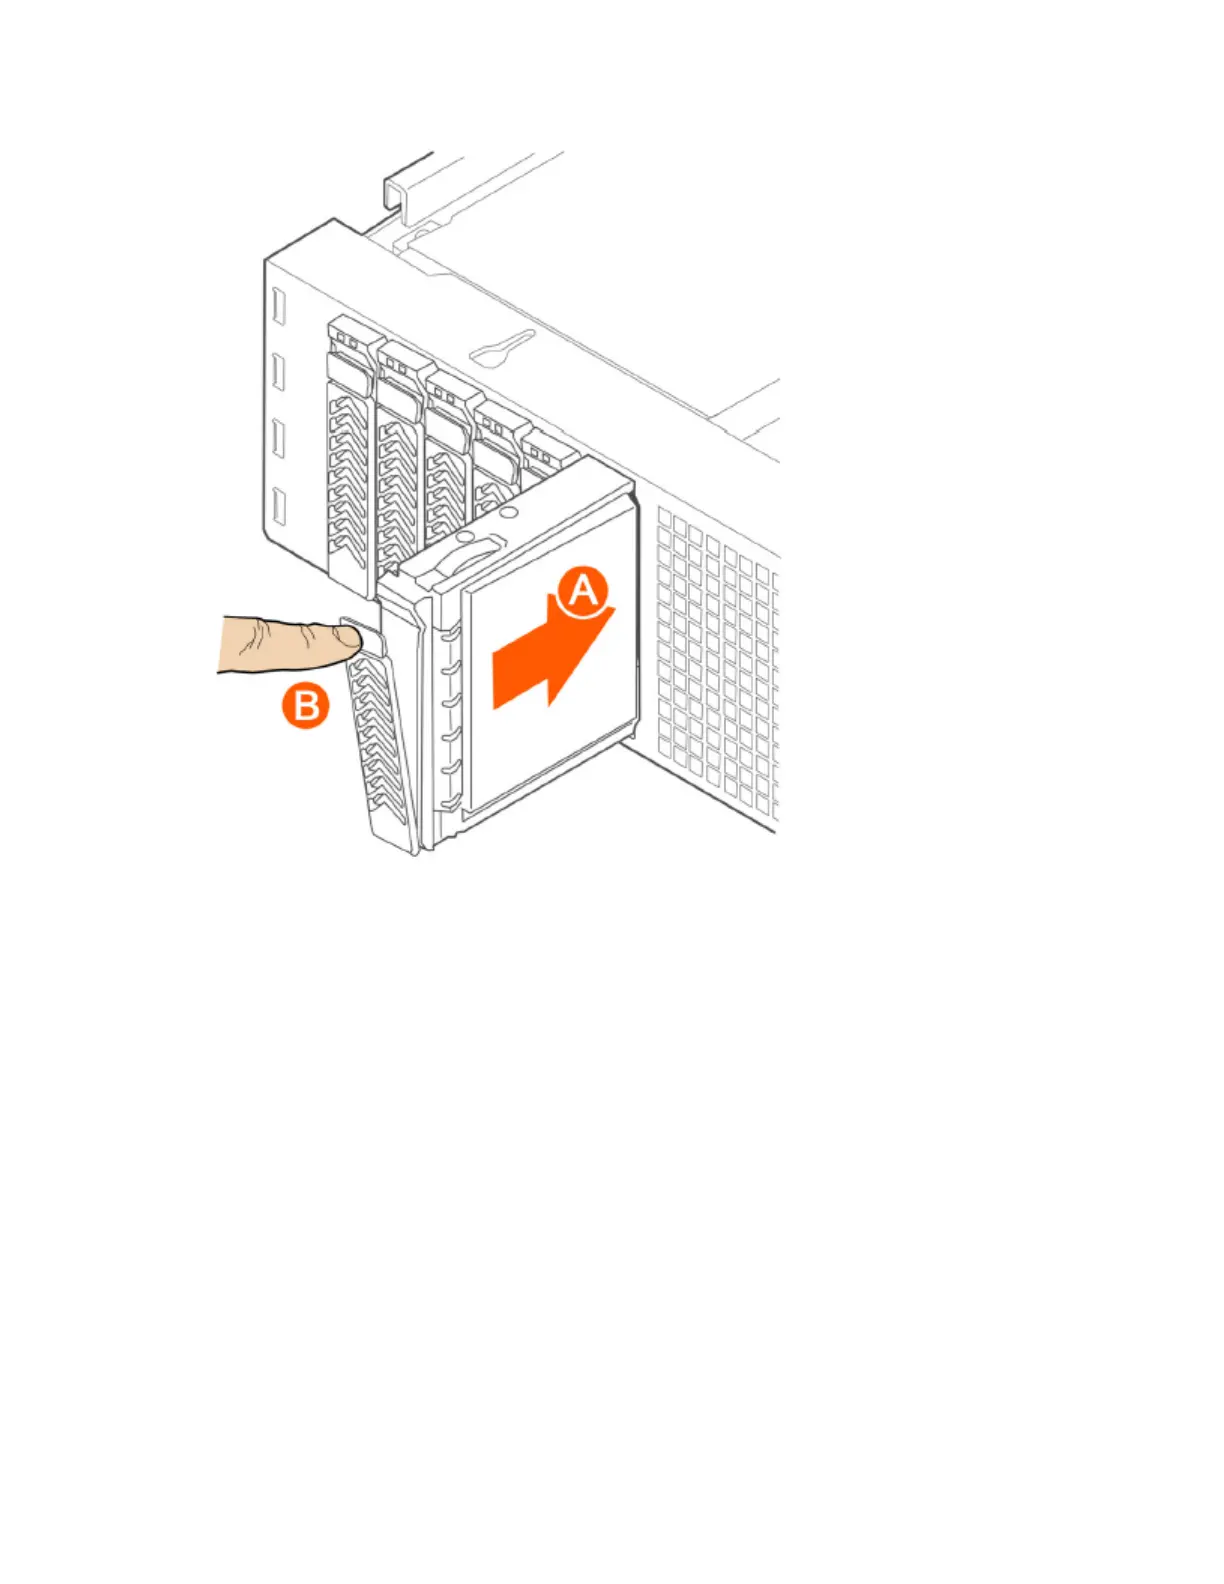
Figure 264: Inserting the carrier back into the chassis
5. Press the locking lever until it snaps shut and secures the drive in the bay.
You have completed installing or replacing the hard drive onto the controller.
NOTE: The new hard drive will synchronize automatically with the existing RAID array. During
the synchronization process, the HDD LED on the controller will blink amber and green alternately.
When the process is complete, the HDD LED will turn off.
Reinstalling the Front Bezel
Follow these steps to reinstall the front bezel on the controller.
1. Insert the tabs on the left side of the bezel into the slots on the front panel of the chassis.
2. Move the bezel toward the right of the front panel and align it on the front panel pins.
3. Snap the bezel into place and tighten the retention screw to secure it.
SmartCell Gateway 200/Virtual SmartZone High-Scale for Release 3.4.1 Administrator Guide
448
Replacing Hardware Components
Installing or Replacing Hard Disk Drives