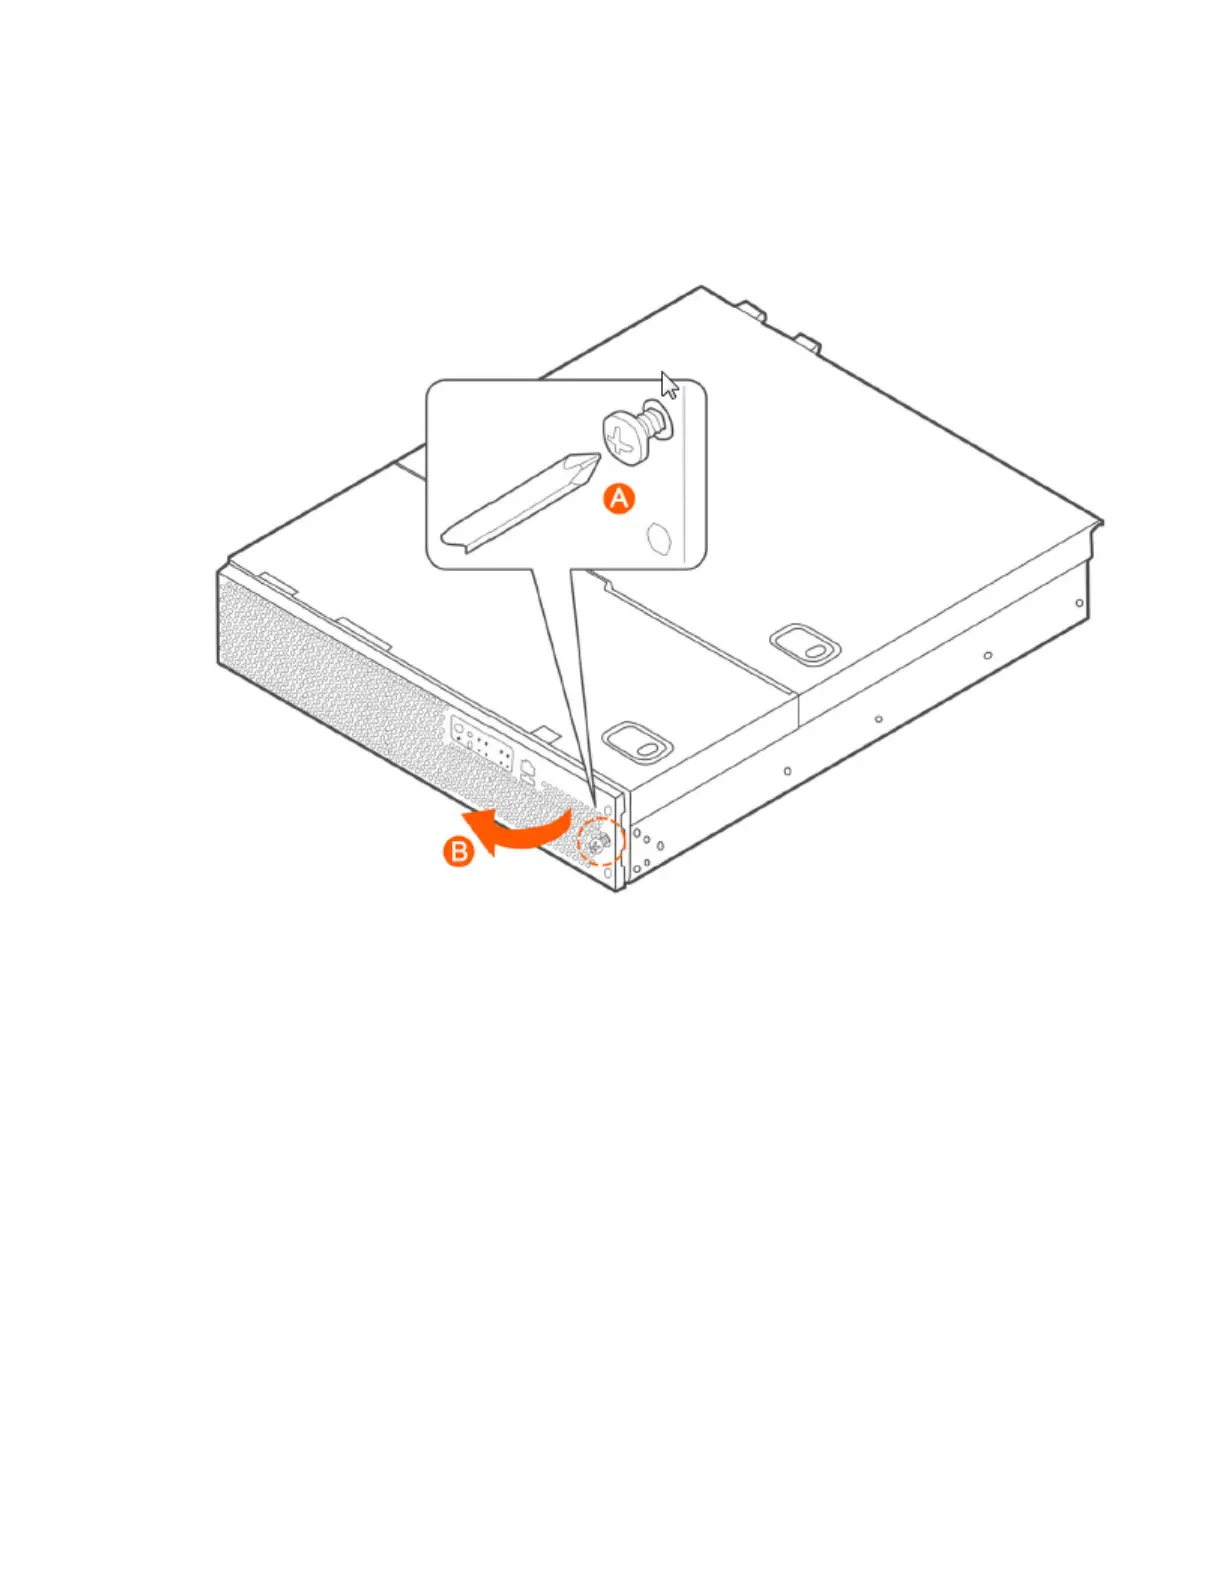
The server does not have to be powered down just to remove the front bezel.
1. Loosen the captive bezel retention screw on the right side of the bezel (see A in Figure 6).
2. Rotate the bezel to the left to free it from the pins on the front panel (see B in Figure 6), and
then remove it.
Figure 260: Removing the front bezel
Removing an HDD Carrier from the Chassis
Follow these steps to remove a hard disk drive carrier from the chassis.
1. Remove the front bezel (see Removing the Front Bezel on page 443).
2. Select the drive bay where you want to install or replace the drive.
Drive bay 0 must be used first, then drive bay 1 and so on. The drive bay numbers are printed
on the front panel below the drive bays.
3. Remove the drive carrier by pressing the green button to open the lever.
(See A in Figure 261: Removing the drive carrier on page 445).
4. Pull the drive carrier out of the chassis.
SmartCell Gateway 200/Virtual SmartZone High-Scale for Release 3.4.1 Administrator Guide
444
Replacing Hardware Components
Installing or Replacing Hard Disk Drives