• Sanity Timer: Set a timer (in seconds) that the controller will use to assert event 1301.
When the load condition drops below the configured Threshold value (above), the controller
will wait for the sanity timer to elapse before asserting event 1301.
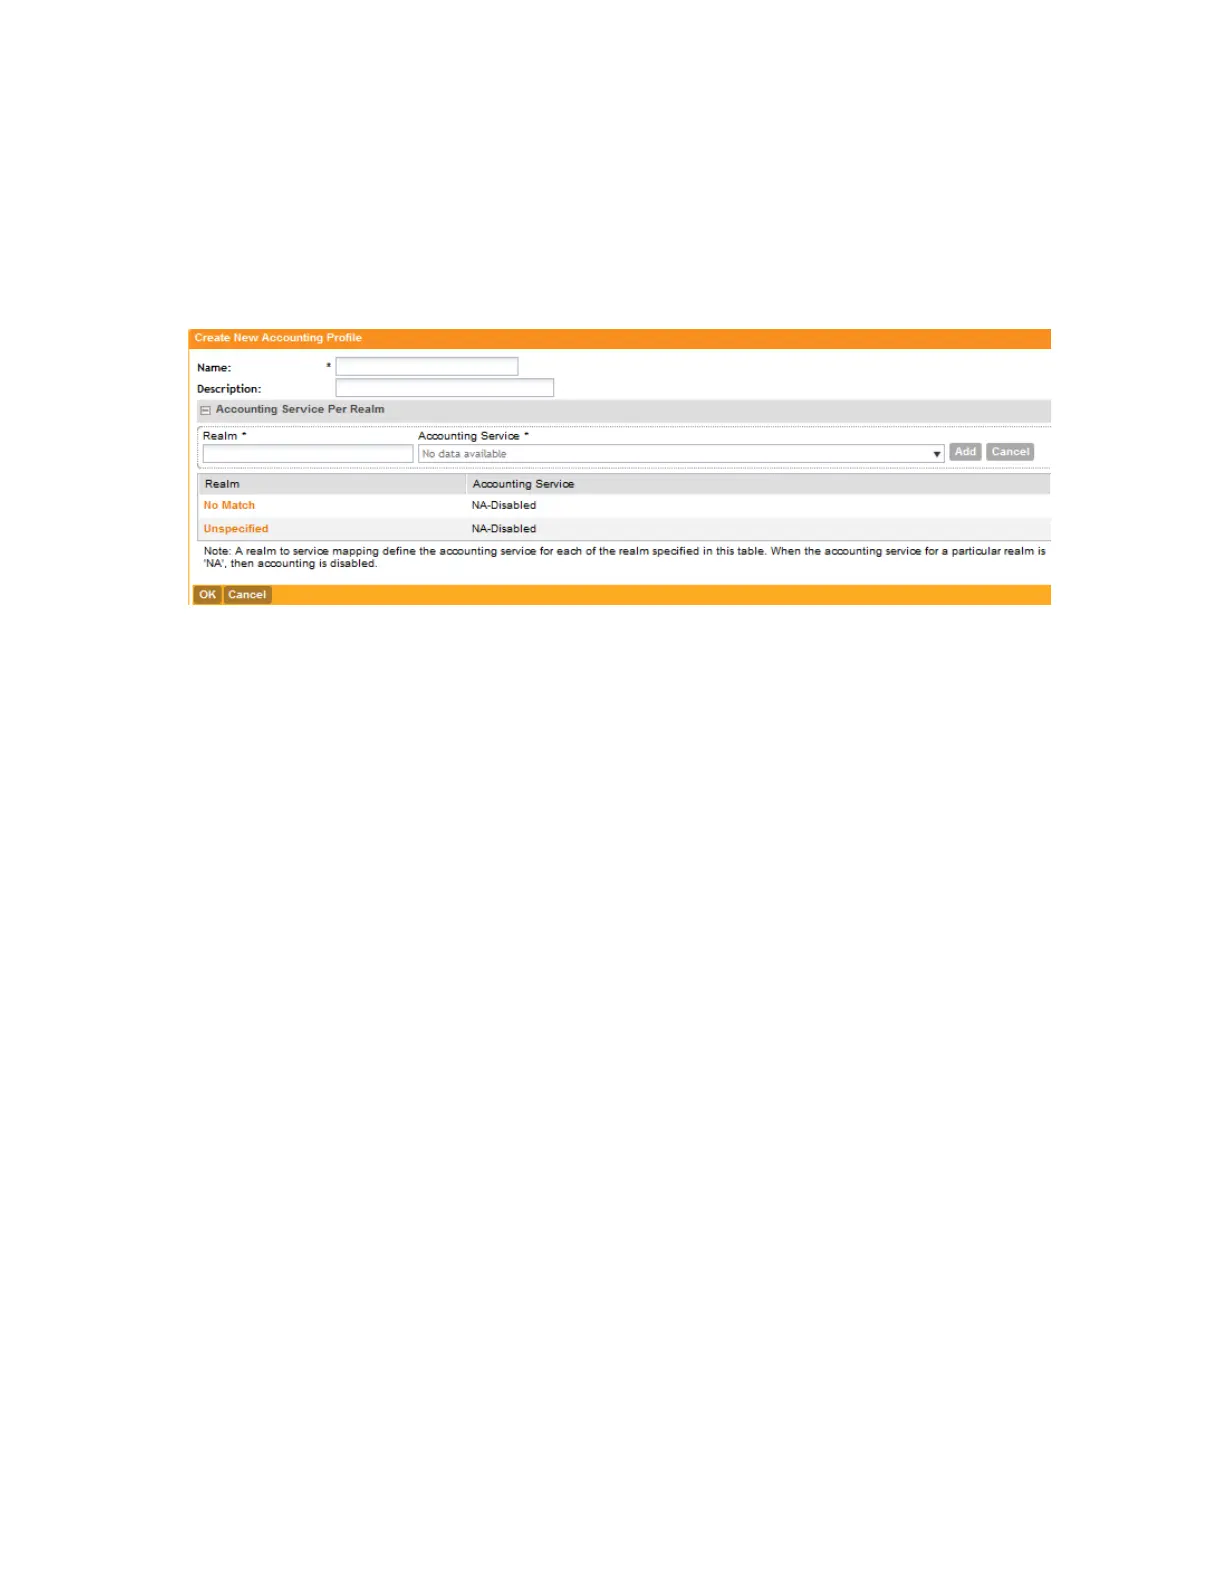
11. Click OK at the bottom of the form.
You have completed adding an accounting profile.
Figure 249: Accounting Profile form
Configuring TTG+PDG Forwarding Profiles
A TTG+PDG forwarding profile defines the gateway and tunnel configurations for core network
GTP tunnels and LBO configurations.
Follow these steps to add a TTG+PDG profile.
1. On the TTG+PDG Forwarding Profiles page, click Create New.
The Create New TTG+PDG Forwarding Profile form appears.
2. In Name, type a name for the TTG+PDG Profile that you are adding.
3. In Description, give a brief description of the profile created.
This is an optional field.
4. In Common Settings, configure the following:
• APN Format to GSN: Select either DNS or String from the drop-down list.
• APN-OI for DNS Resolution: Specify if the APN-OI is required.
• # of Accounting Retry: Specify the interval (in minutes) at which the controller will recheck
the primary TTG+PDG RADIUS profile, if it is available. The default interval is 5 minutes.
• Accounting Retry Timeout (secs): Type the timeout period (in seconds) after which an
expected response message is considered to have failed.
• PDG UE Session Idle Timeout (secs): Type the timeout period (in seconds) after which
an expected response message is considered to have failed.
5. In DHCP Relay, configure the following options to enable the DHCP relay agent in the
controller:
SmartCell Gateway 200/Virtual SmartZone High-Scale for Release 3.4.1 Administrator Guide
394
Overview of the Captive Portal
Configuring the Captive Portal