e-STUDIO5540C/6540C/6550C/5560C/6560C/6570C © 2011 - 2015 TOSHIBA TEC CORPORATION All rights reserved
DISASSEMBLY and REPLACEMENT
4 - 168
4.9 Fuser Unit
Notes:
• Before taking off the fuser unit, be sure that the temperature of the fuser unit is fully lowered.
If you need to take it off while its temperature is still high, be sure to wear gloves.
• When a new fuser unit is installed, be sure that the fuser-related life counter values are reset
in the list print mode (9S), PM support mode (6S) or setting mode (08).
• Be sure to follow the note in the disassembly procedure since the fuser belt and fuser roller
are easily damaged.
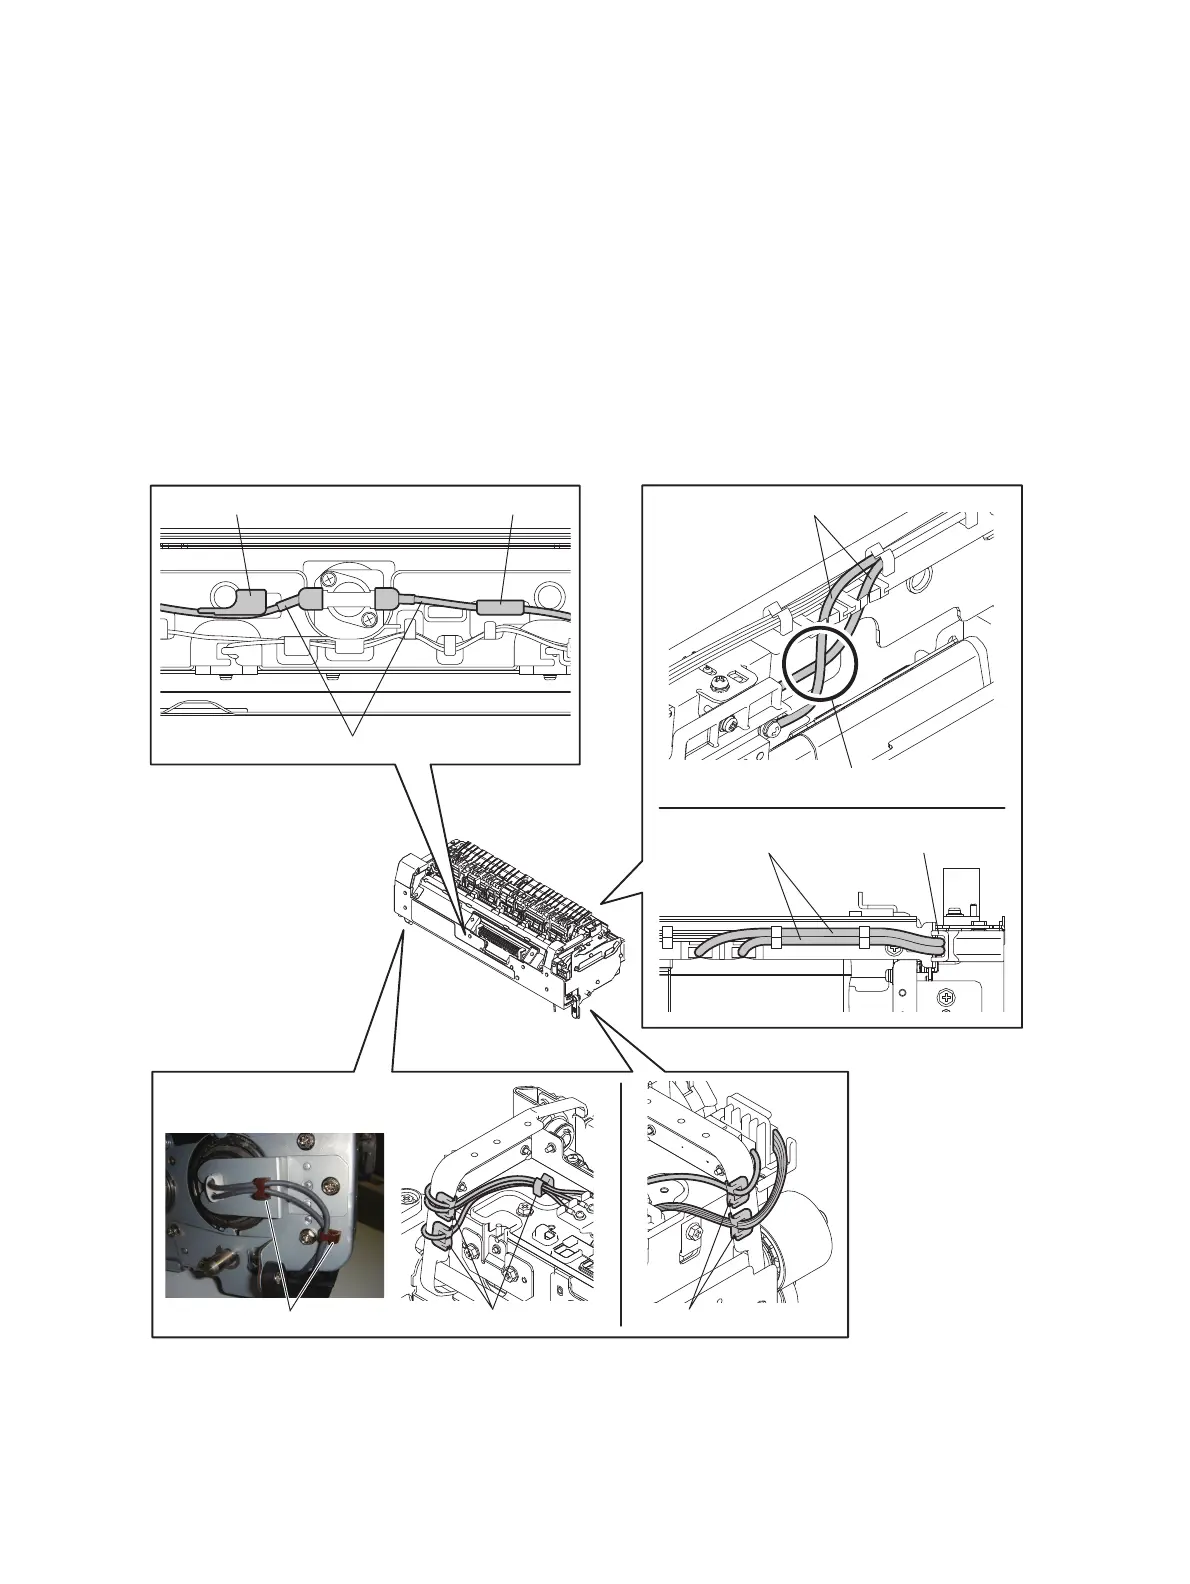
• When disassembling the fuser unit or replacing any parts in it, be sure that the wire harness is
correctly set, and also be careful not to catch it between other parts.
a. Hang the AC harnesses [1] on the hooks [2].
b. Cross [4] the AC harnesses [3].
c. Set the 2 AC harnesses [5] in parallel. Be sure that the harness guide [6] is not pressing the
AC harnesses.
d. Be sure to pass the harnesses for the pressure roller heater lamp through the clamps.
Fig. 4-491
[ 7 ]
[ 2 ]
[ 1 ]
a
c
b
d
[ 2 ]
[ 7 ]
[ 7 ]
[ 3 ]
[ 4 ]
[ 6 ]
[ 5 ]
 Loading...

