6
© 2011 - 2015 TOSHIBA TEC CORPORATION All rights reserved e-STUDIO5540C/6540C/6550C/5560C/6560C/6570C
SETTING ADJUSTMENT
6 - 73
6.4.5 Sharpness adjustment
If you want to make scan images look softer or sharper, perform the following adjustment. The
adjustment can be made for each of the color modes and original modes independently.
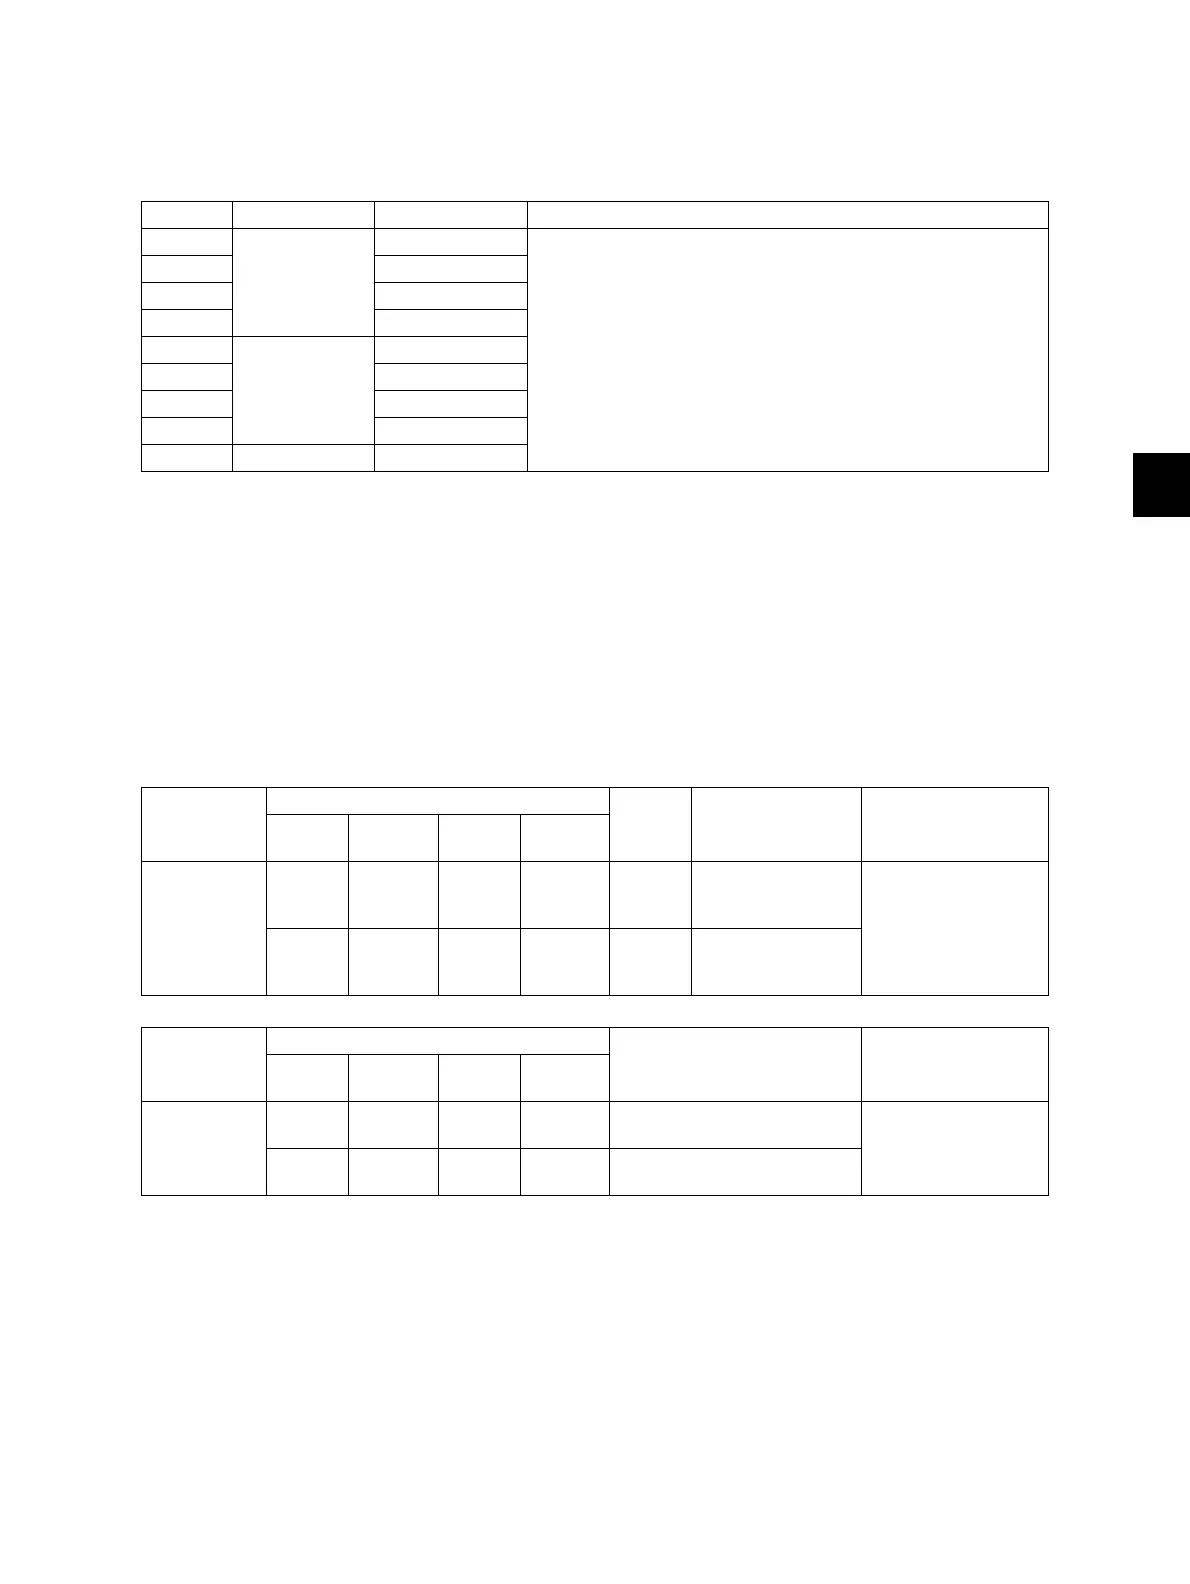
<Adjustment Mode (05)>
Notes:
You have to make adjustment by balancing between moire and sharpness.
<Procedure>
The procedure is the same as that of P. 6-71"6.4.2 Density adjustment".
6.4.6 Setting range correction
The values of the background peak in the range correction can be switched to “varied” or “fixed” in the
following codes.
If they are fixed, the range correction is performed with standard values.
<Adjustment Mode (05)>
<Procedure>
The procedure is the same as that of P. 6-71"6.4.2 Density adjustment".
Code Color mode Original mode Contents
8335 Full Color Text • The larger the value is, the sharper the image becomes;
while the smaller the value is, the softer the image becomes.
• The smaller the value is, the less moire tends to appear.
• The acceptable values are 0 to 255.
The center value is 128.
8336 Printed Image
8337 Photo
8375 Custom mode
7430 Black Text/Photo
7431 Text
7432 Photo
7470 Custom mode
7433 Gray Scale -
Color mode
Original mode
Gray
Scale
Item to be
adjusted
Remarks
Text/
Photo
Text Photo
Custom
mode
Black 7416 7417 7418 7425 7419 Range correction
(Automatic density
adjustment)
0: Background peak -
fixed
1: Background peak -
varied
7421 7422 7423 7426 7424 Range correction
(Manual density
adjustment)
Color mode
Original mode
Item to be adjusted Remarks
Text
Printed
image
Photo
Custom
mode
Color 8330 8331 8332 8334 Range correction (Automatic
density adjustment)
0: Background peak -
fixed
1: Background peak -
varied
8361 8362 8363 8365 Range correction (Manual
density adjustment)
 Loading...

