It is always possible to set up the instrument without the need for a marked ground point.
The laser plummet described in this topic is built into the vertical axis of the instrument. It
projects a red spot onto the ground, making it appreciably easier to center the instrument.
The laser plummet cannot be used in conjunction with a tribrach equipped with
an optical plummet.
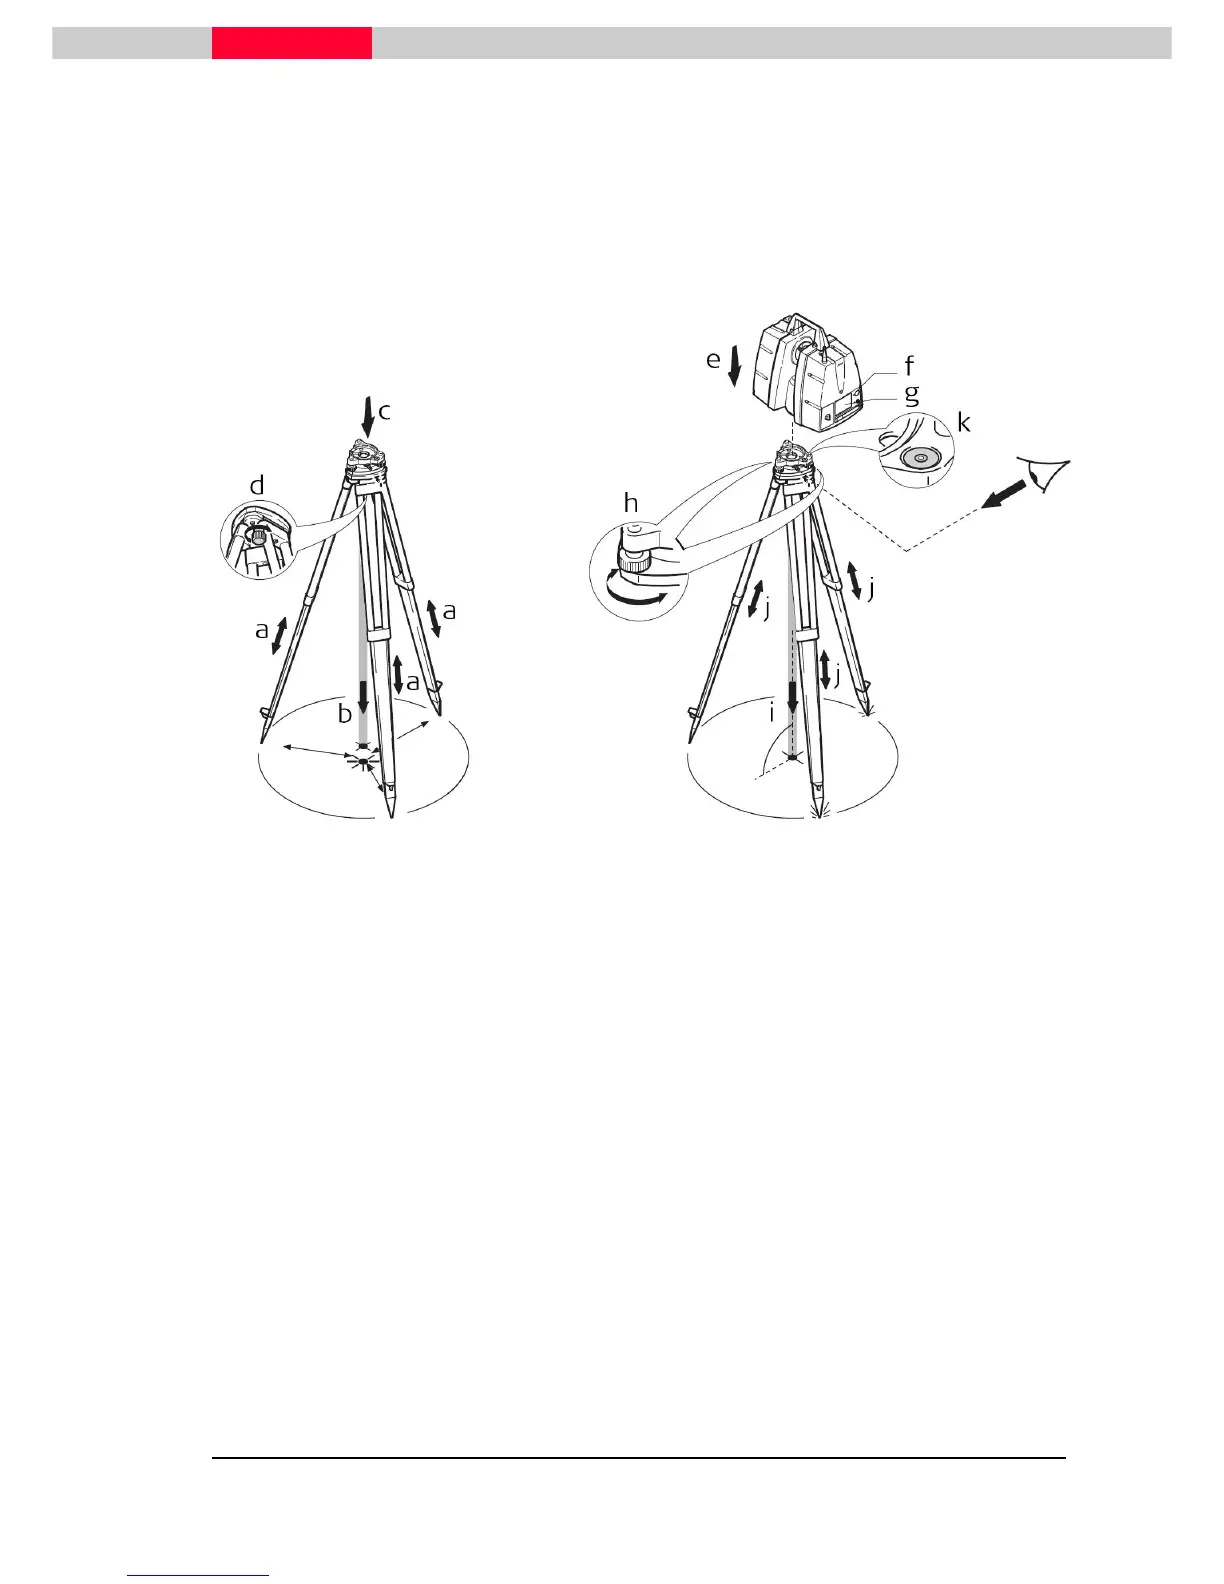
Figure 7
1. Extend the tripod legs to allow for a comfortable working posture (a). Position the tripod
approximately over the marked ground point, centring it as well as possible (b).
2. Place the tribrach on the tripod (c) and secure it with the central fixing screw (d).
3. Place the instrument on the tribrach (e) and secure it with the tribrach’s locking knob.
4. Turn the tribrach’s footscrews (h) to level the instrument.
5. Turn on the instrument by pressing the ON/OFF button (f). Go to Status, Level and Laser
Plummet, Plummet and activate the laser plummet (g).
6. Move the tripod legs (a) and use the tribrach’s footscrews (h) to center the plummet (i) over
the ground point.
7. Adjust the tripod legs (j) to level the circular level (k).
8. By using the electronic level (Status, Level and Laser plummet, Level) turn the tribrach’s
footscrews (h) to precisely level the instrument.
9. Center the instrument precisely over the ground point (i) by shifting the tribrach on the
tripod plate.
10. Repeat steps 8 and 9 until the required accuracy is achieved.