11 - 28
•
Ensure the plane is orientated to the local UCS by executing
Tools | Reference Plane |
Tools | Reference Plane | Tools | Reference Plane |
Tools | Reference Plane | Set to UCS.
Set to UCS.Set to UCS.
Set to UCS.
•
Move the reference plane center to the selected point via
Tools | Reference Plane |
Tools | Reference Plane | Tools | Reference Plane |
Tools | Reference Plane | Set Plane Origin at Pick Point
Set Plane Origin at Pick PointSet Plane Origin at Pick Point
Set Plane Origin at Pick Point.
..
.
•
Now the reference plane is positioned correctly to continue with the following
measurements.
A Reference Plane is still active when visually switched off.
When working more with specific command groups like the Reference Plane it
can be useful to pull out the respective toolbar. This can be accessed through
Edit | Customize Toolbars
Edit | Customize ToolbarsEdit | Customize Toolbars
Edit | Customize Toolbars.
. .
. Either keep it floating as seen in Figure 12 or dock it to
the top or side.
Mesh Volume
A mesh volume is calculated either above or below a reference place based upon the center of a
rectangle defined by the Sampling Step Intervals. The lines created in the Cyclone volume
calculation represent the “stems” of each rectangular volume. The resulting volume of the
rectangular box is calculated.
A mesh volume can be calculated based on Basic, Complex and TIN meshes.
Figure 13
•
Select the mesh.
•
Go to Tools
Tools Tools
Tools |
||
| Measure
Measure Measure
Measure |
||
| Mesh Volume
Mesh Volume Mesh Volume
Mesh Volume |
||
|
Reference Plane
Reference PlaneReference Plane
Reference Plane
•
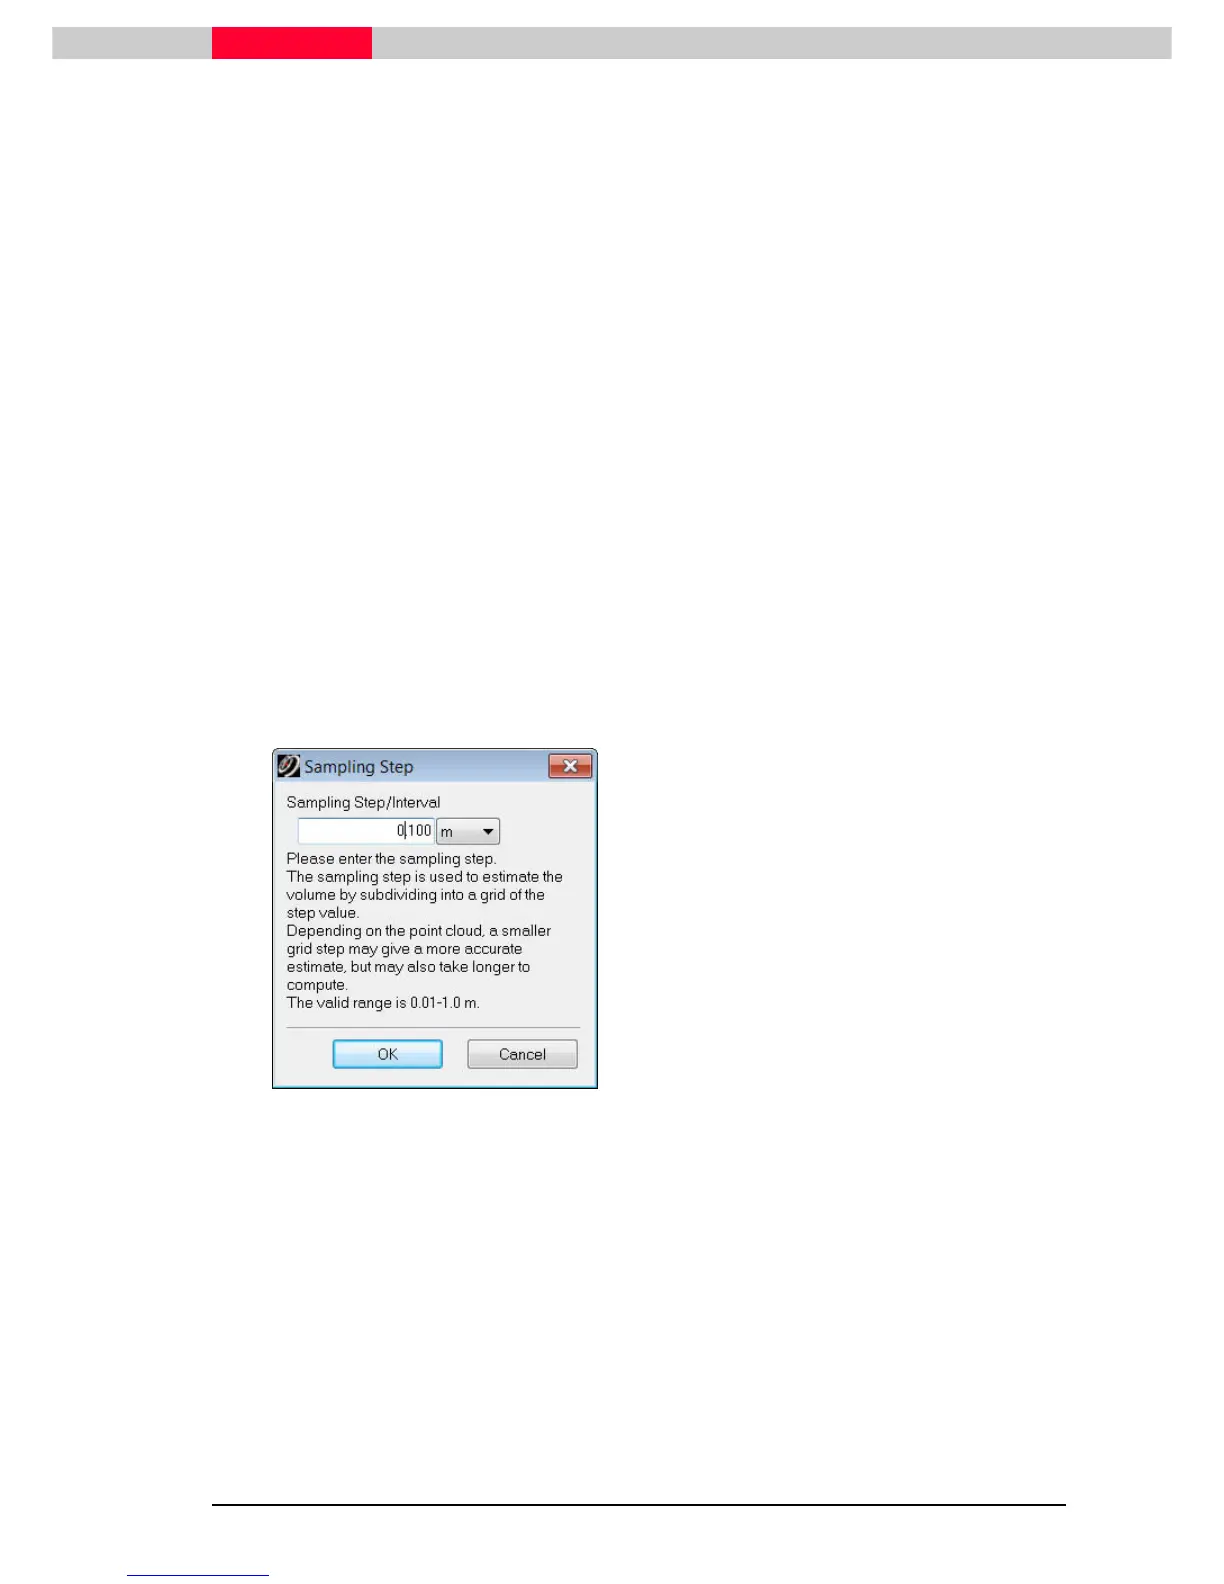
Enter a value for the Sample Step, which is
the grid size in which the mesh area is
divided into (Figure 13).
•
The volume reached is depending on the chosen interval, but should be close to 850m
3
•
Turn off the graphical representation as well as the actual measurement via
Tools |
Tools |Tools |
Tools | Measure
Measure Measure
Measure |
||
| Clear Temporary Measurement.
Clear Temporary Measurement. Clear Temporary Measurement.
Clear Temporary Measurement.