17 - 34
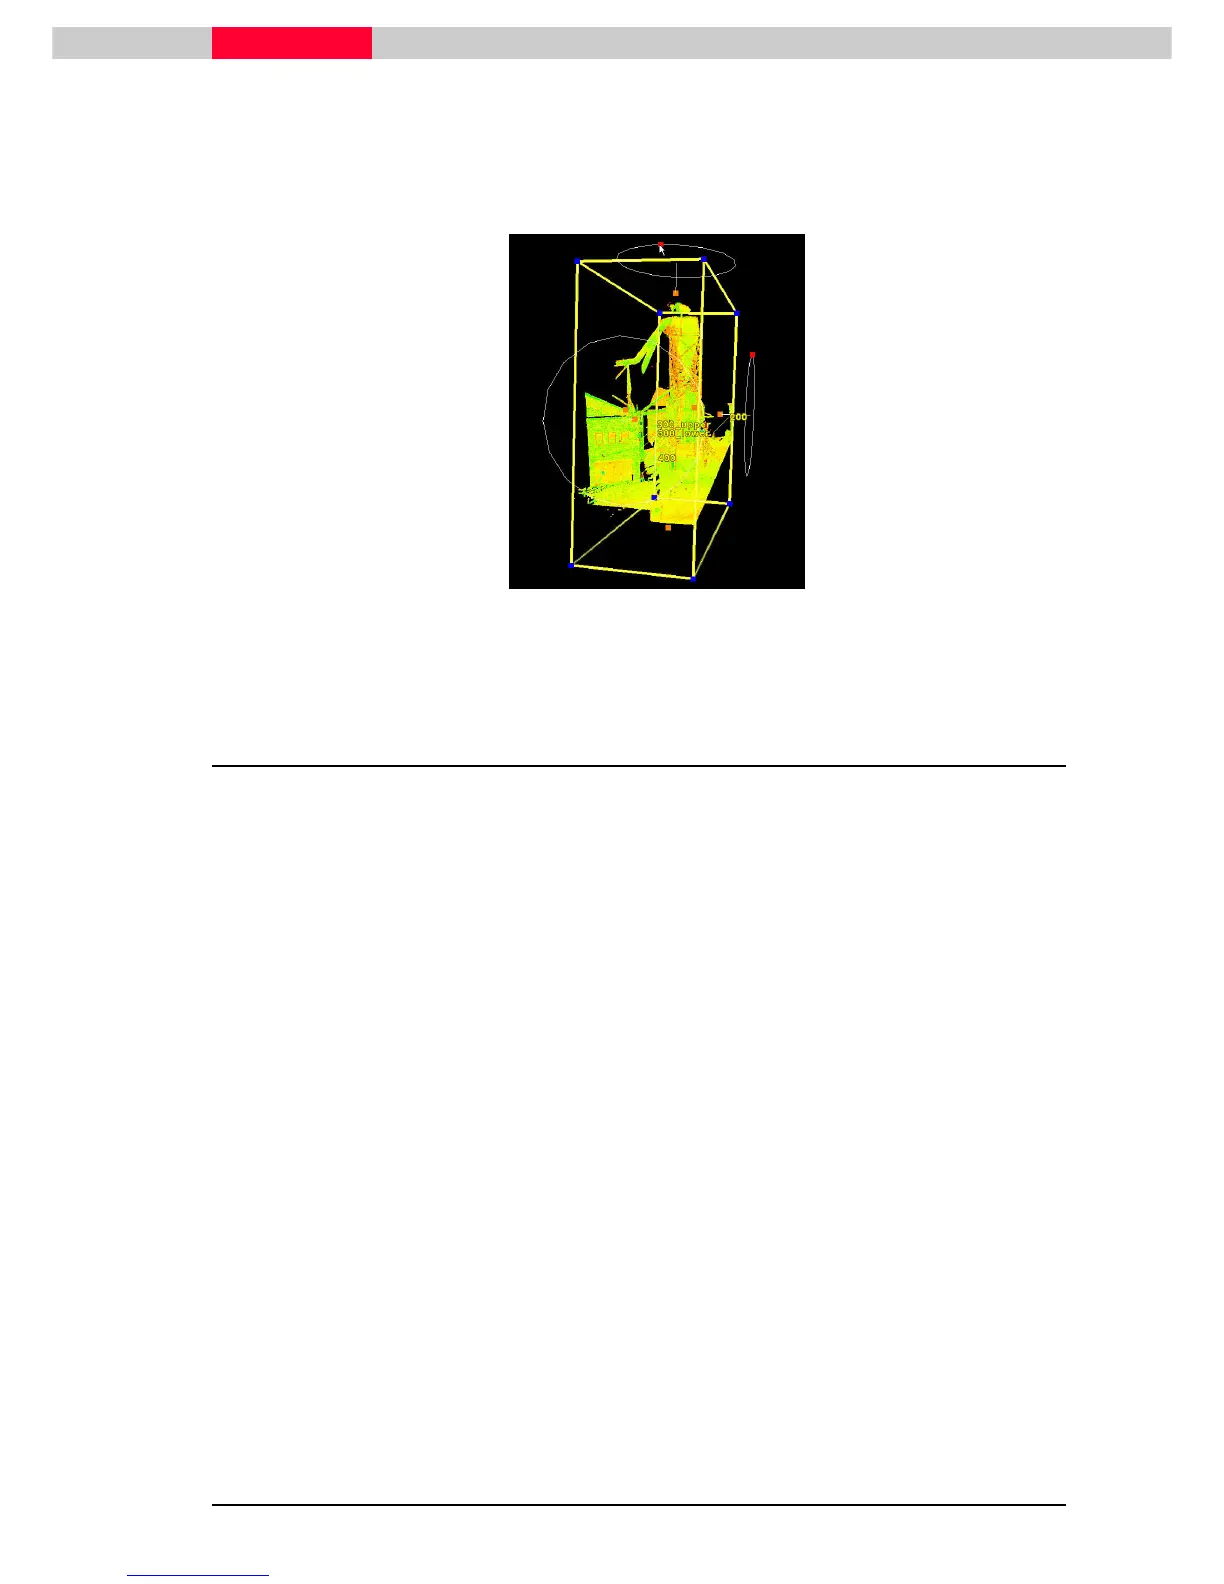
Now rotate the Limit Box by showing and using rotation handles.
•
Edit Object | Handles | Show Rotation Handels
Edit Object | Handles | Show Rotation HandelsEdit Object | Handles | Show Rotation Handels
Edit Object | Handles | Show Rotation Handels
•
Pick
Pick Pick
Pick the red handles and rotate the Limit Box around the specific axis.
Figure 24
4.3 Save and Manage Limit Boxes
The Limit Box Manager can be used to save multiple Limit Boxes and activate them.
•
Go to View | Add / Edit Limit Boxes…
View | Add / Edit Limit Boxes…View | Add / Edit Limit Boxes…
View | Add / Edit Limit Boxes…
Note how the already defined limit box is already stored and can be edited in the columns
defining its size and is name.
•
Change the name of this Limit Box.
Now create a new Limit Box using two different ways:
•
In the Limit Box Manager go to Limit Box |
Limit Box | Limit Box |
Limit Box | New
NewNew
New
•
This new Limit Box will be created to encompass all points by default. It can then be edited
again as seen above. Rename appropriately.
•
With the very first Limit Box selected in the Limit Box Manager go to Limit Box |
Limit Box | Limit Box |
Limit Box | Create…
Create…Create…
Create…
•
A new window will come up which already includes the values of the previous Limit Box.
•
Enter a name for this limit box and press OK
OKOK
OK.