Data Extraction
•
Sub-selecting the area where the Region Growing will occur is not mandatory, but beneficial.
•
For more on Region Growing, refer to Cyclone’s help files. (Press F1)
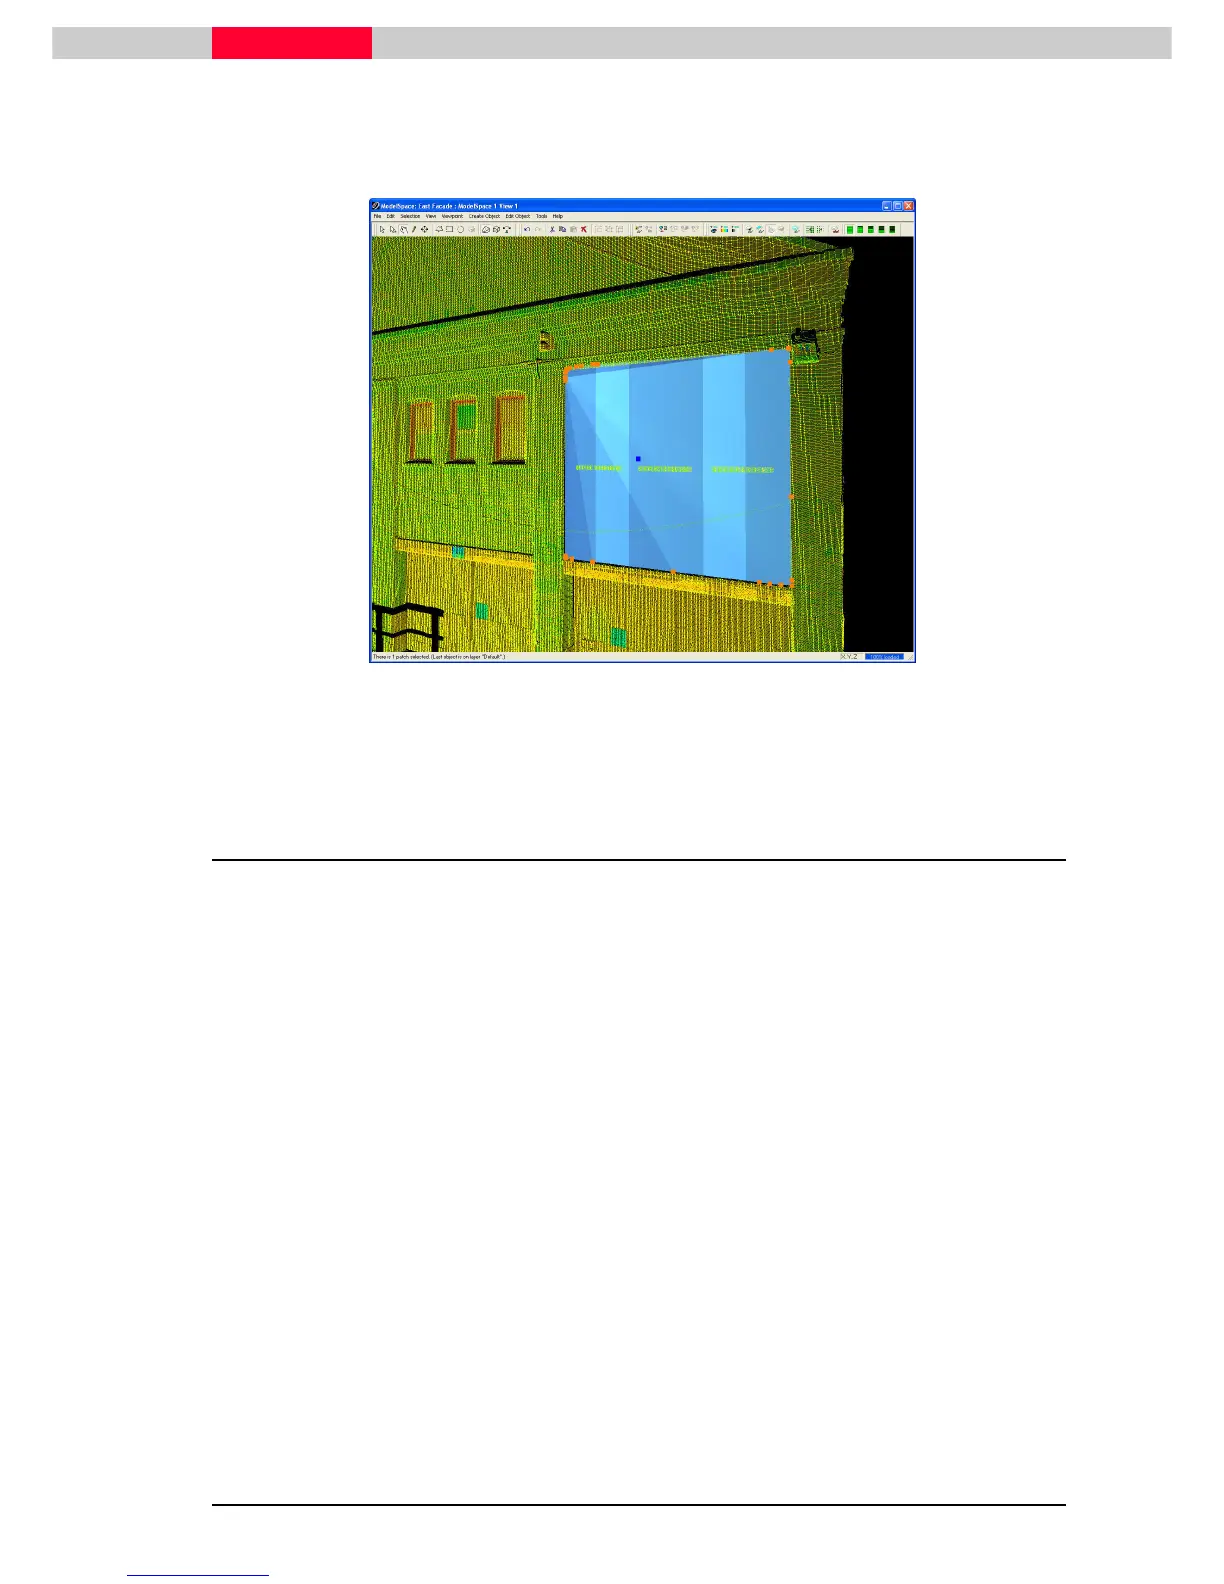
Figure 15
Figure 15 shows the patch created from the region grow command. The size and the position of
the patch is calculated from the white preview points shown when Region Growing.
2.4 Editing Patches
This section introduces several editing functions that can be performed on patches. Continuing
in the ModelSpace View of the ModelSpace named East Facade…
Note that the patch is solid; holes for the windows are not yet represented.
Make Rectangular
Select the region grown patch made in the previous section and Click Edit Object | Patch | Make
Click Edit Object | Patch | Make Click Edit Object | Patch | Make
Click Edit Object | Patch | Make
Rect
RectRect
Rectangular
angularangular
angular. This will square off the patch, reducing the amount of handles to four.
Now we will create holes in the patch for the window panes based on a drawn fence.
To do this it will be beneficial to have point cloud visibility on, for reference, and pickability off.
We will also want to turn off the visibility of our patch. We can do both of these tasks in the Set
Selectable tab of the View Properties dialog.
Set Selectable
1) First, align the viewpoint to the normal of the patch by selecting the patch, then clicking
Viewpoint | Align to Selection.
2) Click Selection | Set Selectable.
3) The Selectable/Visible tab is opened in the View Properties dialog. Uncheck the box under the
pickability column for the point cloud object type and the visibility column for planar patches.
(Figure 16)