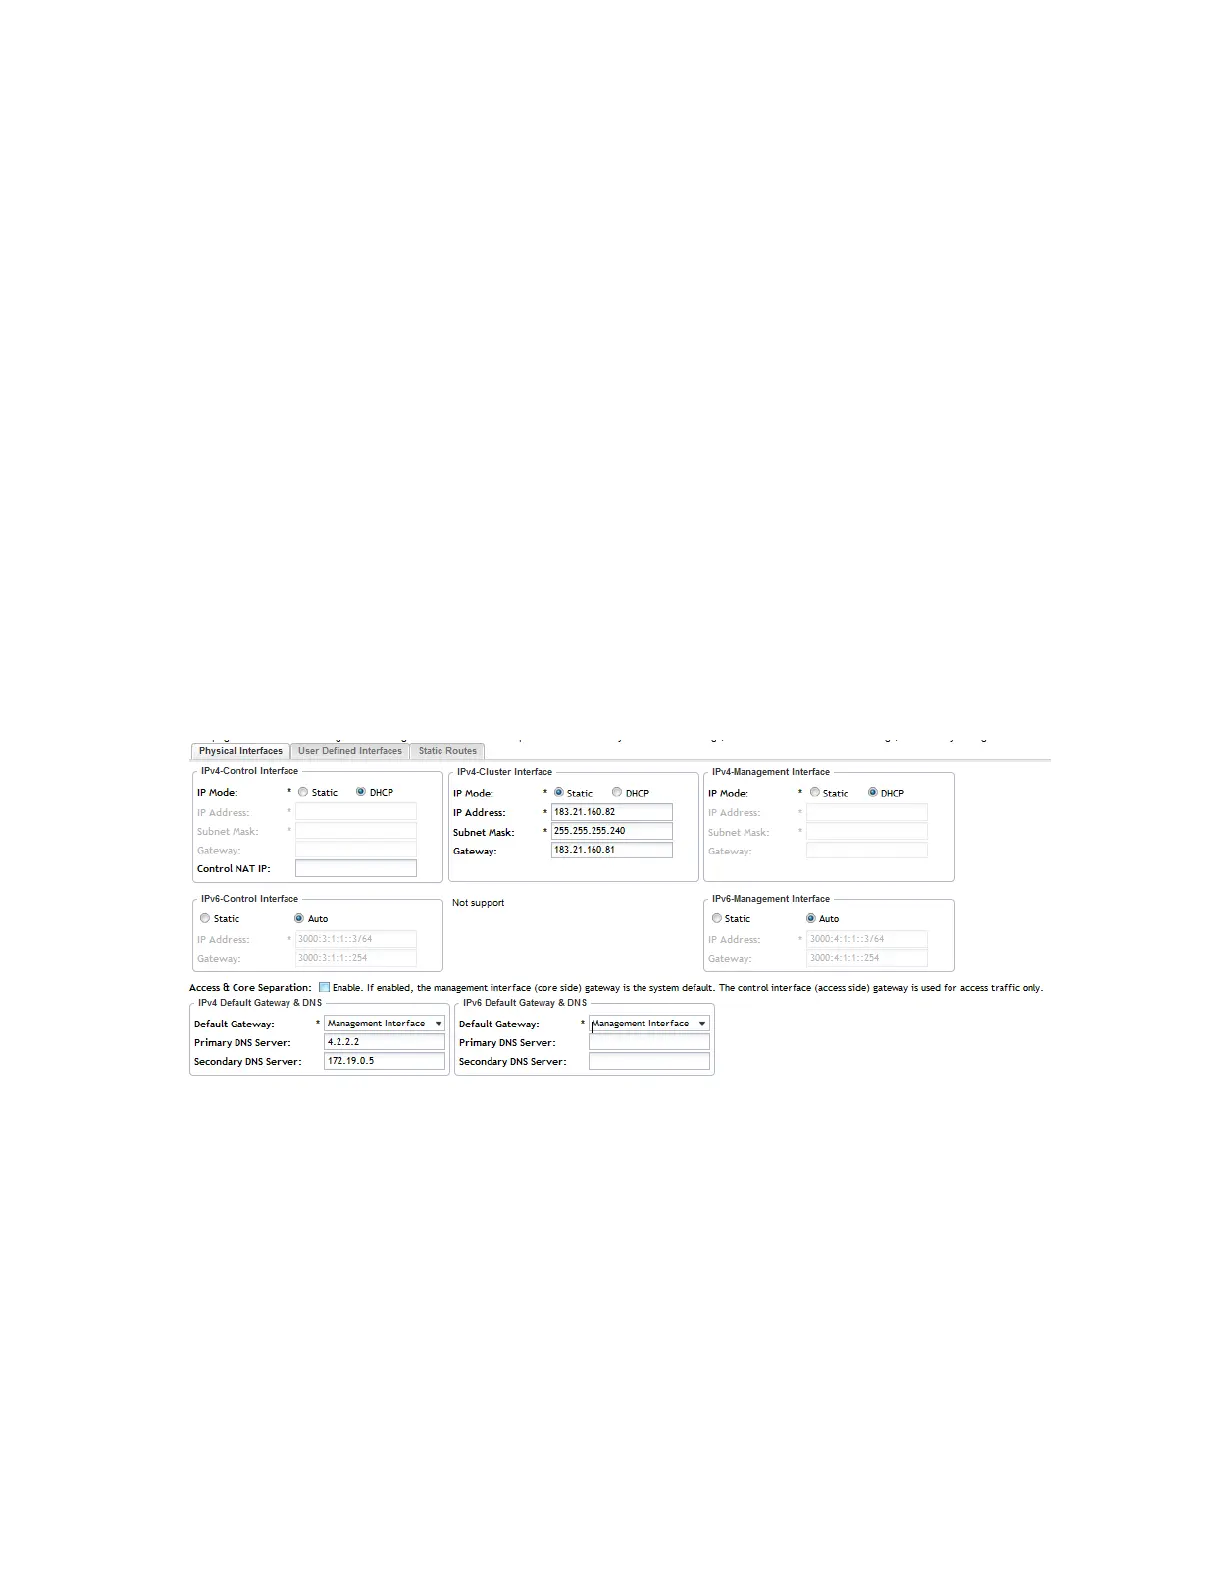
5. In Access & Core Separation, select the Enable check box if you want the management
interface (core side) to be the system default gateway.
The control interface (access side) will be used for access traffic only.
6. In Default Gateway, select the gateway that you want use - CLuster, COntrol and
Management (IPv4 and IPv6).
The options that appear here are the gateways that you have defined for control, cluster, and
management interfaces.
NOTE: When Access & Core Separation is enabled, the Default Gateway field is hidden.
7. In Primary DNS Server and Secondary DNS Server, configure the DNS servers that you
want the controller to use.
8. Click Apply.
The controller restarts and applies the updated network interface settings. You have completed
updating the physical interface settings.
NOTE: For information on how to configure the management IP address from the command
line interface, refer to the corresponding Command Line Interface Reference Guide for your
controller platform.
Figure 114: The Physical Interface tab
User Defined Interface Tab
Use the User Defined Interface tab to configure the service settings (captive portal, subscriber
portal, and Web proxy).
Note that you can only create one user defined interface, and it must be for a service and must
use the control interface as its physical interface.
NOTE: The user defined interface (UDI) is unavailable in Virtual SmartZone (High-Scale and
Essentials).
SmartCell Gateway 200/Virtual SmartZone High-Scale for Release 3.4.1 Administrator Guide
224
Configuring the System Settings
Configuring Cluster Planes