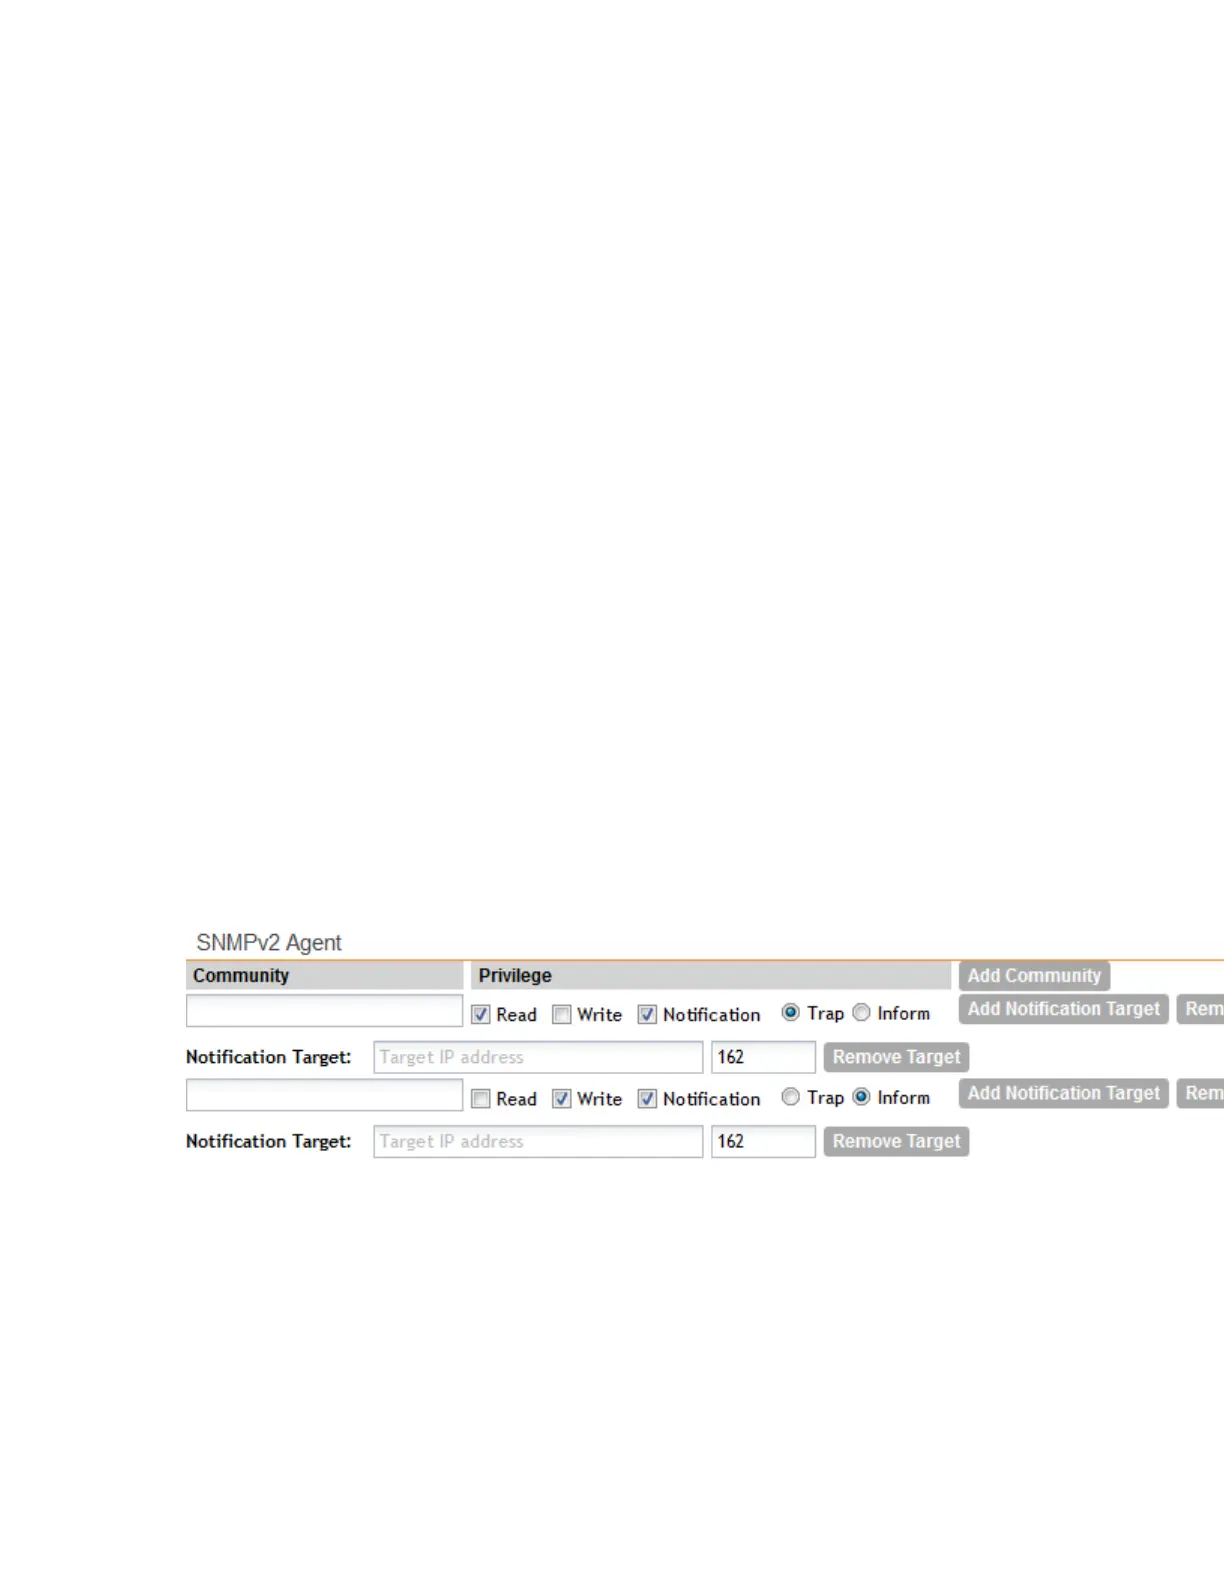
• Read
• Write
• Notifications
• Trap: Select this privilege if you want to send SNMP trap notifications for this community.
To add a trap target, click Add Notification Target, and then configure the following
options (required) that appear below:
• Notification Target : Type the IP address and server port of the SNMP notification
server on the network.
• Inform: Select this option if you want to send SNMP notifications for this community.
To add a trap target, click Add Notification Target, and then configure the options.
3. Click Add Community again.
A second set of configuration options for adding a community appears.
4. Configure the read-write community settings by following these steps:
a) In the text box under Community, type the read-write community string (for example,
private).
Applications that send SNMP Set-Requests to the controller (to set certain SNMP MIB
variables) will need to send this string along with the request before they will be allowed
access. The default value is private.
b) Under Privilege, select the check boxes for the privileges that you want to grant to this
community.
5. Click Apply.
You have completed configuring the communities for the SNMPv2 agent. To add another
community, click Add Community again, and then repeat the procedure above.
Figure 121: The SNMPv2 Agent section
Configuring the SNMPv3 Agent
The controller supports the Simple Network Management Protocol (SNMP v2 and v3), which
allows you to query controller information, such as system status, AP list, AP zones, etc., and
to set a number of system settings using a Network Management System (NMS) or SNMP MIB
browser.
Follow these steps to configure the SNMPv3 agent.
SmartCell Gateway 200/Virtual SmartZone High-Scale for Release 3.4.1 Administrator Guide
234
Configuring the System Settings
Configuring Network Management