EasyManuals Logo

Hach sc200 User Manual

Hach sc200
875 pages
To Next Page IconTo Next Page
To Previous Page IconTo Previous Page
Page #131 background imageLoading...
Page #131 background image
3. Slide the controller into the cut-out, ensuring that the rubber seal is
in place.
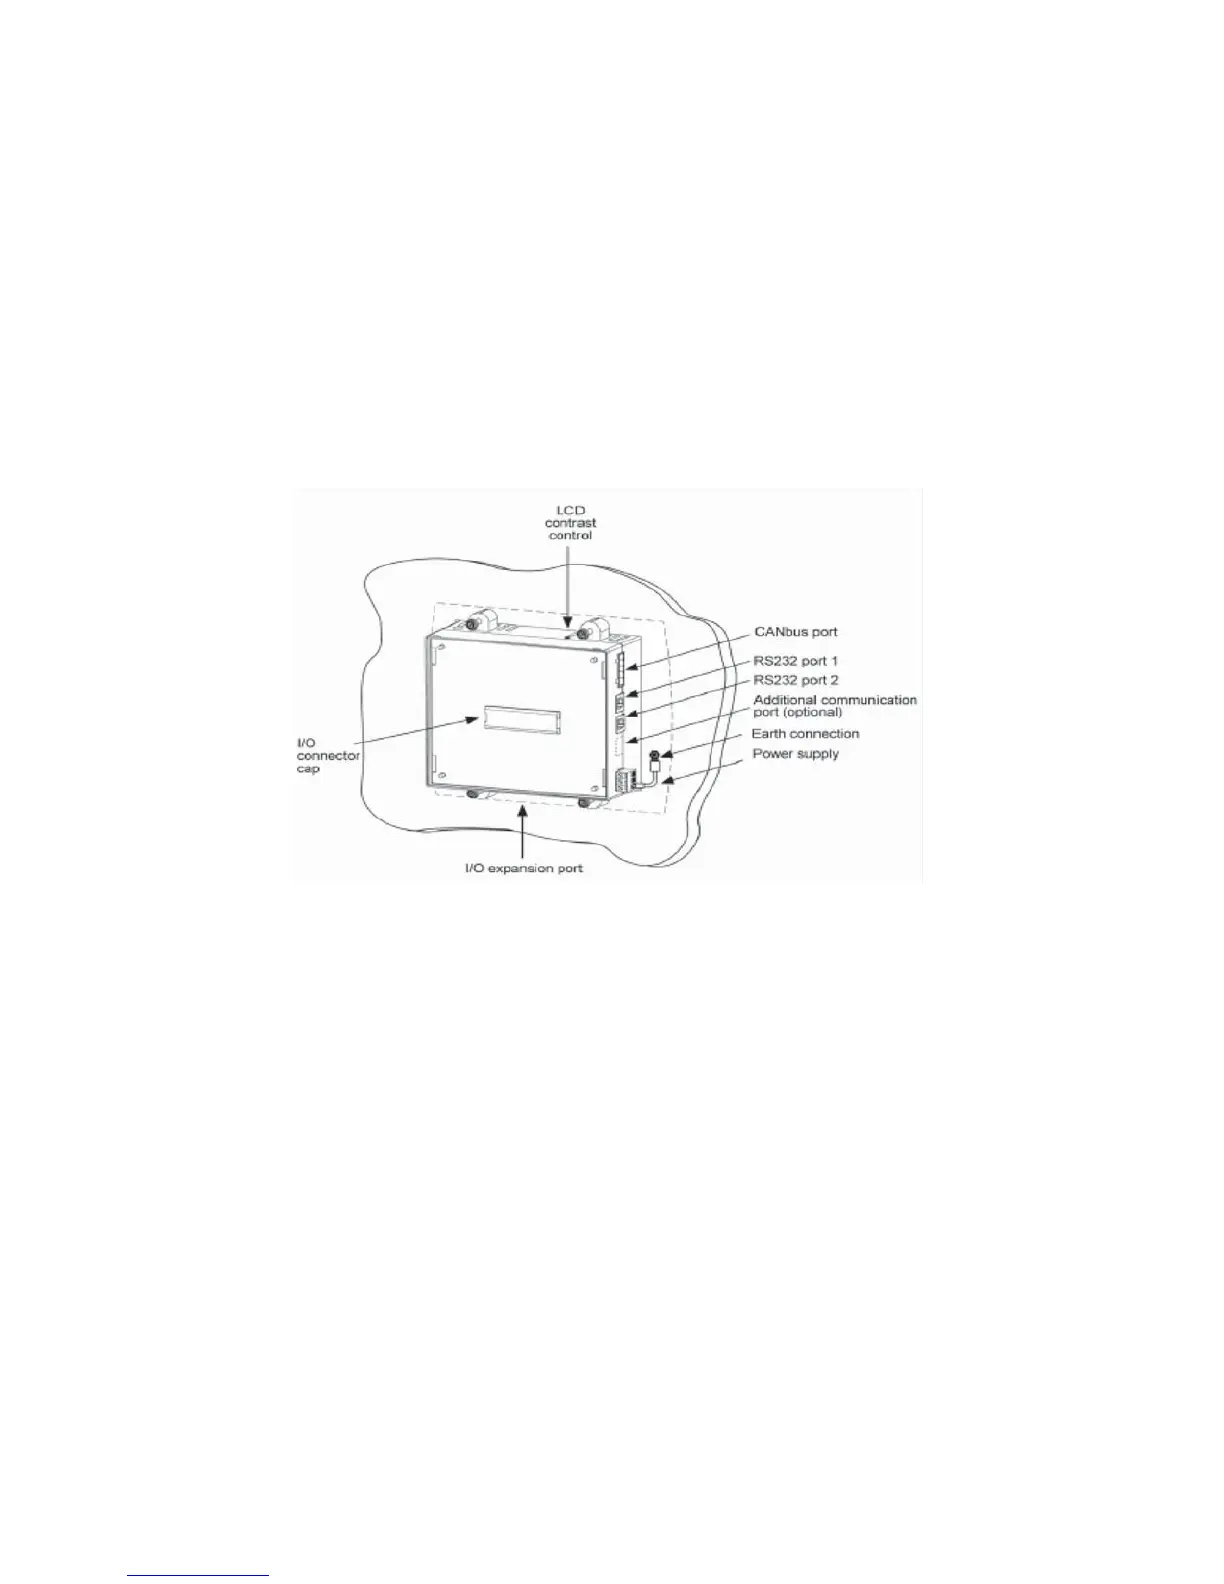
4. Push the four mounting brackets into their slots on the sides of the
controller as shown in FIGURE 2-1.
5. Tighten the bracket screws against the panel.
When properly mounted, the controller is squarely situated in the
panel cut-out as shown in FIGURE 2-4.
Figure 2-4. Panel Mounted—Rear View
2-4

Table of Contents

Other manuals for Hach sc200

Questions and Answers:

Question and Answer IconNeed help?

Do you have a question about the Hach sc200 and is the answer not in the manual?

Hach sc200 Specifications

General IconGeneral
Enclosure RatingNEMA 4X/IP66
Operating Temperature-20 to 60 °C (-4 to 140 °F)
Ambient Temperature-20 to 60 °C (-4 to 140 °F)
Enclosure MaterialPolycarbonate
Operating Humidity0 to 95% non-condensing
Relay OutputsUp to 4 SPDT relays
Storage Conditions-40 to 70 °C (-40 to 158 °F)
DisplayGraphical LCD
Inputs2 digital sensor inputs
Outputs4-20 mA
Power Supply100 to 240 VAC, 50/60 Hz
Analog Outputs2 or 4, 0/4-20 mA
CertificationsCE
CommunicationModbus RTU, HART
Dimensions144 x 144 mm
MountingPanel mount
Output4-20 mA
Power Requirements (Voltage)100 to 240 VAC
Warranty1 year
Weight1.2 kg

Related product manuals