Service Parts Disassembly 8-81
Developer Assembly (PL7.1.17~20)
Since all four Developer Assemblies are removed in the same manner, use this
procedure for any of the four colors.
Note
Toner will spill from the rear of the Developer Frame Assembly. Keep the
assembly vertical to reduce the amount of Toner spillage. Prepare a location to
replace the Developer Assemblies by covering a flat surface with paper or other
material to capture Toner spilled during the replacement procedure. Following
the repair, use an approved Type
II Toner Vacuum to clean spilled toner from
within the printer and around the work area.
1. Remove the Top Main Cover (page 8-8).
2. Remove the Left Front Cover (page 8-18).
3. Remove the Left Side Cover (page 8-13).
4. Remove the HVPS (page 8-109).
5. Remove the Developer Frame Assembly (page 8-78).
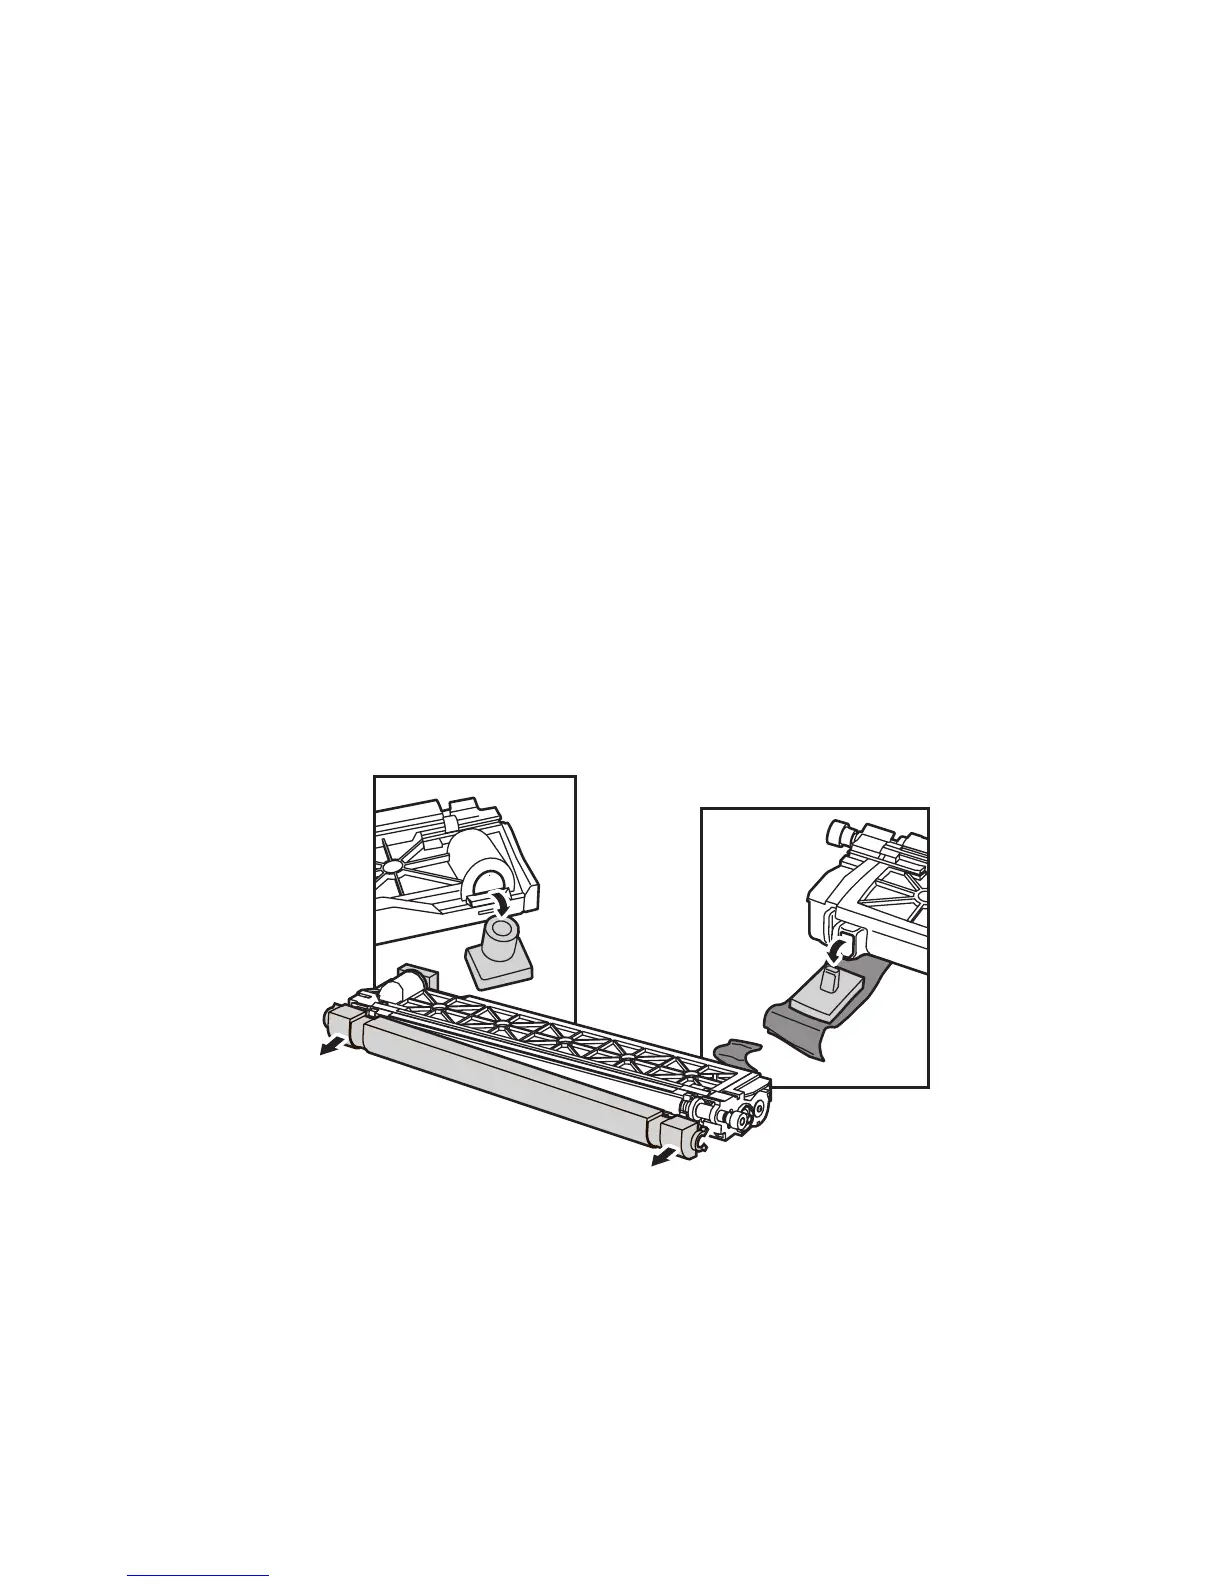
6. Open the replacement Developer Assembly packaging and transfer the shipping
plugs and roller cover from the new assembly to the old. Use the plugs, cover,
and packaging to repack the old part for return.
s6300-379