SmartAXIS Touch User’s Manual 8-3
1 Pilot Lamps
8
Lamps
1.3 Properties of Pilot Lamp Dialog Box
This section describes items and buttons on the properties dialog box.
●
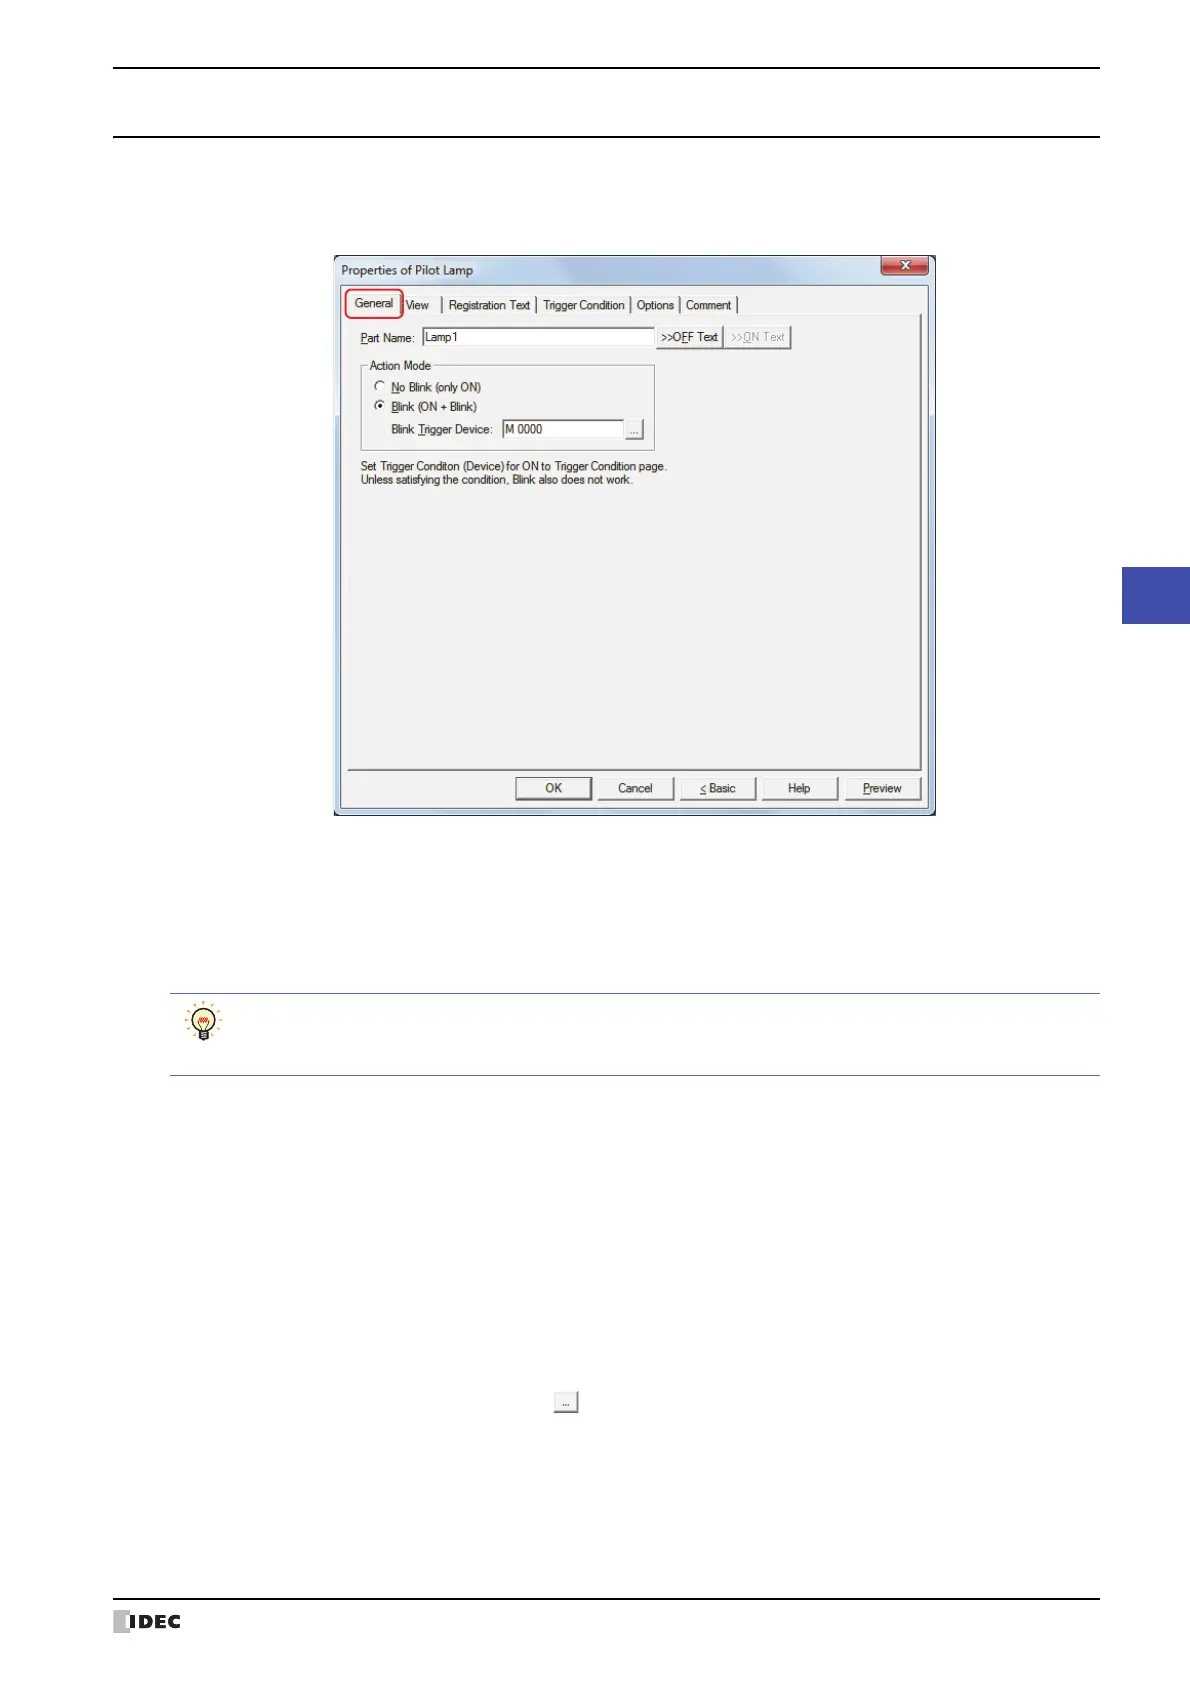
General Tab
■ Part Name
Enter a name for the part. The maximum number is 20 characters.
■ >>OFF Text, >>ON Text
Applies the text entered in the Part Name field to the Text field under the OFF or ON fields on the Registration
Text tab. This is used as the Registration Text when the lamp is OFF or ON.
■ Action Mode
Select the action when the part is ON.
To specify the Registration Text to use when the button is ON, select the Set by State check box on the
Registration Text tab. If left unchecked, the same Registration Text assigned for the OFF state is
displayed for the ON state as well.
No Blink (only ON): Displays the drawing object for the ON state when the trigger condition is satisfied.
Blink (ON + Blink): When the condition is satisfied and the value of the trigger device is 1, the object blinks
(alternates between the drawing object for the ON and OFF states at fixed time interval). The
blinking interval can be set with the Blinking Cycle setting on the System tab of the Project
Settings dialog box.
Blink Trigger Device: Specify the bit device to cause the lamp to blink.
The lamp blinks when
the
value of device is 1. The action for No Blink
applies when the value is 0.
Click to display the Device Address Settings dialog box. For the device
address configuration procedure, refer to Chapter 2 “5.1 Device Address
Settings” on page 2-62.