SmartAXIS Touch User’s Manual 6-5
1 Shapes
6
Drawings
1.3 Polygon
● Polygon Drawing Procedure
This section describes the procedure for drawing polygons.
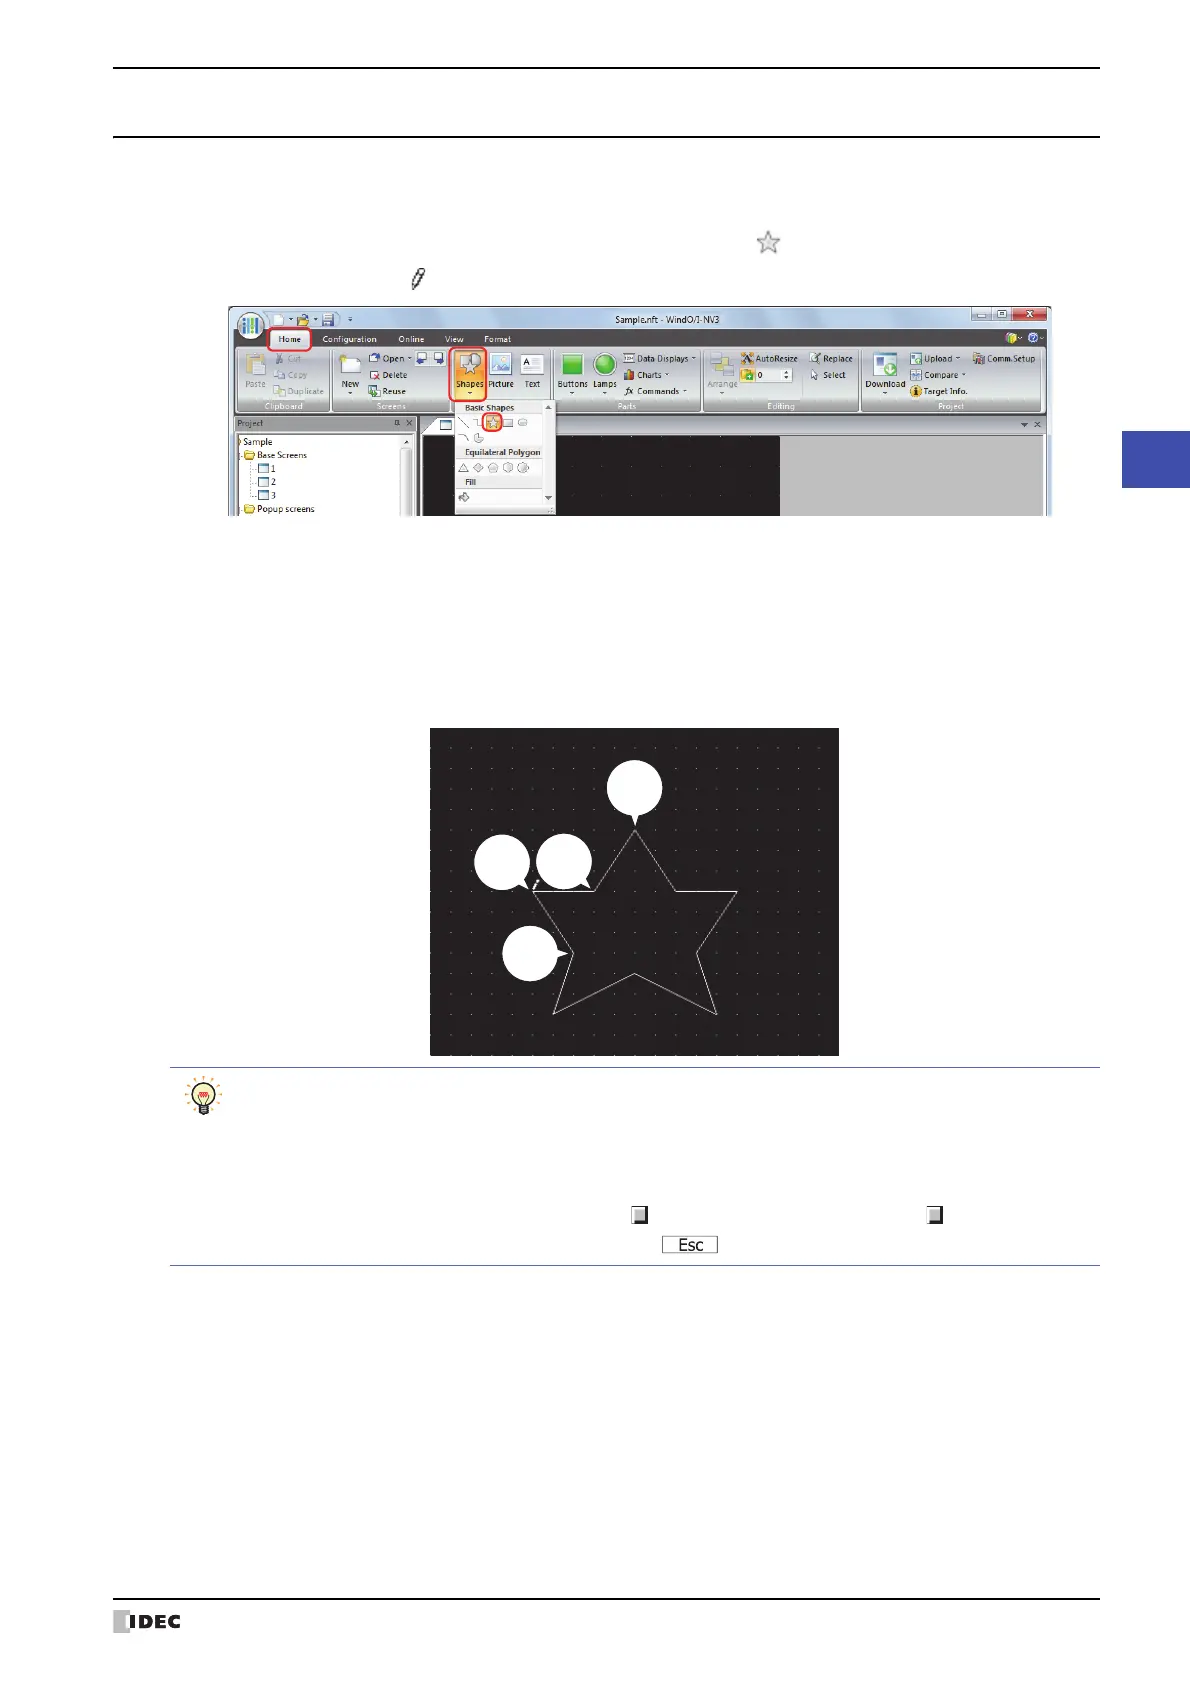
1 On the Home tab, in the Drawings group, click Shapes, and then click (Polygon) under Basic Shapes.
The mouse cursor changes to (pencil).
2 Click at the location (starting point) to start drawing the polygon on the edit screen.
3 Click the corner point locations in order.
A line is drawn that connects the starting point and the various corner point locations in the order that they were
created.
4 Double click at the ending point location.
A polygon is drawn with the starting point and ending point connected.
Starting
point
Corner
point
• To change the style of the drawn polygon, perform one of the following operations.
- Double click the polygon to open the Properties dialog box
- Select the polygon and select the style with Shape Style on the Format tab
- Select the polygon and right click to display the popup menu
• To change the starting point, corner points, or the ending point of the drawn polygon, select the polygon
and right click on it, and then click Reshape. is displayed on the polygon. Drag to the desired
location. Double click the edit screen or press the key to finish changing the shape.