PROGRAM mode: HD-1
28
If there is distortion, but the “ADC OVERLOAD!” message
does not appear, it’s possible that the distortion is being
caused by the settings of the internal effects. To solve this
problem, either lower the input Level (see “Level,” above),
or adjust the effects settings (such as changing the individual
effect Input Trim parameters).
0–8d: Metronome Setup
Here you can specify the output destination and volume of
the metronome, as set up in by “Metronome Precount” (0–
2c). The metronome is available only if “Trigger” is set to
Sampling START button.
Output Bus [L/R, L, R, 1…4]
This sets the audio output for the metronome sound.
L/R: The metronome will be hear d in the main stereo
outputs (L/Mono and R), USB, and the headphones.
1…4: The metronome will be heard only in the selected
individual output.
Level [000…127]
This controls the volume of the metronome sound.
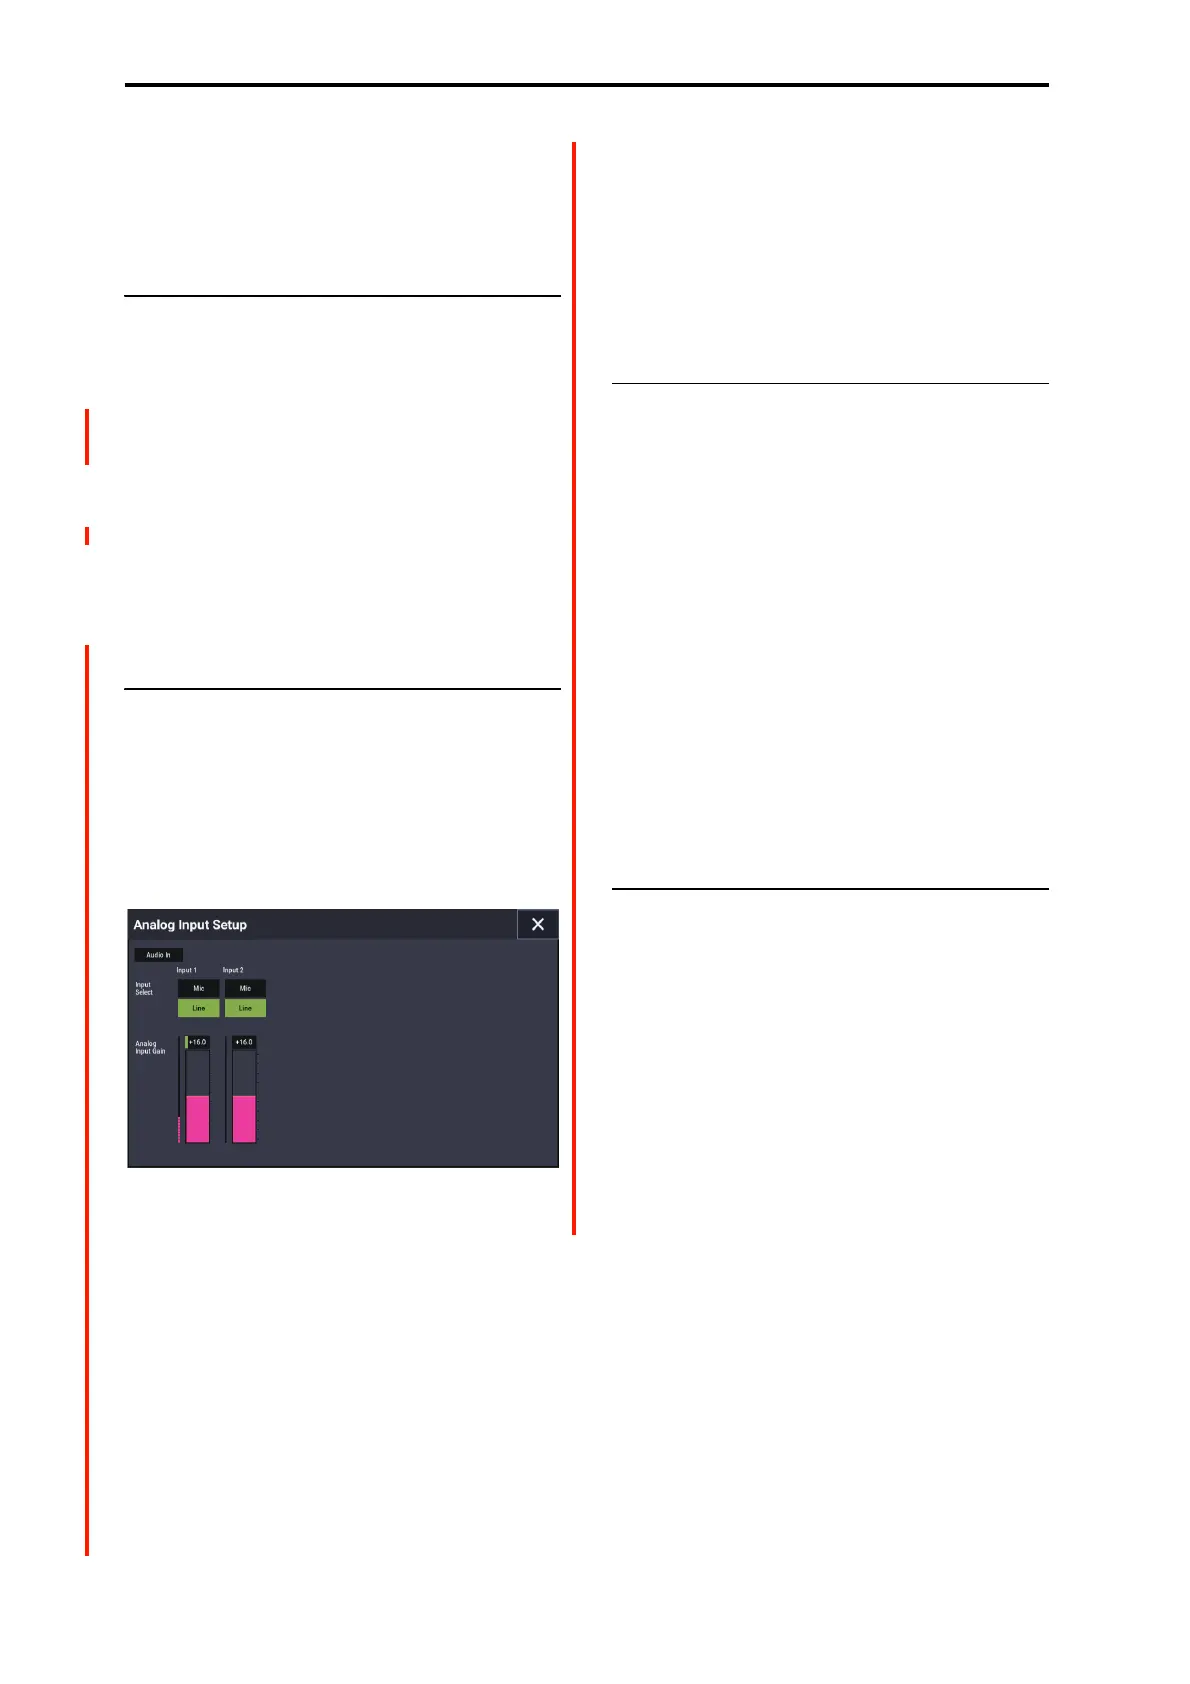
0–8e: Analog Input Setup
Audio In
[Button]
Switches the audio input on/off. This works in tandem with
the AUDIO IN button on the front panel.
Press the Setup button to display the Analog Input Setup
dialog box.
Analog Input Setup dialog
Input Select
Sets the specified level of the input signal. Switch this to
match the device that is connected, and use Analog Input
Gain to adjust the gain.
LINE: Set this to “LINE” when you want to connect a
mixer, computer, audio. system, signal processor or another
synthesizer. The specified level is +4 dBu, with 12 dB of
headroom.
MIC: Use the “MIC” setting if you are connecting a mic.
Analog Input Gain
Use this to fine-tune the gain after setting the gain in “Input
Select”.
When Input Select is set to “LINE”, the “MIN” position
equals unity gain.
The MAX position is about 40 dB higher than the MIN
setting.
Auto Sampling Setup
This command automatically configures the PROGRAM
mode sampling-related parameters, making it easy for you to
sample an external audio source or to resample your
performance as you play a Program. You can also use this
command to initialize the sampling settings. For more
information, see “Auto Sampling Setup” on page 116.
0–8f: Sampling button
Press the button to enter sampling standby.
To begin sampling, press the SAMPLING START/STOP
button.
SAMPLING START/STOP
When you press this button after pressing the SAMPLING
REC button, one of the following will occur depending on
the “Trigger” settings.
• When “Trigger” is set to “Sampling START Button”,
pressing this button will immediately begin sampling.
• When “Trigger” is set to “Note On”, sampling begins
after you press this button and then play a key (note on)
on the keyboard.
• When “Trigger” is set to “Threshold”, sampling begins
after you press this button and the threshold level is
reached for the audio source.
Press this button on the Sample Edit page in SAMPLING
mode to play back the selected sample.
v
0–8: Page Menu Commands
• Compare →p.112
• Write Program →p.112
• Exclusive Solo →p.113
• Optimize RAM →p.114
• Select Sample No. →p.115
• Auto Sampling Setup →p.116
• Add To Set List →p.113
• PAGE →p.126
•MODE →p.126

 Loading...


