Customize
Mailbox Options: Subscriber: [Email]
448 ◆ Chapter 3: Programming UX Mail Manual
Setting up the VM Folder Only Option on an Exchange Account with Outlook 2003
Part 1: Set up an IMAP Account in Outlook 2003
To set up an IMAP account:
1. Move all your voice mail messages from your inbox to another folder.
● Automatic synchronization could initially delete any voice mail messages left in your inbox.
2. In Outlook 2003, click Tools + E-Mail Accounts.
3. In the E-Mail Accounts opening screen, select Add a new e-mail account and click Next.
4. In the E-Mail Accounts: Server Type screen, select IMAP and click Next.
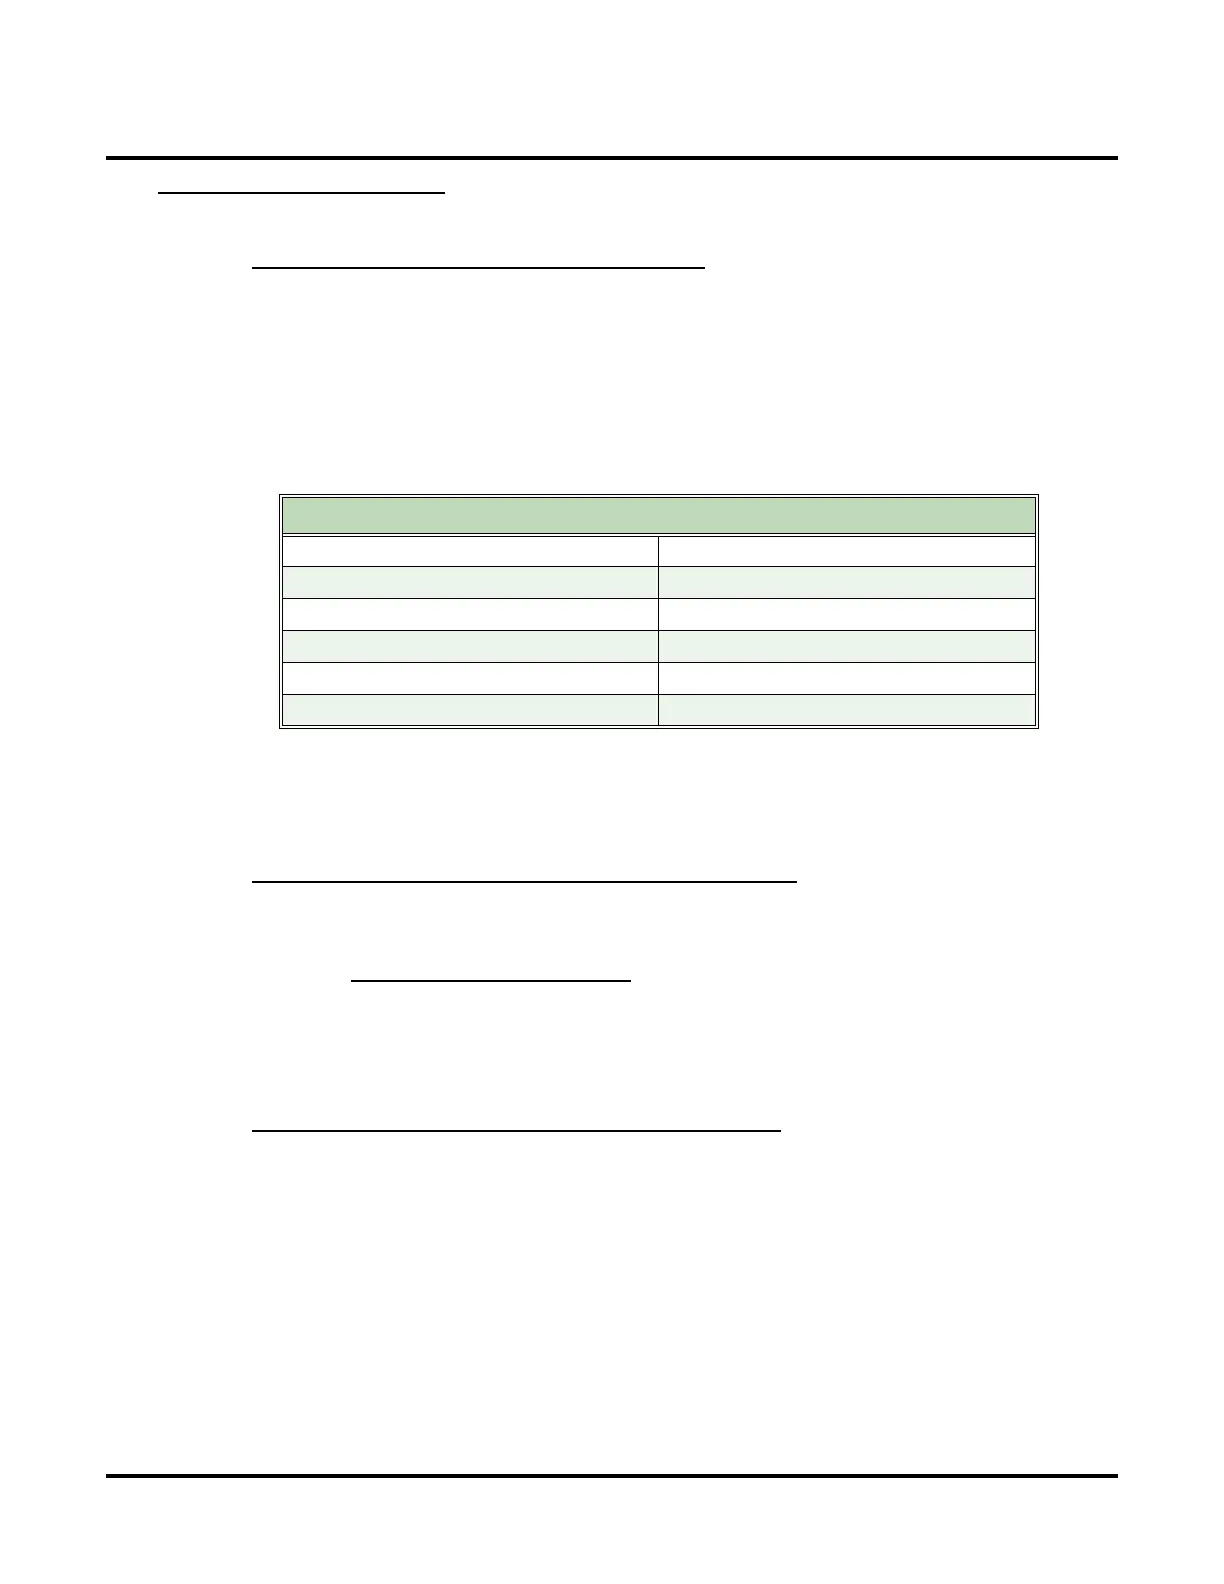
5. In the E-Mail Accounts: Internet E-mail (IMAP) screen, enter the following information:
6. Click More Settings, select the Connection tab, and verify that Connect using my local area net-
work (LAN)
is selected.
7. Click OK to return to the E-Mail Accounts: Internet E-mail (IMAP) screen.
8. Click Next + Finish to complete the installation.
Part 2: Enable the VM Folder Only Sync Option in UX Mail
To set up the VM Folder ONly Sync Option:
1. For the mailbox corresponding to the Outlook account you just set up, in Mailbox Options Edit: Sub-
scriber:
[EMAIL] EMAIL INTEGRATION SYNC MODE (PAGE 441), select VM Folder Only.
2. Click Apply changes.
3. From any system extension, leave a test message in the mailbox you just configured.
● This will cause Outlook to automatically create the Voice Mail Messages folder. This folder will be
automatically synchronized (subscribed).
Part 3: Create a Rule to Move Message to the VM Folder
To create the VM Folder rule in Outlook 2003:
1. In Outlook 2003, Tools + Rules and Alerts.
2. In the E-Mail rules tab, make sure the Apply changes to this folder drop-down box selects Inbox
[Microsoft Exchange Server].
3. Click New Rule to launch the Rules Wizard.
4. In the Rules Wizard, in Step 1 select the Stay Organized template Move messages with specific words in
the subject to a folder.
5.
In
Step 2
, click the
specific words
link, enter
Voice Mail Message
(case sensitive - be precise) +
Add
+
OK
.
6. Also in Step 2, click the specified link and select the Voice Mail Messages folder + OK + Finish.
Outlook 2003 Option Typical Entry
Your Name Enter your name
E-Mail Address yourname@emailserver.com
Incoming Mail Server (IMAP) imap.emailserver.com
Outgoing Mail Server (SMTP) smtp.emailserver.com
User Name yourname
Password Enter your email account password