Auto Forward
UX Mail Manual Chapter 2: Features ◆ 65
2
- To have the forwarded message be deleted from the recipient mailbox, select Forward and
Erase
.
✔ The default setting is
Forward and Save.
Step 4 To set up the Auto Forward mode for a Subscriber Mailbox:
4.1 CUSTOMIZE: MAILBOX OPTIONS EDIT: SUBSCRIBER: [MESSAGING] AUTO FORWARDING (PAGE 431).
- To disable Auto Forward, select Disabled.
- To have the forwarded message also be saved in the recipient mailbox, select
Forward
and Save
.
- To have the forwarded message be deleted from the recipient mailbox, select
Forward and
Erase
.
✔ The default setting is Forward and Save.
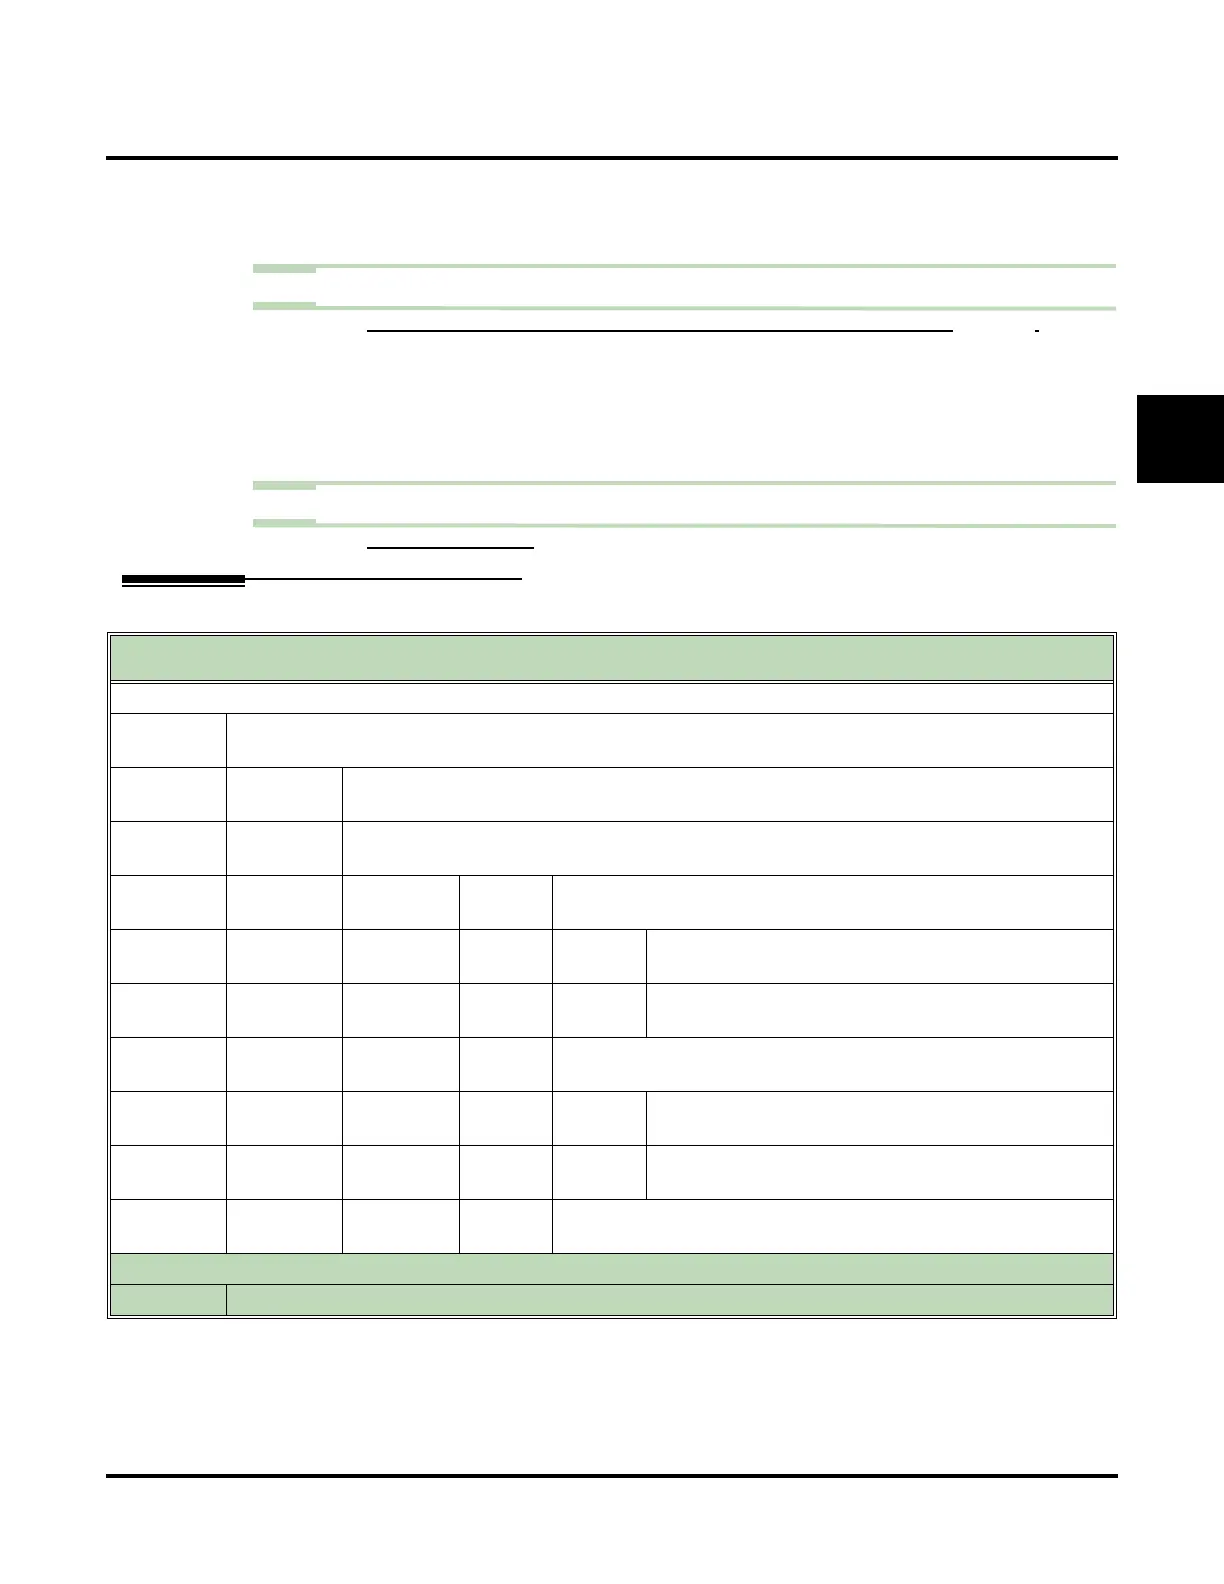
Step 5 Turn Auto Forward On or Off in the Subscriber, Guest, or Message Center Mailbox.
5.1 SEE OPERATION BELOW.
Operation
Turning Auto Forward On or Off
(If you don’t see a Soft Key, press More> until it appears.)
Log onto Subscriber, Guest, Network, or Message Center Mailbox.
[Optns]
Access the Mailbox Options Menu.
• Alternately dial
OP (67).
[AFwd]
Access Auto Forward
• Alternately dial
AF (23).
Voice mail plays a summary of your Auto Forward settings.
• By default, Auto Forward is turned off.
[On] [Off]
Turn Auto Forward on or off.
• Alternately dial
O (6).
Enter the mailbox number to receive Auto Forward
Messages (if none programmed).
[Back]
Go back to Mailbox Options Menu.
• Alternately dial
#.
[Mbox]
Change the Auto Forward recipient.
• Alternately dial
C (2).
Enter the mailbox number to receive Auto Forward
Messages
[Back]
Go back to Mailbox Options Menu.
• Alternately dial
#.
[Back]
Go back to Mailbox Options Menu.
• Alternately dial
#.
Options
●
Dial 0 for recorded help in any menu or sub-menu.