SEQUENCER mode
548
QWERTY keyboard (commercially available) is
connected, you can use this to enter text instead of the on-
screen keyboard.
Regions whose names are shown as “=No Assign=” are
empty. You cannot edit these names.
5. Select the region that you want to edit, and use the
buttons at the bottom of the dialog box to edit the
region.
The available buttons will differ depending on whether
you’ve checked Song.
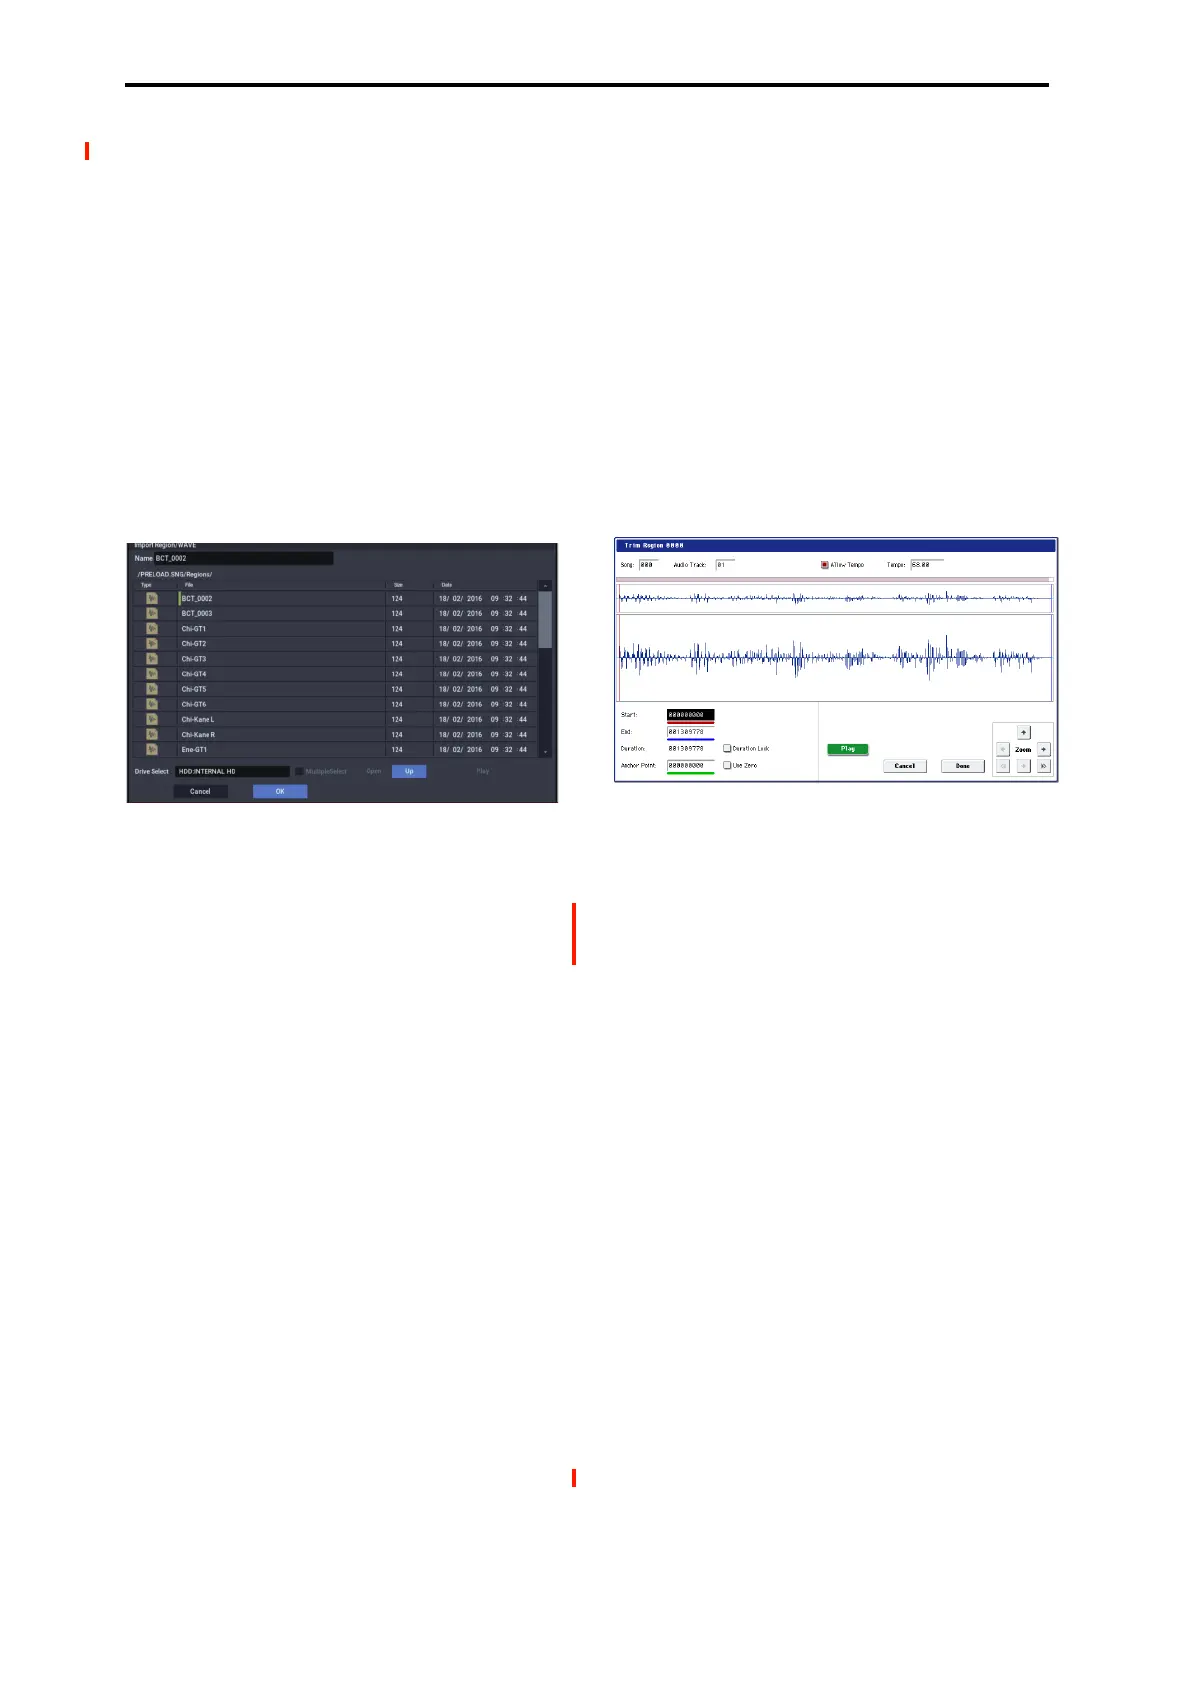
• Importing a region
You can copy a region from a .SNG file, or create a
region from a WAVE file.
Select the region that you want to import, and press the
Import button.
The Import dialog box will appear.
Use “Drive Select,” “Open,” and “Up” to move to the
desired directory, select the region file or WAVE file you
want to import, and press OK.
You can use “Name” in the upper line to edit the name of
the region. Edit “Name” after you’ve selected a file.
Important: You can only directly import WAVE files
from the internal hard drive. To use files from CDs or
external USB devices, you must first copy them to the
internal hard drive, and then import the copied file into
the Song.
• Note: You can only import WAVE files with a sample
rate of 44.1 or 48 kHz, and which are no longer than 80
minutes.
When you press the Play button, the selected WAVE file
will play. (Play is available only for 44.1 and 48 kHz
WAVE files). See also “WAVE files” on page 237 of the
OG.
• Copying a region
Select the copy-source region and press the Copy button.
Then select the copy-destination and press the Paste
button or Insert button to paste (overwrite) or insert the
region into that destination.
Commands that are available if Song is unchecked
• Paste region
Select the region to which you want to paste, and press
the Paste button to overwrite that region.
• Clear region
Select the region that you want to clear, and press the
Clear button to clear that region.
Commands that are available if Song is checked
• Insert region
Select the region at which you want to insert, and press
the Insert button to insert a region.
• Cut region
Select the region that you want to cut (delete), and press
the Cut button to delete that region.
6. Play back the region.
Select the region that you want to play back, and press the
Play button to play the region from its “Start” to “End”
(Trim step 6). During playback, the Play button
indication will change to Stop. You can press the Stop
button to stop playback.
7. Use the trim dialog box to specify the portion of the
region that will play back.
In the trim dialog box, select the region that you want to
edit and press the Trim button to open the trim dialog
box.
WAVE file waveform display, ZOOM
This area shows the waveform of the WAVE file that is
assigned to the region.
The waveform display and the ZOOM buttons are the
same as in SAMPLING mode, except for the fact that the
displayed data is a WAVE file. Refer to SAMPLING
mode “1–1c: Sample waveform display” on page 586 and
“1–1f: ZOOM” on page 587.
Start [0000000…230399998]
End [0000001…230399999]
“S
tart” and “End” specify the range (start address and end
address) of the waveform that will be played. The range
you specify here is highlighted in the “WAVE file
display.”
Duration
This indicates the length between “Start” and “End.”
(You can’t edit this indication.)
Anchor Point [0000000…230399999]
Here you can specify an anchor point, which is
convenient when you need to move an audio event. (The
value is shown in samples.)
Anchor points are used in audio event editing.
Use Zero [Off, On]
On: When you edit “Start,” “End,” or “Anchor Point,”
you will be able to select only “zero-cross” addresses;
locations at which the waveform level crosses the center
line of the sample waveform display, and is therefore at
±0. When you operate the VALUE dial, or +/− buttons,
the next or previous zero-cross point will be
automatically found and selected. If you use the numeric
keys 0–9 to enter a value, the nearest zero-cross address
will be found automatically.

 Loading...


