13. E2 Maintenance
13.9 3RU Fan Tray
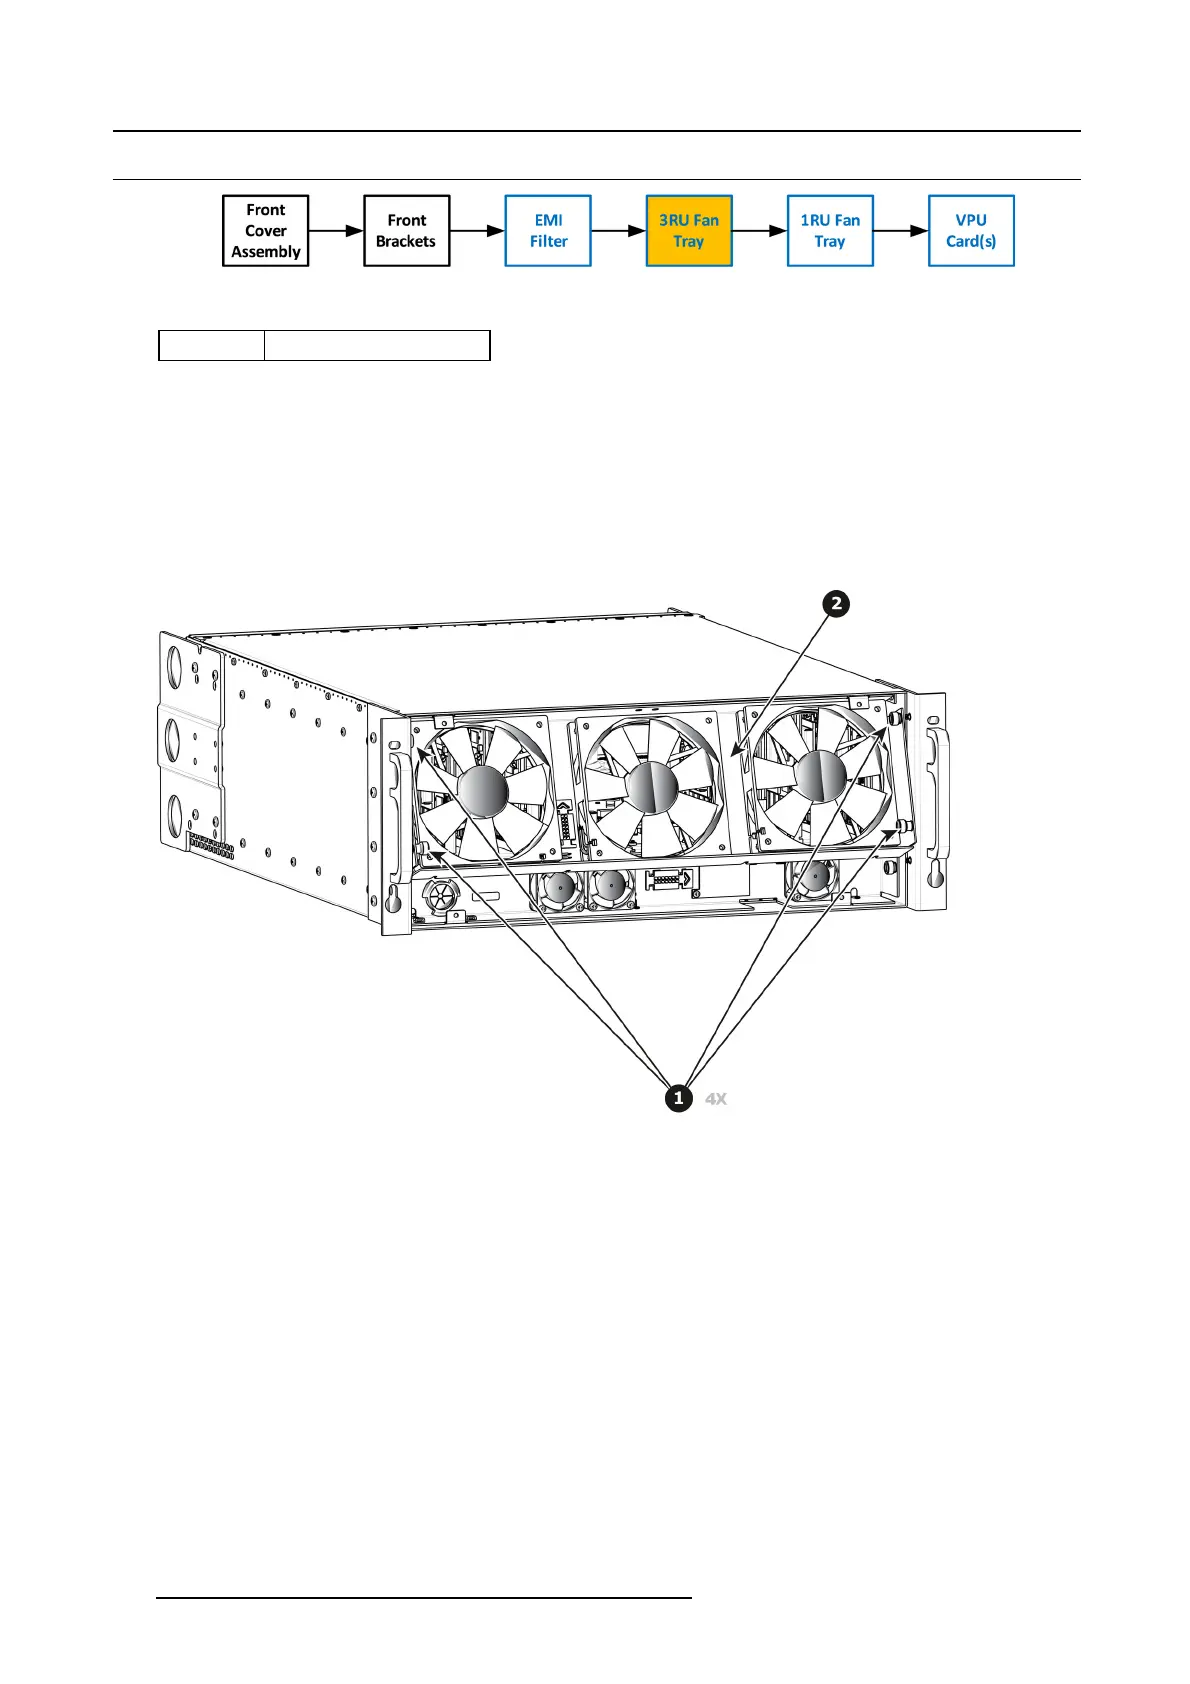
Image 13-18
Concerned parts
R767271K 3R U Fan Tray
Necessary tools
1 x Phillips Screwdriver #2 ( optional).
How to remove the 3RU Fan Tray
1. Loosen an d unsc rew the 4 thumbscrews holding the 3RU fan tray to the chassis.
Note: You may need a screwdriver if the thumbscrews are ver y tight.
2. Pull the tray out.
Note: You need to tilt the tray a nd maneuver it to go ar ound the dimples located on the side of the chassis.
Image 13-19
How to install the 3RU Fan Tray
Follow the same procedure in the reverse order and in addition per form the following:
1. Ensure that the bottom slots at the bottom of the tray align with the pins located on the bracket in the chassis.
2. Make sure that the c onnector located at the b ack of the tray is aligned to the c onnector located on the bracket behind it.
3. Push so that the two connectors ma te.
362
R5905948 EVENT MASTER DEVICES 17/07/2017