13. E2 Maintenance
13.34 Top Co ver
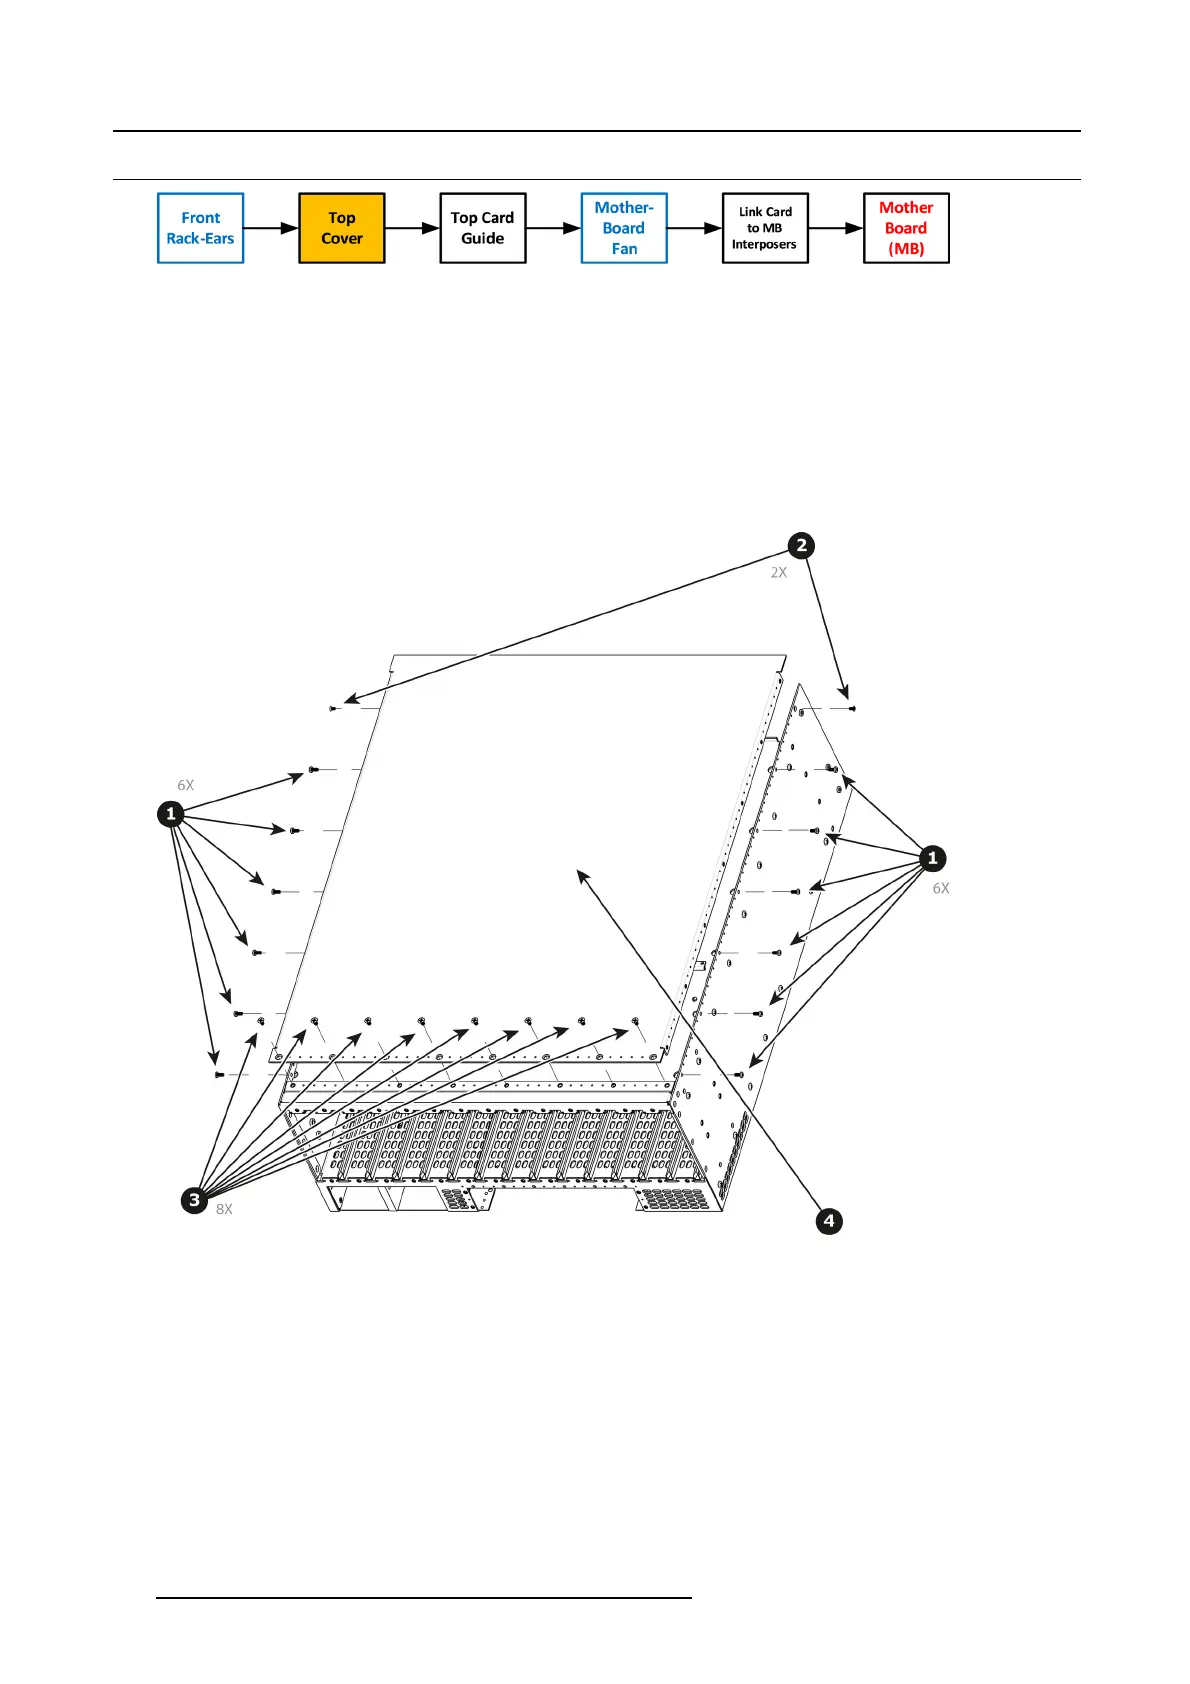
Image 13-91
Necessary tools
1 x Phillips Screwdriver #2
How to remove Top Cover
1. Remove the 12 screws from the two sides (6 in each side, 4-40x0.25) that are located towards t he top side of the unit.
2. Remove the two (2) screws (4-40x0.25) located closer to the rear end of the unit. These are flat head screws.
3. Remove the 8 screws (6-32x0.25) located on the top at the back of the chassis.
4. Remove the cover by gently pulling it a way from the E 2
Image 13-92
How to install Top Cover
To install the Top Cover follow the sam e procedure in the reverse order.
410
R5905948 EVENT MASTER DEVICES 17/07/2017