7. System Setup
7.17 Configuration Menu > Add MVR Outputs
General
In this procedure, y ou will add MV R Outputs to the system.
Prerequisite
• Ensure that you are familiar with the Configuration Menu. For details on this m enu, pleas e refer to chapter "Confi guration
Menu", page 96
Add MVR Output
1. Click on the MVR tab to s elect the outputs that will be defined .
Auto create MVR Outputs
Auto create MVR Outputs is pressed to create the two available M W R outputs.
The MVROu t1 and 2 have a Unit ID, wh ich is the sam e as the actual un it, it is there to allow s election in linked
scenarios.
(Optional) Edit the Name
1. Double click on default nam e in the Name list to edit the nam e.
2. When the area turns blue, click the eraser icon to clear the field.
3. Type a new name an d hit enter when done.
(Optional) Adjust Output Parameters
Click on the Adjust tab that is located on the top. The output adjustment panel is divided in three sections (Main, Timing, Connector).
In the Adjustment pan el you can:
1. [Main tab] Auto Config ure Output Format function is not available for MVR at this time.
2. [Main tab] Edit the name.
3. [Main tab] Select F ormat value and Frame Rate.
4. [Main tab] E nable Test P atterns with raster box and enable diagona l motion.
5. [Timing tab] Read all timing parameters associated with the se
lected format and make adjustments. Adjustm ents are limited t o
the formats that can be pr e-selected.
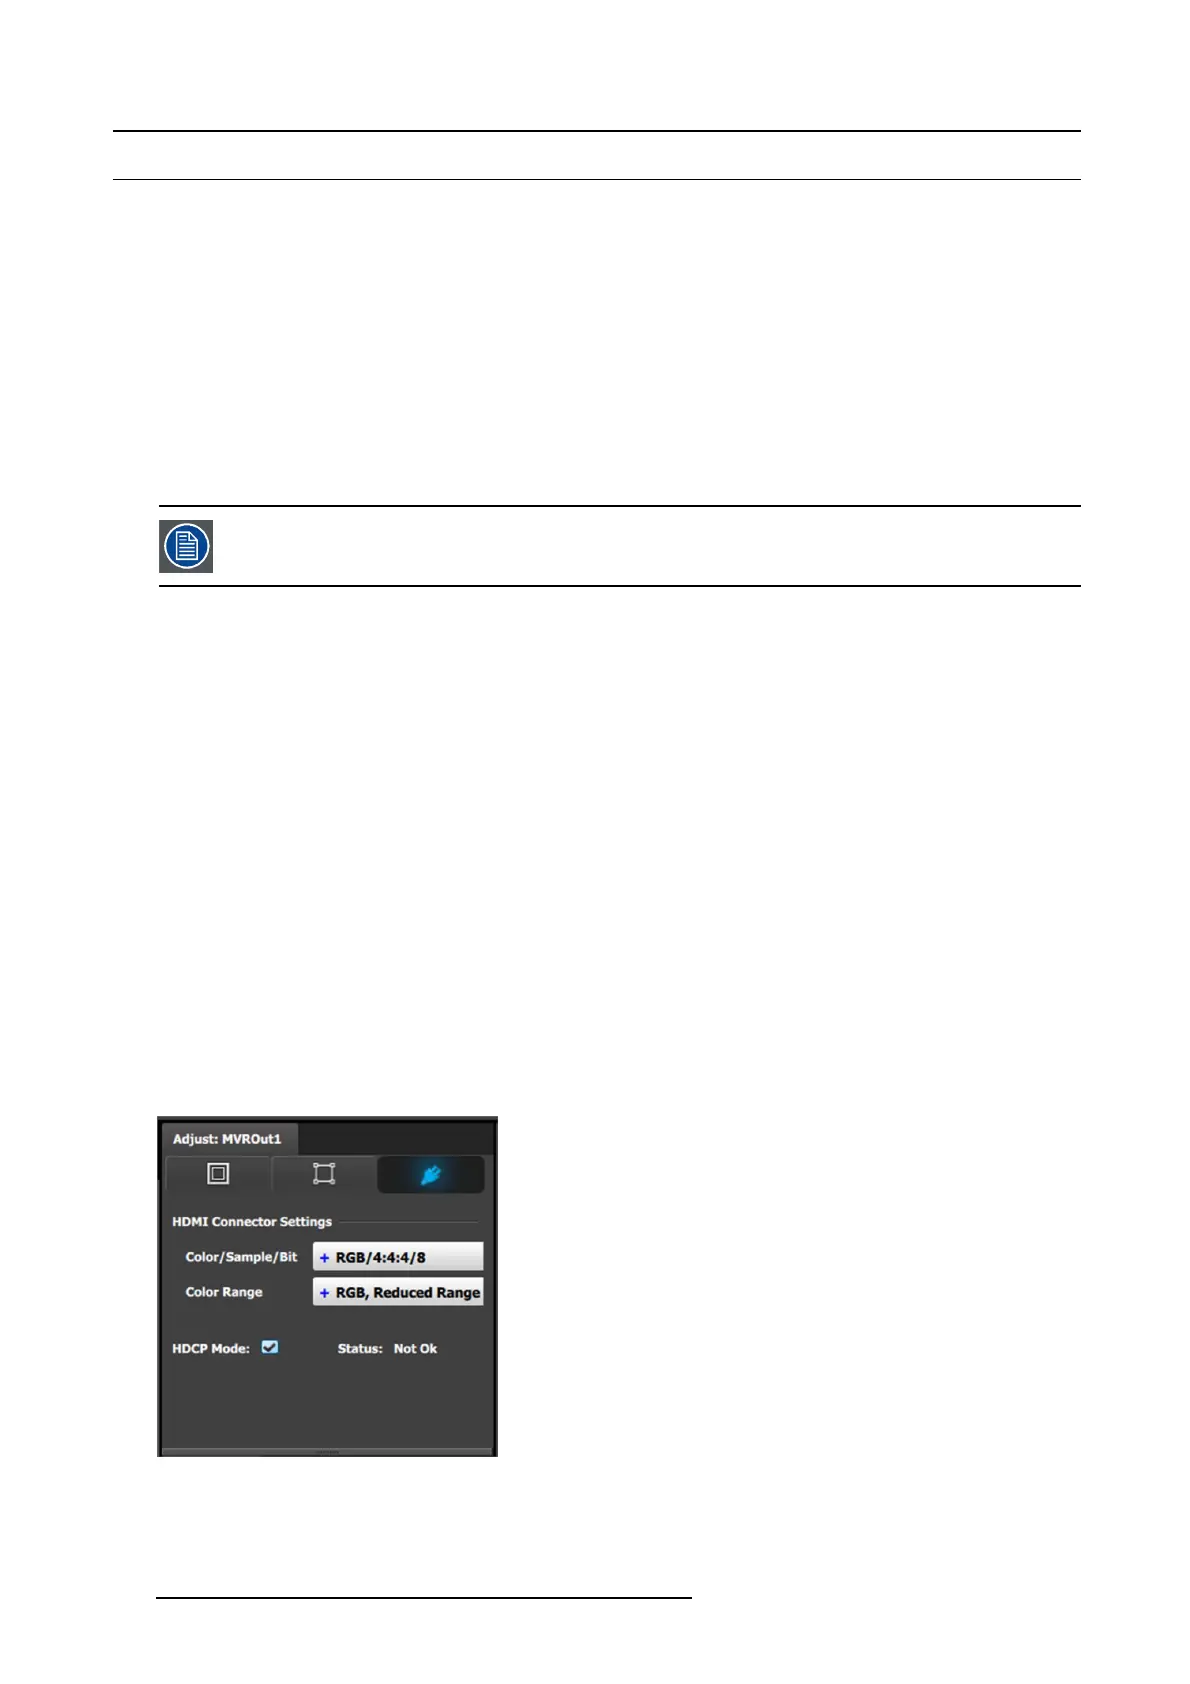
6. [Connector tab] Select H D MI Sync standards.
7. [Connector tab] S elect Color sp ace and Sample bit depth available as reported from the EDID of the Device.
8. [Connector tab] Select HDCP Mode for Multiviewer outputs.
The default for HDCP Mode is Off. To turn On the H DCP Mode, click on the empty HDCP Mode c heckbox. When the checkbox
displays a check mark, HDC P Mode is On. HDCP Mode is not applicable to SDI outputs.
Image 7-6
Adjust tab: Connector Settings subtab
242 R5905948 EVENT MASTER DEVICES 17/07/2017