Lantronix SISPM1040-xxxx-L3 Web User Guide
33856 Rev. A https://www.lantronix.com/ 105
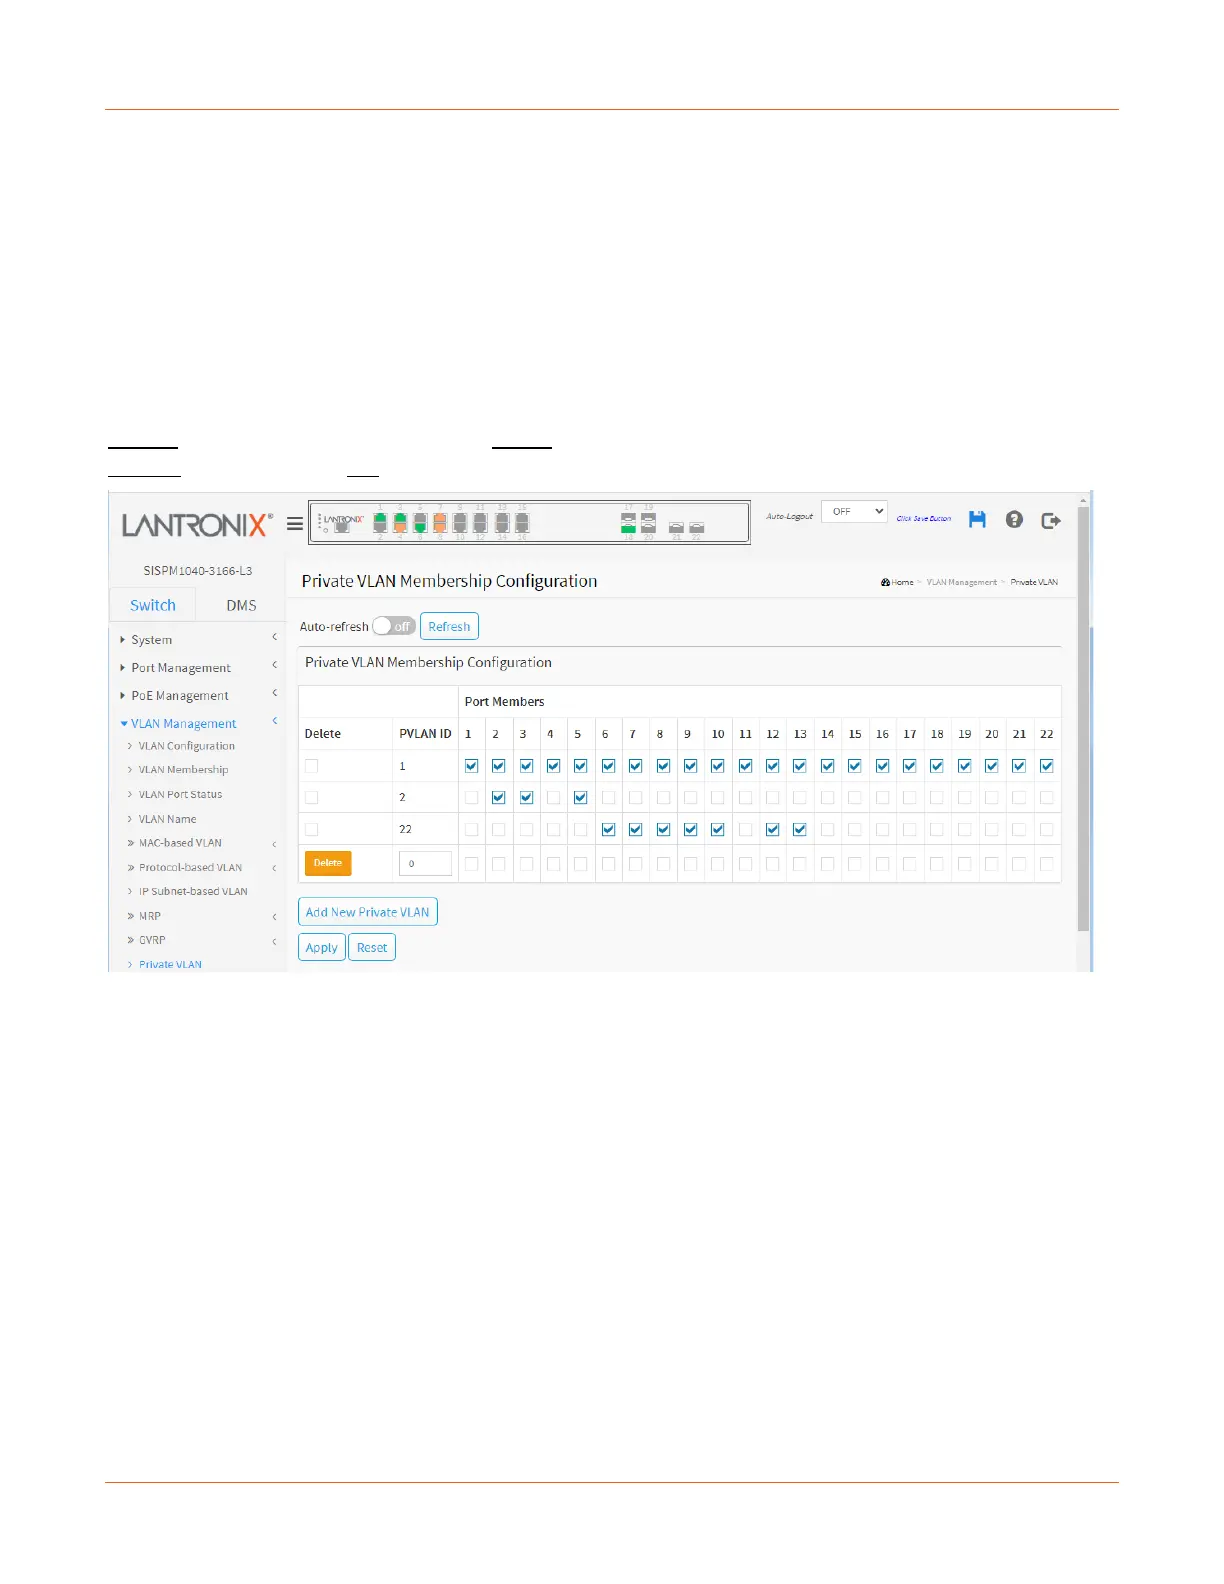
VLAN Management > Private VLAN
The Private VLAN membership configurations for the switch can be monitored and modified here. Private VLANs
can be added or deleted here. Port members of each Private VLAN can be added or removed here.
Private VLANs are based on the source port mask, and there are no connections to VLANs. This means that
VLAN IDs and Private VLAN IDs can be identical.
A port must be a member of both a VLAN and a Private VLAN to be able to forward packets. By default, all ports
are VLAN unaware and members of VLAN 1 and Private VLAN 1.
A VLAN unaware port can only be a member of one VLAN, but it can be a member of multiple Private VLANs.
In a private VLAN, PVLANs provide layer 2 isolation between ports within the same broadcast domain.
Isolated ports configured as part of PVLAN cannot communicate with each other.
Member ports of a PVLAN can communicate with each other.
Delete: To delete a private VLAN entry, check this box. The entry will be deleted during the next save.
Private VLAN ID: Indicates the ID of this particular private VLAN.
Port Members: A row of check boxes for each port is displayed for each private VLAN ID. To include a port in a
Private VLAN, check the box. To remove or exclude the port from the Private VLAN, make sure the box is
unchecked. By default, no ports are members, and all boxes are unchecked.
Buttons
Auto-refresh: Check this box to refresh the page automatically every 3 seconds.
Refresh: Click to refresh the page immediately.
Add New Private VLAN: Click to add a new private VLAN ID. An empty row is added to the table, and the private
VLAN can be configured as needed. The allowed range for a private VLAN ID is the same as the switch port
number range. Any values outside this range are not accepted, and a warning message appears. Click "OK" to
discard the incorrect entry or click "Cancel" to return to the editing and make a correction. The Private VLAN is
enabled when you click "Save".
Apply: Click to save changes.
Reset: Click to undo any changes made locally and revert to previously saved values.

 Loading...