User's Manual 9. Configuring VoIP Parameters
Version 4.4.0 113 MP26x/MP27x
9.5.1.1.2 Windows 7
The procedure below describes how to create an Auto Attendant message using
Windows 7.
To create an Auto Attendant message using Windows 7:
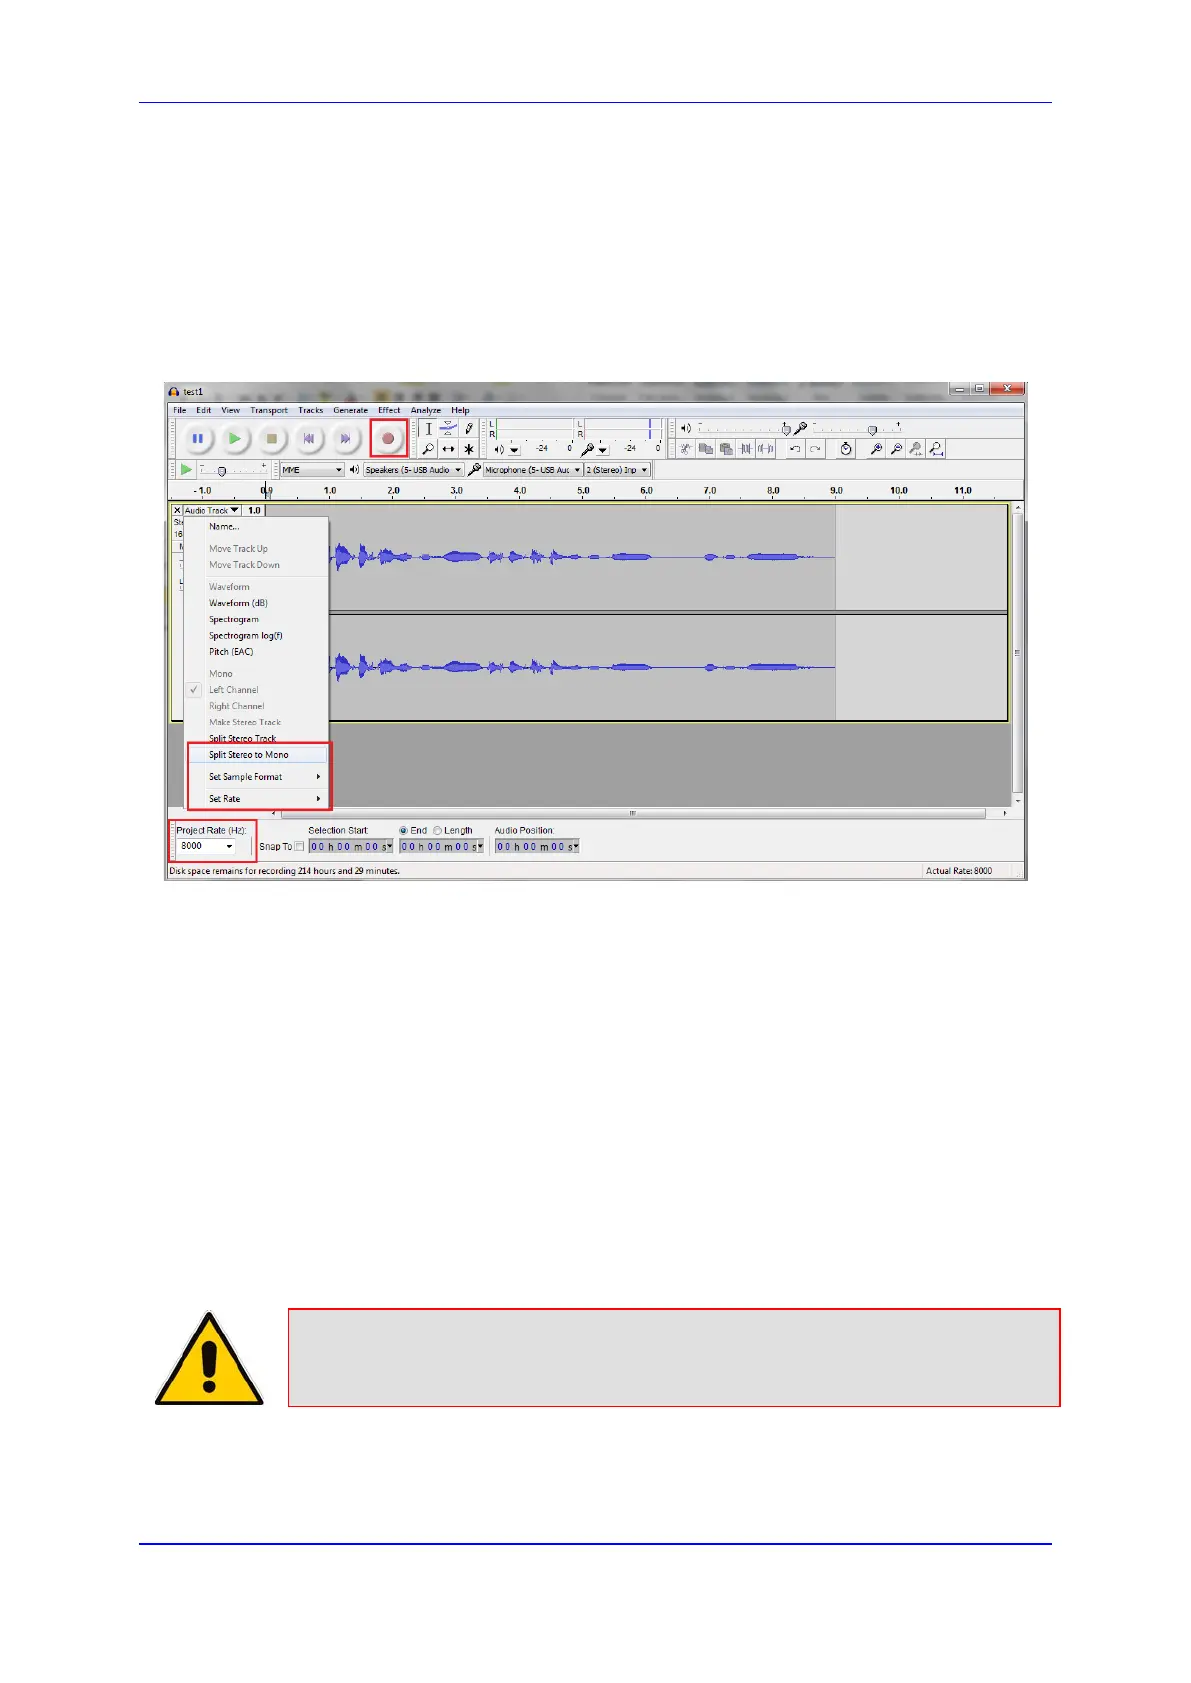
1. From http://audacity.sourceforge.net/, download and install Audacity Version 1.3.
2. Start Audacity.
Figure 9-10: Audacity Window
3. From the ‘Project Rate (Hz)’ drop-down list, select 8000.
4. Click the red Record icon to start the recording.
The recording should be made using the following example:
“Hello, you’ve reached ________,
For __[ User allocated to phone connected to FXS2]__ - press 1.
For __[ User allocated to DECT1]__ - press 2.
For __[ User allocated to DECT2]__ - press 3.
For __[ User allocated to DECT3]__ - press 4.
For __[ User allocated to DECT4]__ - press 5.
For __[ User allocated to DECT5]__ - press 6.
For __[User allocated to phone connected to FXS1 (usually operator/secretary)]__ -
press 0.
To repeat this message, press 9.”
Note: You can skip the lines that are not connected or allocated.