User's Manual 116 Document #: LTRT-23510
MP-26x/MP-27x Multimedia Home Gateway
9.5.1.4 Configuring Auto Attendant using Web Interface
The procedures for Configuring Auto Attendant using the Web Interface as described
below.
To configure Auto Attendant using the Web interface:
1. Access the device Web interface tool by opening the Web browser.
2. Enter the username and password.
3. Access the ‘Voice Over IP’ page and then click the Services tab.
4. Under the Auto Attendant group, select the Enabled check box.
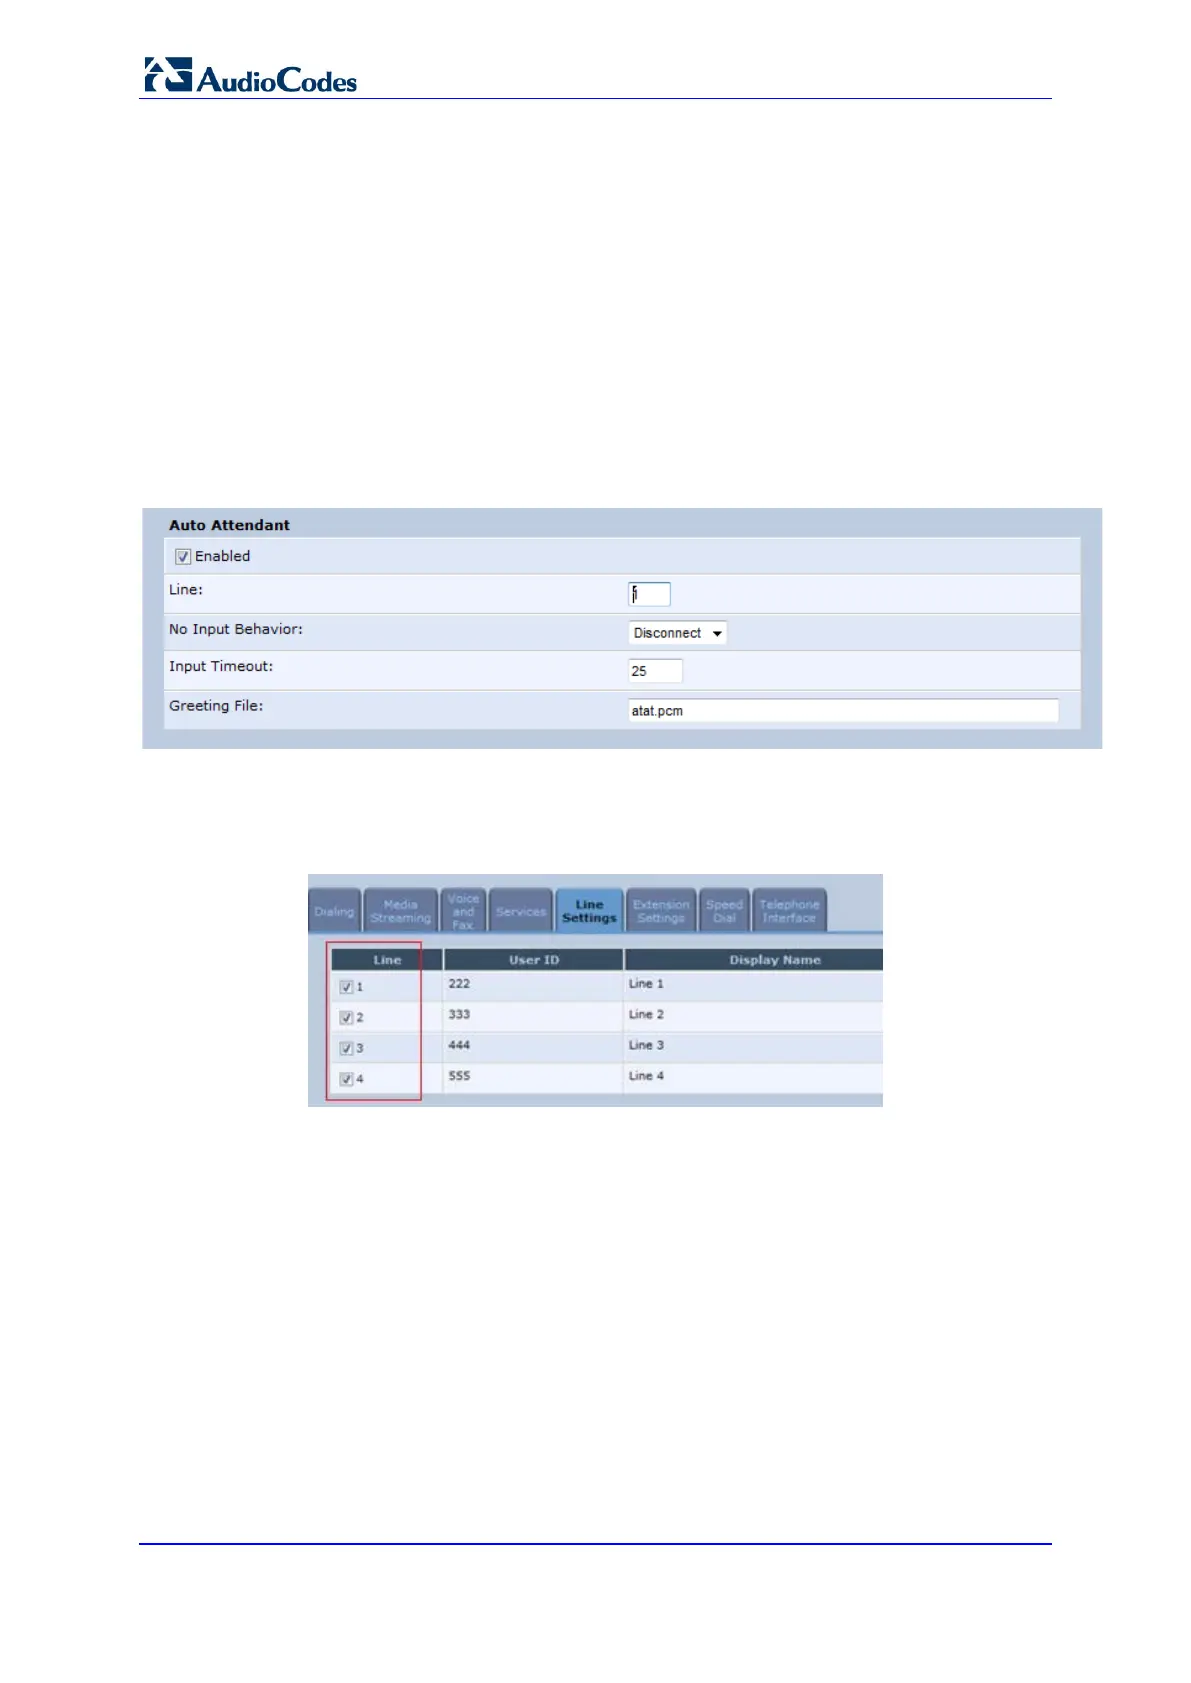
5. Configure the Auto Attendant fields as shown below.
Figure 9-13: Auto Attendant Web Fields
• Enabled – Enables/Disables the Auto Attendant feature.
• Line – Enables line numbers as they appear in the Line Settings tab.
Figure 9-14: Line Settings Tab
• Input Timeout – Enables the time in seconds, from the beginning of the Auto
Attendant message, until the conversation disconnects, if the user hasn’t received
any input. This field should be set to the length of the Auto Attendant message
itself, plus a few seconds to allow the user to press the required extension or to
repeat the message.
• Greeting File – Defines the file name of the Auto Attendant message (.pcm),
recorded in Section 9.5.1.1. There is presently no need to set the other
parameters.
6. Click OK.