DGS-3630 Series Layer 3 Stackable Managed Switch Web UI Reference Guide
41
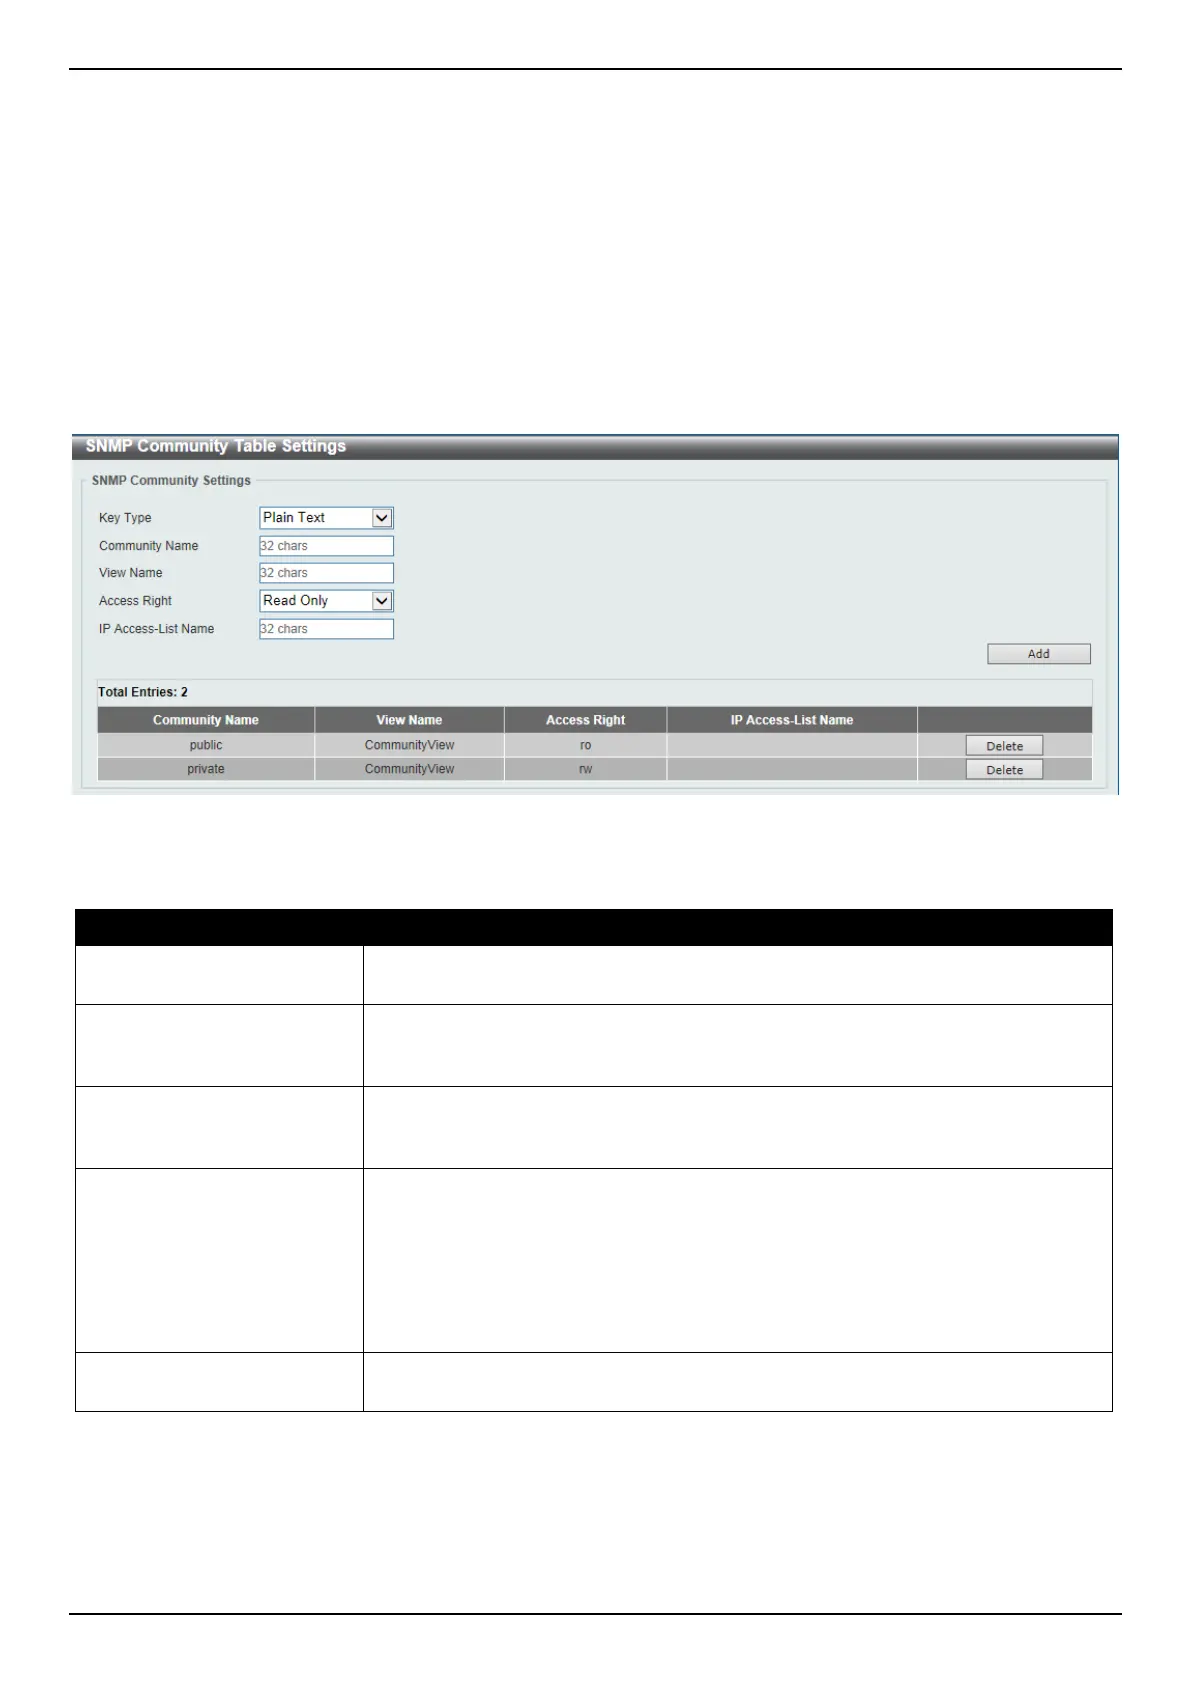
SNMP Community Table Settings
This window is used to create an SNMP community string to define the relationship between the SNMP manager and
an agent. The community string acts like a password to permit access to the agent on the Switch. One or more of the
following characteristics can be associated with the community string:
• An access list containing IP addresses of SNMP managers that are permitted to use the community string to
gain access to the Switch’s SNMP agent.
• Any MIB view that defines the subset of MIB objects that will be accessible to the SNMP community.
• Read-write or read-only level permissions for the MIB objects accessible to the SNMP community.
To view the following window, click Management > SNMP > SNMP Community Table Settings, as shown below:
Figure 4-10 SNMP Community Table Settings Window
The fields that can be configured are described below:
Parameter Description
Key Type
Select the key type for the SNMP community. Options to choose from are Plain
Text, and Encrypted.
Community Name
Enter an alphanumeric string of up to 32 characters that is used to identify
members of an SNMP community. This string is used like a password to give
remote SNMP managers access to MIB objects in the Switch’s SNMP agent.
View Name
Enter an alphanumeric string of up to 32 characters that is used to identify the
group of MIB objects that a remote SNMP manager is allowed to access on the
Switch. The view name must exist in the SNMP View Table.
Access Right
Select the access right here. Options to choose from are Read Only and Read
Write.
• Read Only - SNMP community members using the community string created
can only read the contents of the MIBs on the Switch.
• Read Write - SNMP community members using the community string
created can read from, and write to the contents of the MIBs on the Switch.
IP Access-List Name
Enter the name of the standard access list to restrict the users that can use this
community string to access to the SNMP agent.
Click the Add button to add a new entry based on the information entered.
Click the Delete button to remove the specified entry.
 Loading...