A
B
C
D
E
F
G
H
L
M
N
P
Mototelaio
Frame
sezione / section
H 1
5ST3 - M.Y. 2004 - edizione/edition 00
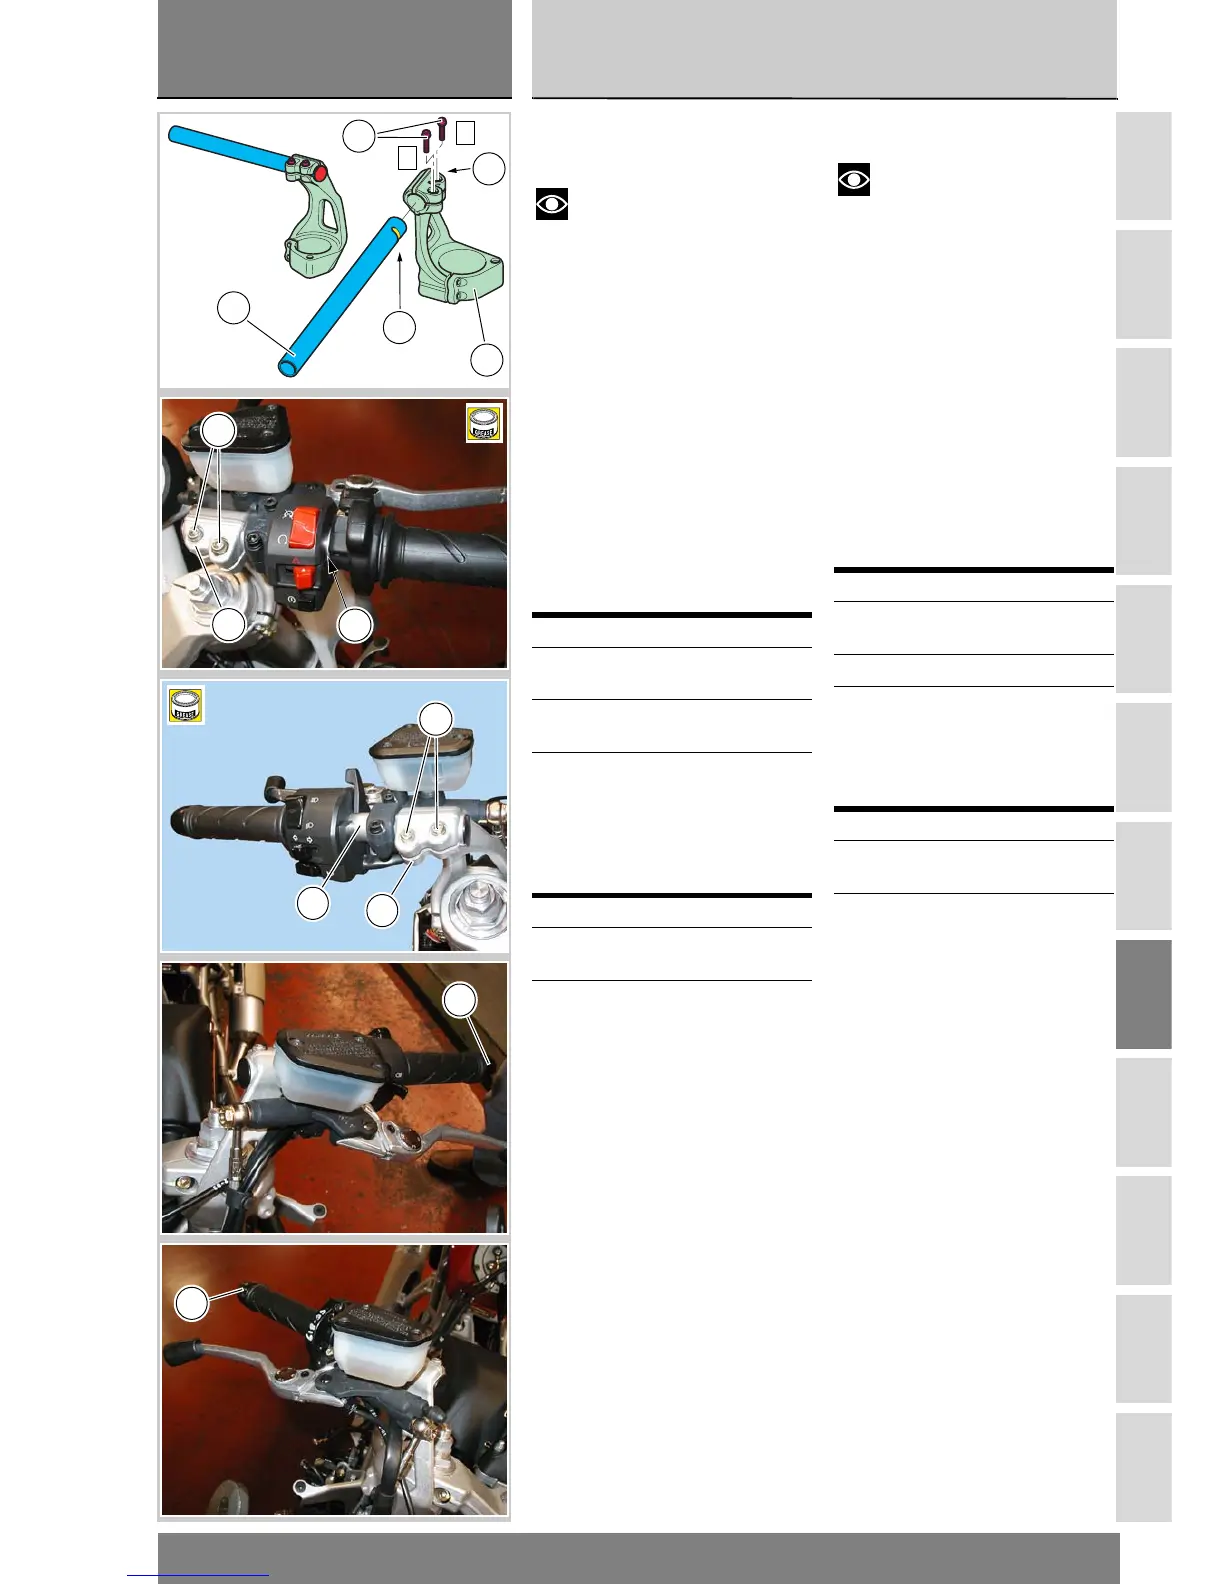
Rimontaggio semimanu-
bri
Note
Se durante lo smontaggio sono
state rimosse dalla loro sede,
applicare grasso prescritto sul filetto
delle viti (5).
Inserire il semimanubrio destro (8) nel
supporto semimanubrio destro (6) e il
semimanubrio sinistro (2) nel suppor-
to semimanubrio sinistro (1), facendo
coincidere lo scasso (A) con il foro (B).
Applicare grasso prescritto sul filetto
e sottotesta delle viti (5). Impuntare le
viti (5) e serrarle alla coppia prescritta
(Sez. C 3), applicando la sequenza 1-2-
1.
Per completare l’installazione del
semimanubrio destro occorre
rimontare i seguenti particolari:
Per completare l’installazione del
semimanubrio sinistro occorre ri-
montare i seguenti particolari:
Rimontaggio manopole
Per inserire le manopole (9) sul
semimanubrio sinistro (2) o sul
comando acceleratore inumidire con
alcool la superficie interna e spingerle
fino a battuta.
Rimontare il contrappeso (12)
inserendo la boccola (10), la bussola
(11) e bloccando la vite (3) sul
semimanubrio alla coppia prescritta
(Sez. C 3).
Operazioni Rif Sez.
Installare il comando
freno anteriore
F 3
Installare il
commutatore destro
P 5
Installare il comando
acceleratore
F 1
Operazioni Rif Sez.
Installare il comando
idraulico frizione
F 2
Installare il
commutatore sinistro
P 5
Refitting the handlebars
Note
If the pinch bolts (5) have been
removed, apply the specified grease
to their threads before refitting them.
Fit the right handlebar (8) into the RH
handlebar mounting (6) and fit the left
handlebar (2) into the left handlebar
mounting (1), aligning the slots (A)
with the bolt holes (B).
Apply the specified grease to the
threads and undersides of the pinch
bolts (5). Fit the pinch bolts (5) and
tighten them to the specified torque
(Section C 3) in the sequence 1-2-1.
To complete right handlebar
reassembly procedure, install the
following parts:
To complete left handlebar
reassembly procedure, install the
following parts:
Refitting the grips
To fit the grips (9) over the left
handlebar (2) or throttle control, damp
the inside of the grip with alcohol first
before pushing them fully home.
Fit the counterweights (12), with the
bush (10) and sleeve (11) in the case
of the RH grip. Fit the screws (3) and
tighten them to the specified torque
(Section C 3).
Operations See Sect.
Fit the front brake
control
F 3
Fit the RH switch P 5
Fit the throttle control F 1
Operations See Sect.
Fit the clutch hydraulic
control
F 2
Fit the LH switch P 5
2
1
2
1
5
A
B
5
6
8
B
5
2
15
B
12
12