A
B
C
D
E
F
G
H
L
M
N
P
Motore
Engine
sezione / section
N 6.2
125ST3 - M.Y. 2004 - edizione/edition 00
Smontaggio coperchio
frizione
Note
Per una miglior chiarezza le im-
magini rappresentano un motore
rimosso dal telaio.
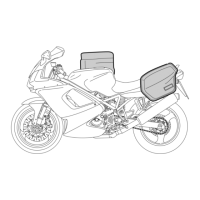
Svitare e rimuovere le sei viti corte (5)
e la vite lunga (15) di fissaggio del co-
perchio frizione (14).
Aiutandosi con un martello di plastica,
battere in vari punti sul contorno del
coperchio per favorire il distacco dello
stesso dal semicarter.
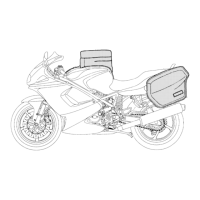
Rimuovere il coperchio frizione dal
semicarter facendo attenzione alla
boccola di centraggio (1).
Importante
È possibile rimuovere il coper-
chio frizione (14) completo di campa-
na frizione e ingranaggio primaria.
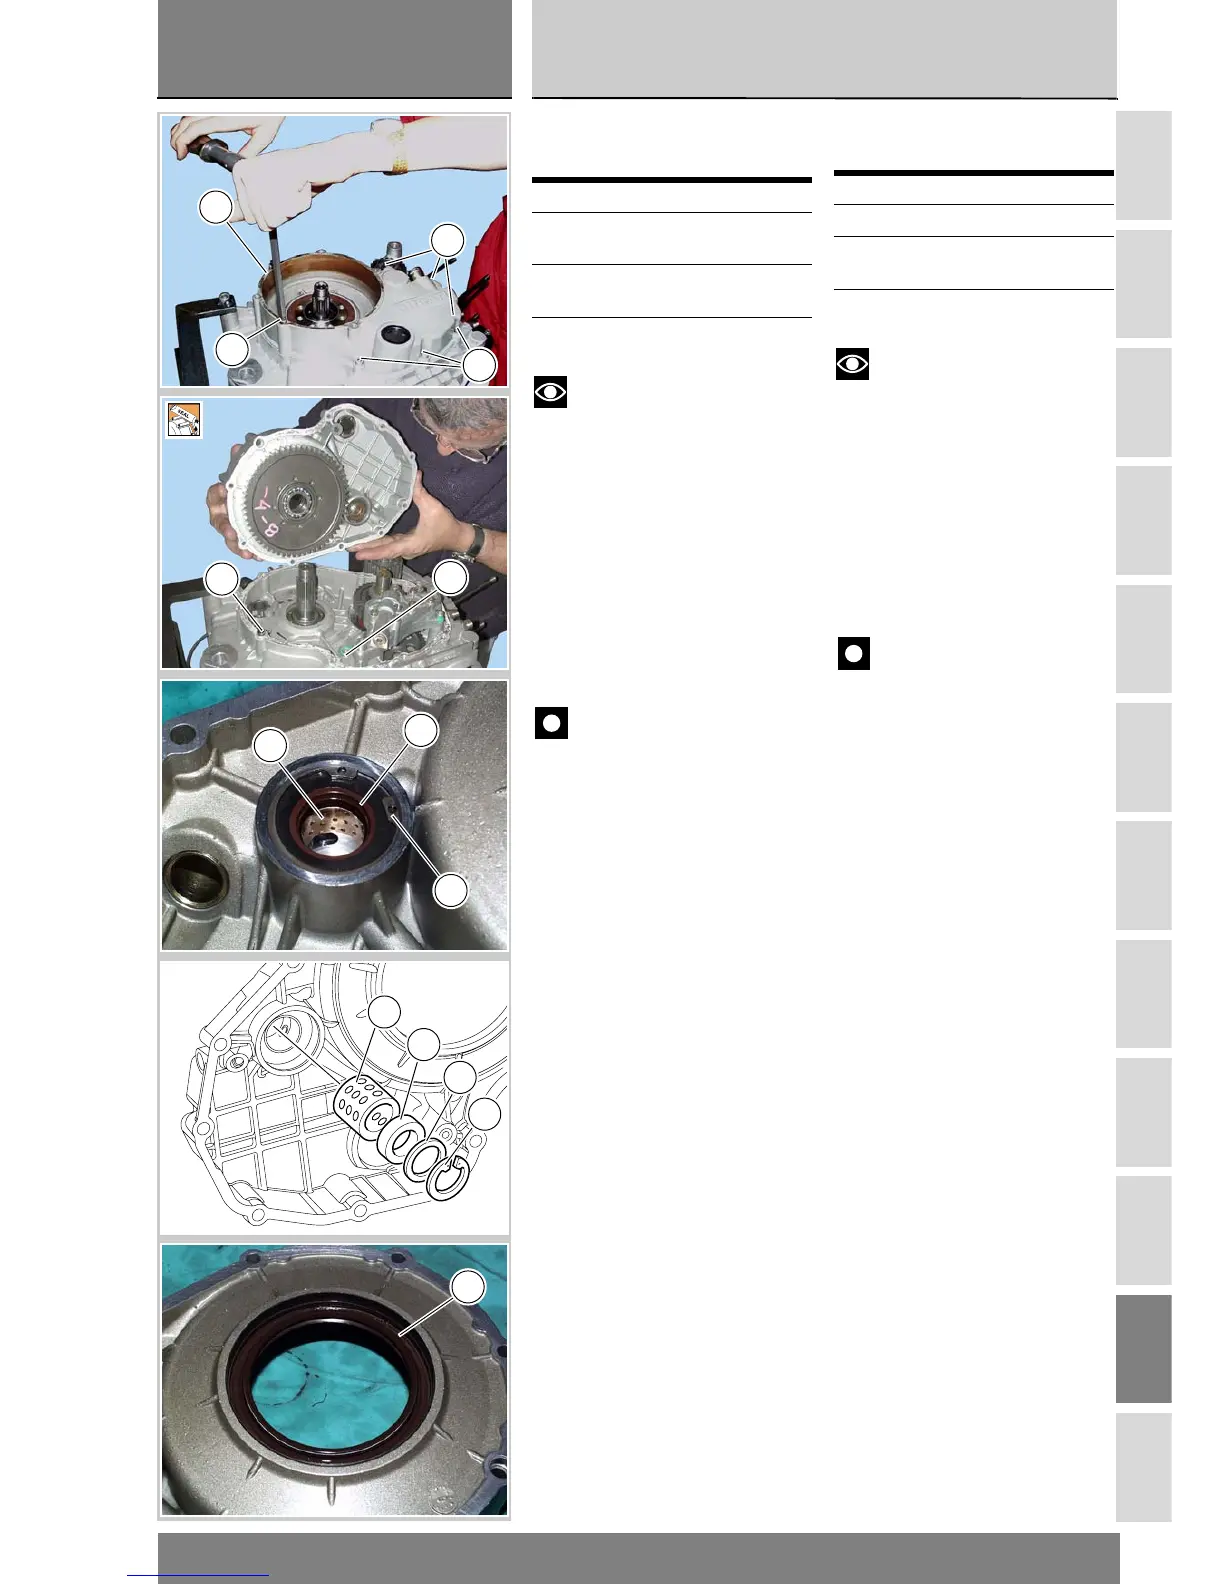
Sfilare dal semicarter la guarnizione
OR (2) in prossimità del foro di pas-
saggio olio.
Scomposizione coperchio
frizione
Rimuovere l'anello seeger (13) e
sfilare il rasamento (12) e l'anello di
tenuta (11).
Verificare visivamente le condizioni
dell'anello di tenuta (11) ed eventual-
mente sostituirlo.
La boccola forata (10) è montata a in-
terferenza sul coperchio. Per la sua
rimozione è necessario disporre di un
estrattore adatto.
Dopo aver rimosso la campana
frizione (Sez. N 6.1) sfilare sul loro in-
terno l’ingranaggio primario e ri-
montarlo sull’albero primario cambio.
Verificare le condizioni dell'anello di
tenuta (6) montato nel coperchio
frizione.
Rimuovere dal coperchio gli altri com-
ponenti seguendo le indicazioni
dell’esploso di inizio capitolo.
Operazioni Rif. Sez.
Rimuovere le carene late-
rali
E 2
Rimuovere la campana
frizione
N 6.1
Scaricare l’olio motore D 4
Removing the clutch
cover
Note
For reasons of clarity, figures
show an engine removed from frame.
Undo and remove the six short
screws (5) and the long screw (15)
fixing the clutch cover (14).
Tap alternately all around the cover
with a plastic mallet until it separates
from the casing.
Remove clutch cover from casing.
Take care not to lose the pilot bush
(1).
Importante
Clutch cover (14) can be
removed also without separating it
from the clutch housing and primary
drive gear.
Slide the O-ring (2), positioned close
to the oil delivery hole, out of the
casing.
Clutch cover disassembly
Remove the snap ring (13) and
withdraw the shim (12) and the seal
(11).
Visually check the seal (11) and
replace, if necessary.
The drilled bush (10) is forced onto
the cover. Remove with a suitable
puller.
Once clutch housing has been
removed (Sect. N 6.1) slide out the
primary drive gear from the inside and
refit it to gearbox primary shaft.
Check the seal (6) into clutch cover.
Remove the other parts from the
cover, as indicated in the exploded
view at the beginning of this section.
Operations See Sect.
Remove side fairings E 2
Remove clutch plate
pack and clutch drum
N 6.1
Drain engine oil D 4
14
15
5
5
2
1
11
10
13
10
11
12
13
6