Service Parts Disassembly 8-85
10. Disconnect the ribbon cable from the FSNS connector on the Front Sensor
Board.
11. Press the Waste Toner Reservoir Auger drive in to clear the frame, and then lift
the Registration Assembly up to remove it.
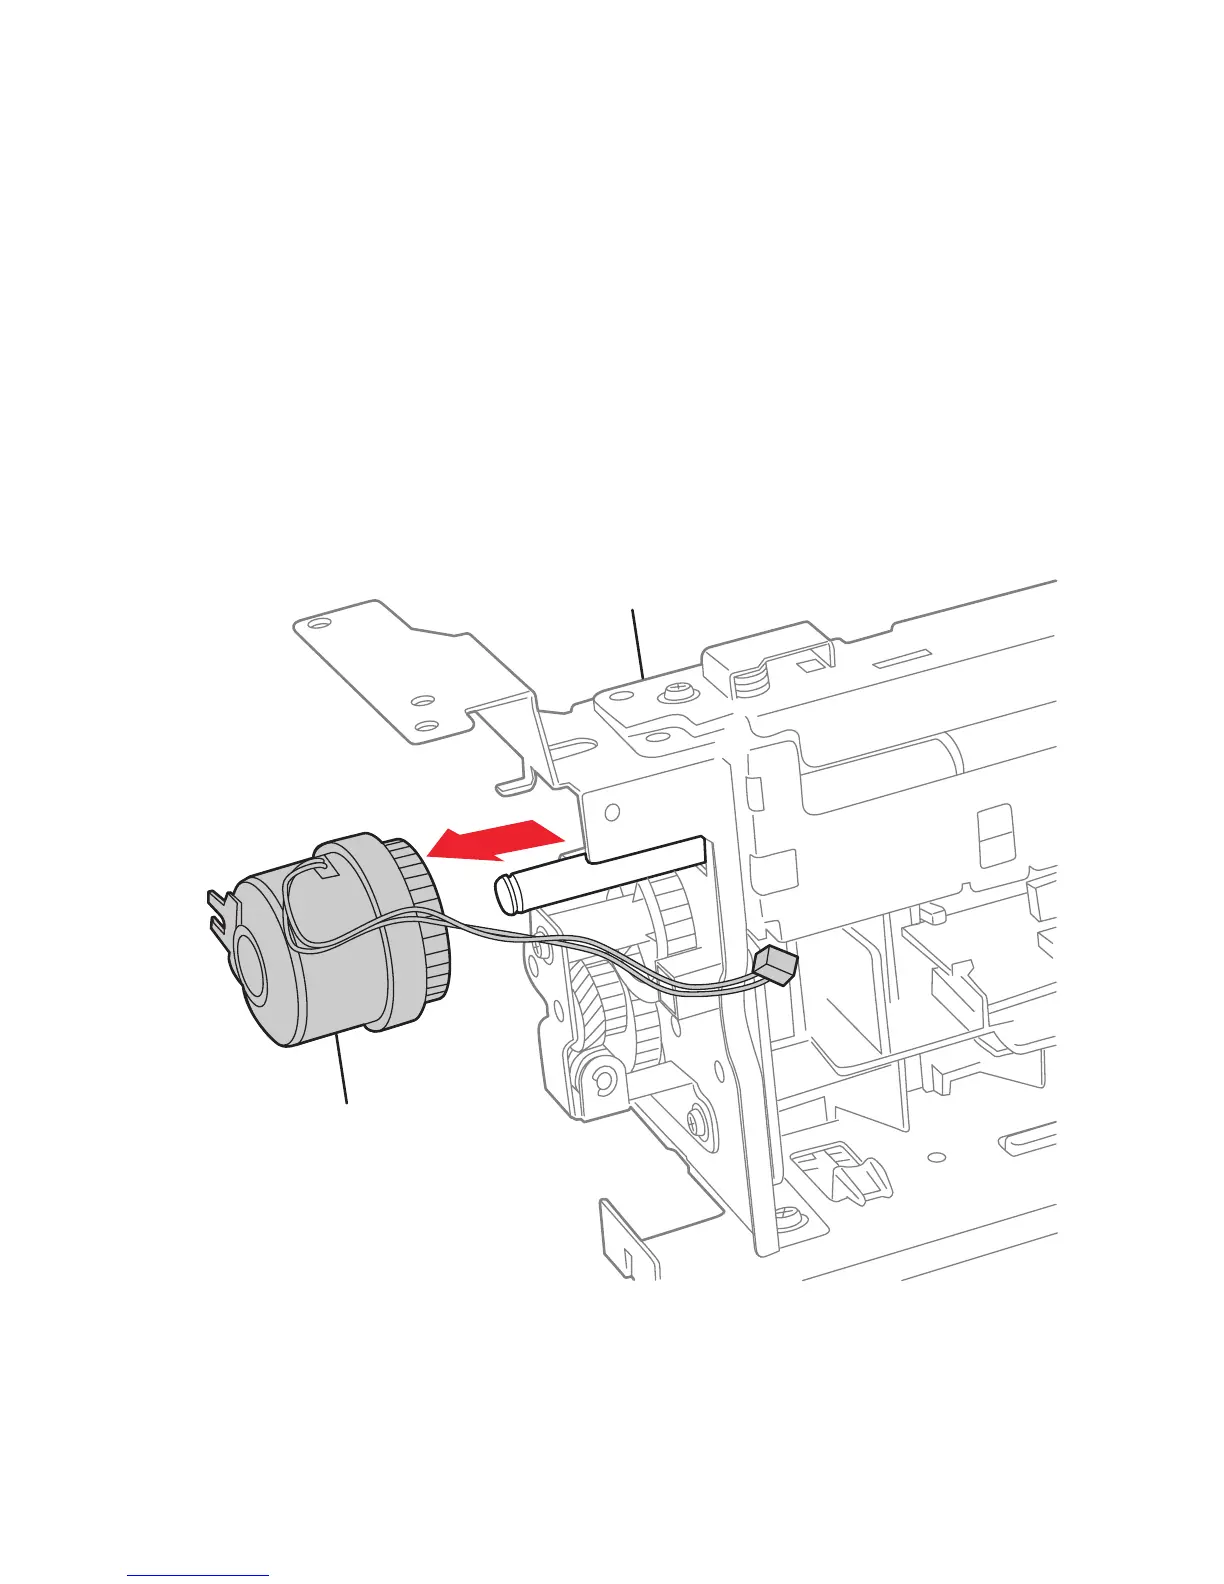
Registration Clutch #1
1. Remove the Registration Assembly (page 8-84).
2. Disconnect the CLUTCH connector from the Front Sensor Board.
3. Remove the clutch wiring from the opening to free it from the Registration
Assembly.
4. Remove the E-clip that secures the Registration Clutch #1 to the lower
Registration Roller.
5. Pull the clutch from the shaft while holding the anti-rattle spring.
Registration Clutch #1
Registration Assembly
s7400-549