Service Parts Disassembly 8-121
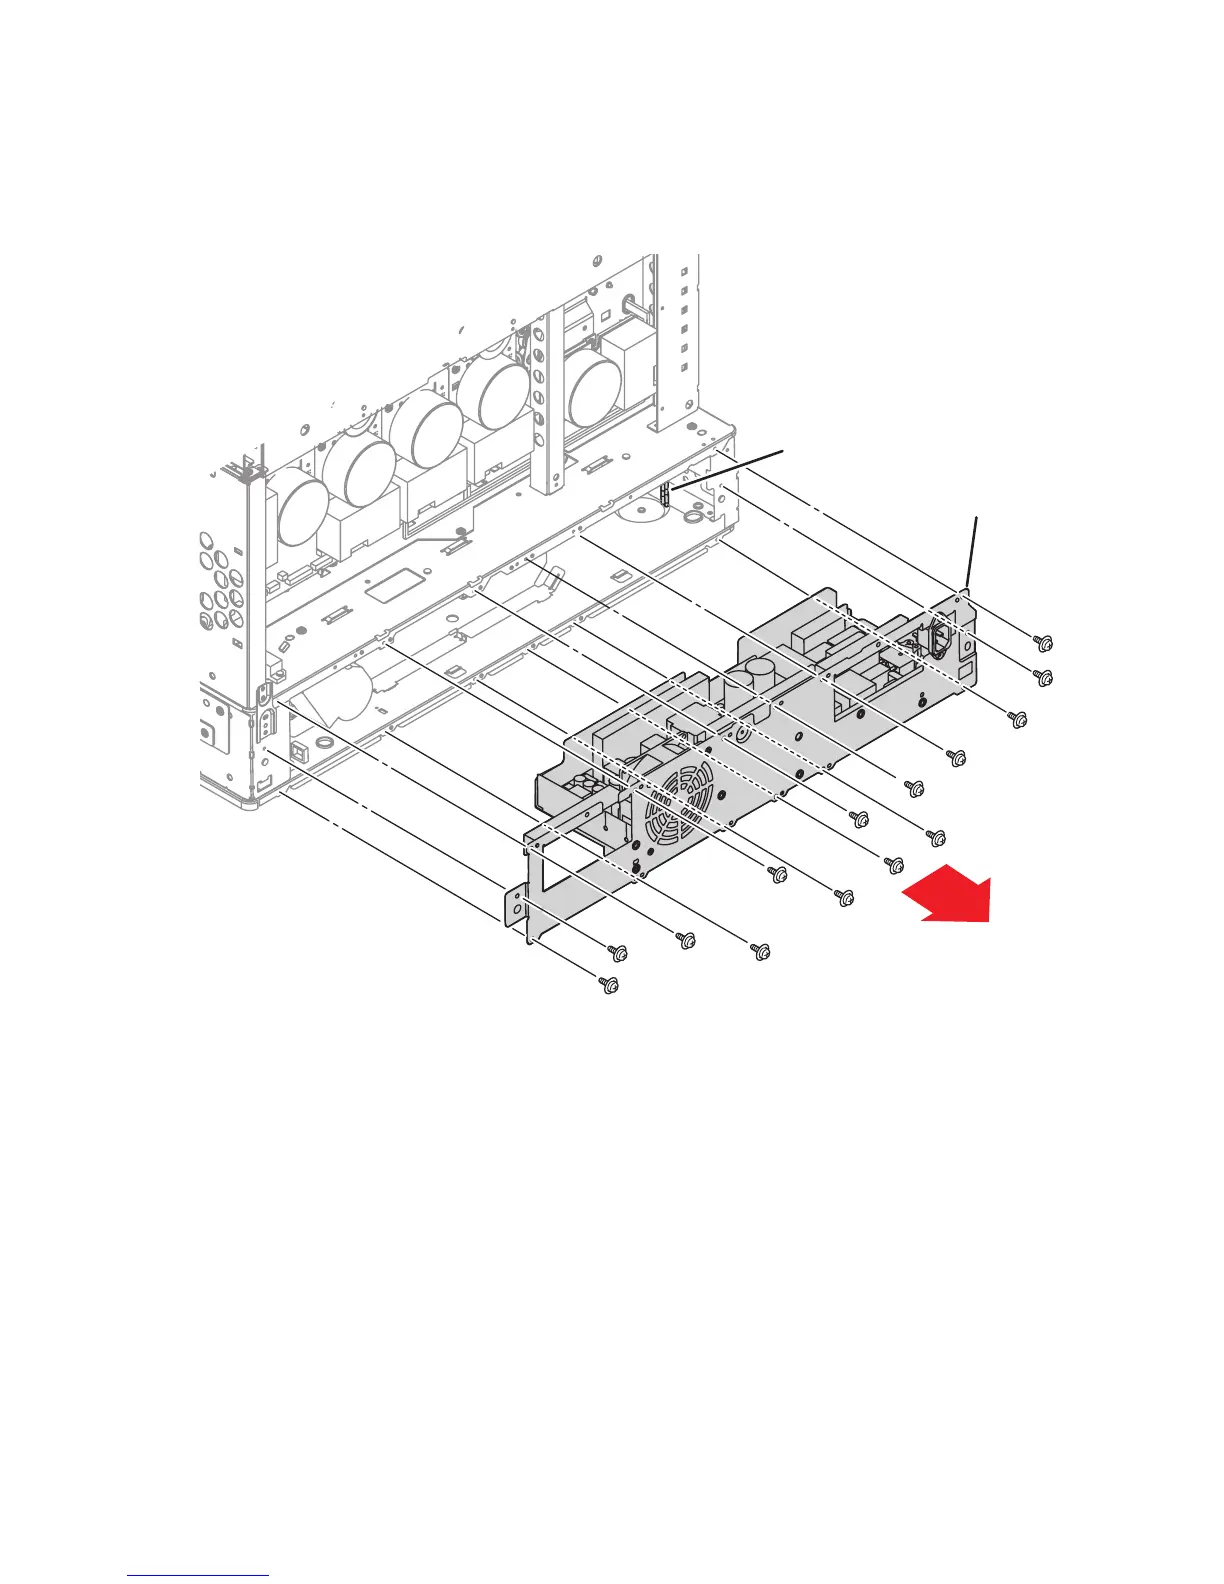
Low Voltage Power Supply
1. Remove 14 (metal, 6 mm) screws securing the power supply enclosure.
2. Lift the Power Switch Link from the Power Switch on the LVPS.
3. Disconnect 4 connections to the LVPS and remove the LVPS enclosure.
4. Remove the LVPS Fan (page 8-124).
5. Remove the 2 (metal, 10 mm) screws that secure the AC Inlet to the LVPS
enclosure.
s7400-074
Low Voltage
Power Supply