Service Parts Disassembly 8-141
Motor Driver Board
1. Remove the Rear Cover (page 8-13).
2. Remove the Right Rear Cover (page 8-15).
3. Remove the Card Cage Fan Duct (page 8-114).
4. Remove the Card Cage (page 8-117).
5. Remove 2 (metal, 6 mm) screws that secures the Magenta Imaging Unit Motor.
6. Remove 2 (metal, 6 mm) screws that secures the Yellow Imaging Unit Motor.
7. Remove the DC1 (Yellow) and DC2 (Magenta) connections from the Motor
Driver Board.
8. Remove the remaining connections from the Motor Driver Board.
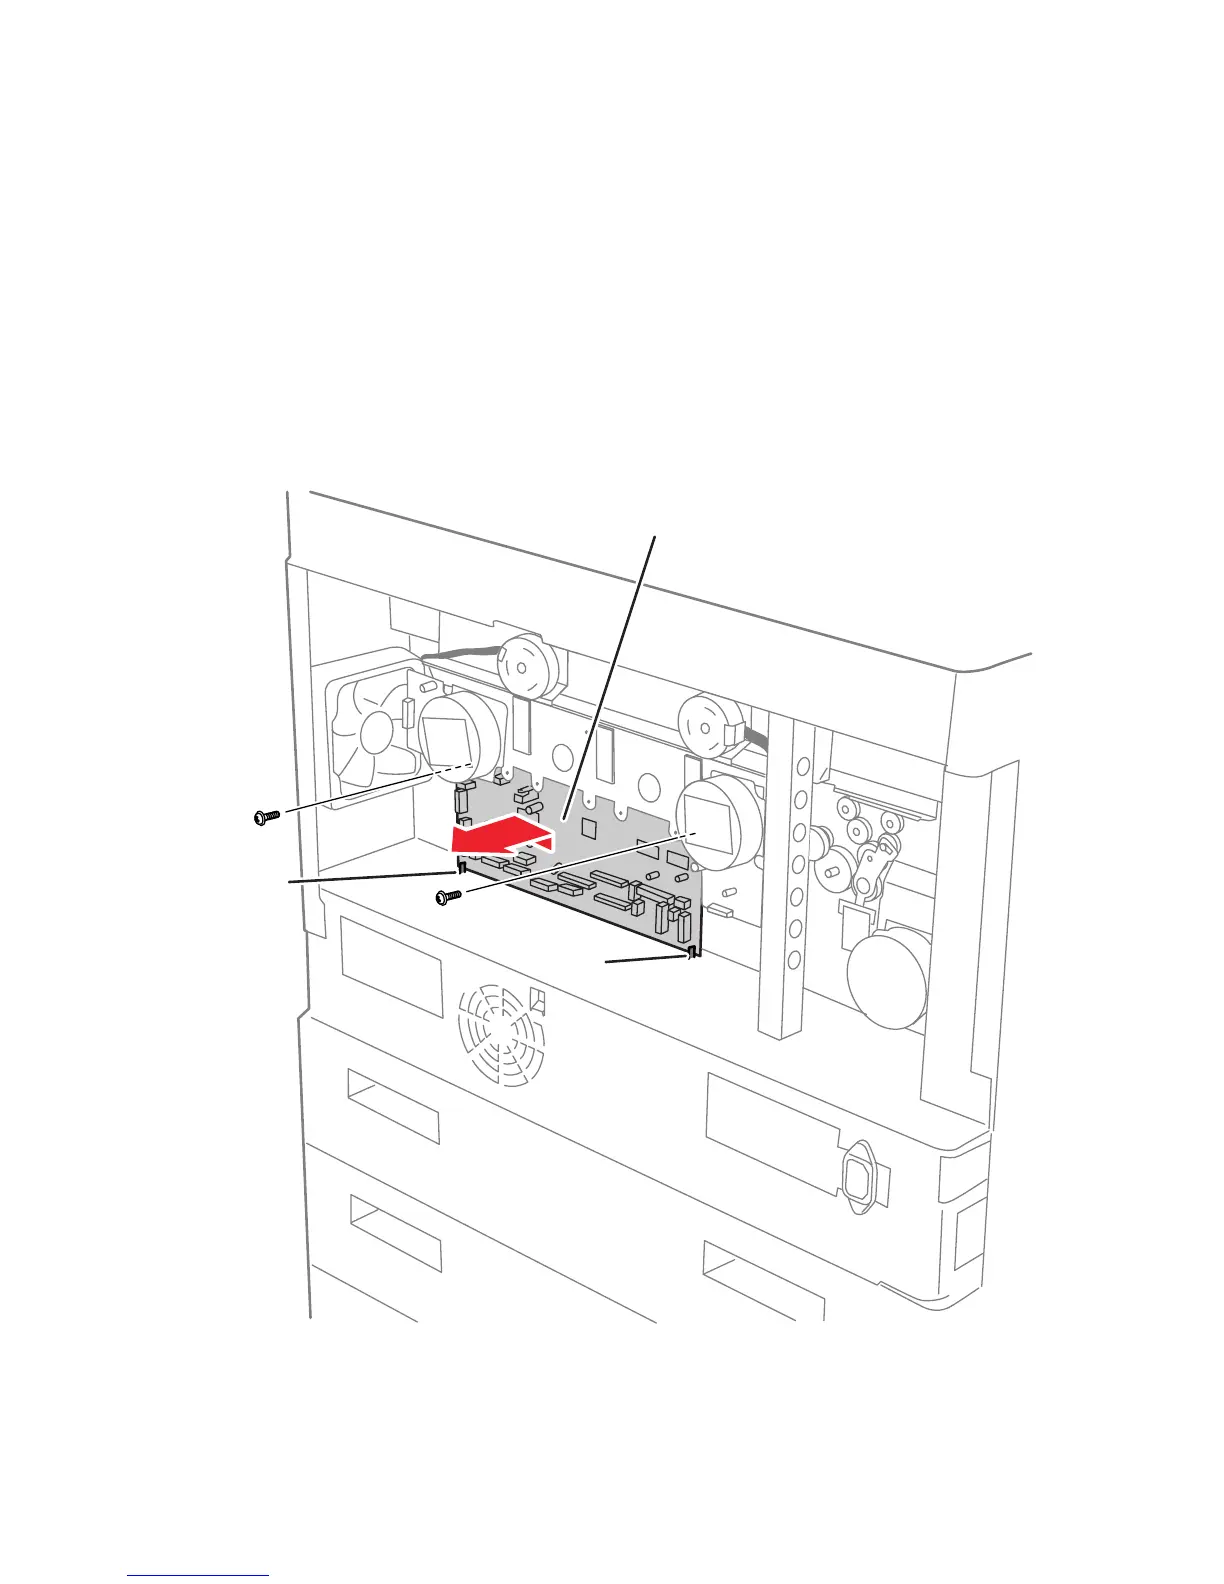
9. Remove 2 (metal, 6 mm) screws at the top of the Motor Driver Board.
10. Lift the board slightly to release it from the hooks along the lower edge.
11. Remove the Motor Driver Board.
s7400-656
Motor Driver Board
Hook
Hook