Service Parts Disassembly 8-117
Card Cage
1. Remove the Rear Cover (page 8-13).
2. Remove the Lower Rear Cover (page 8-14).
3. Remove the Right Rear Cover (page 8-15).
4. Remove the Card Cage Fan Duct (page 8-114).
5. Remove the Engine Control Board (page 8-112).
6. Remove the Image Processor Board (page 8-113).
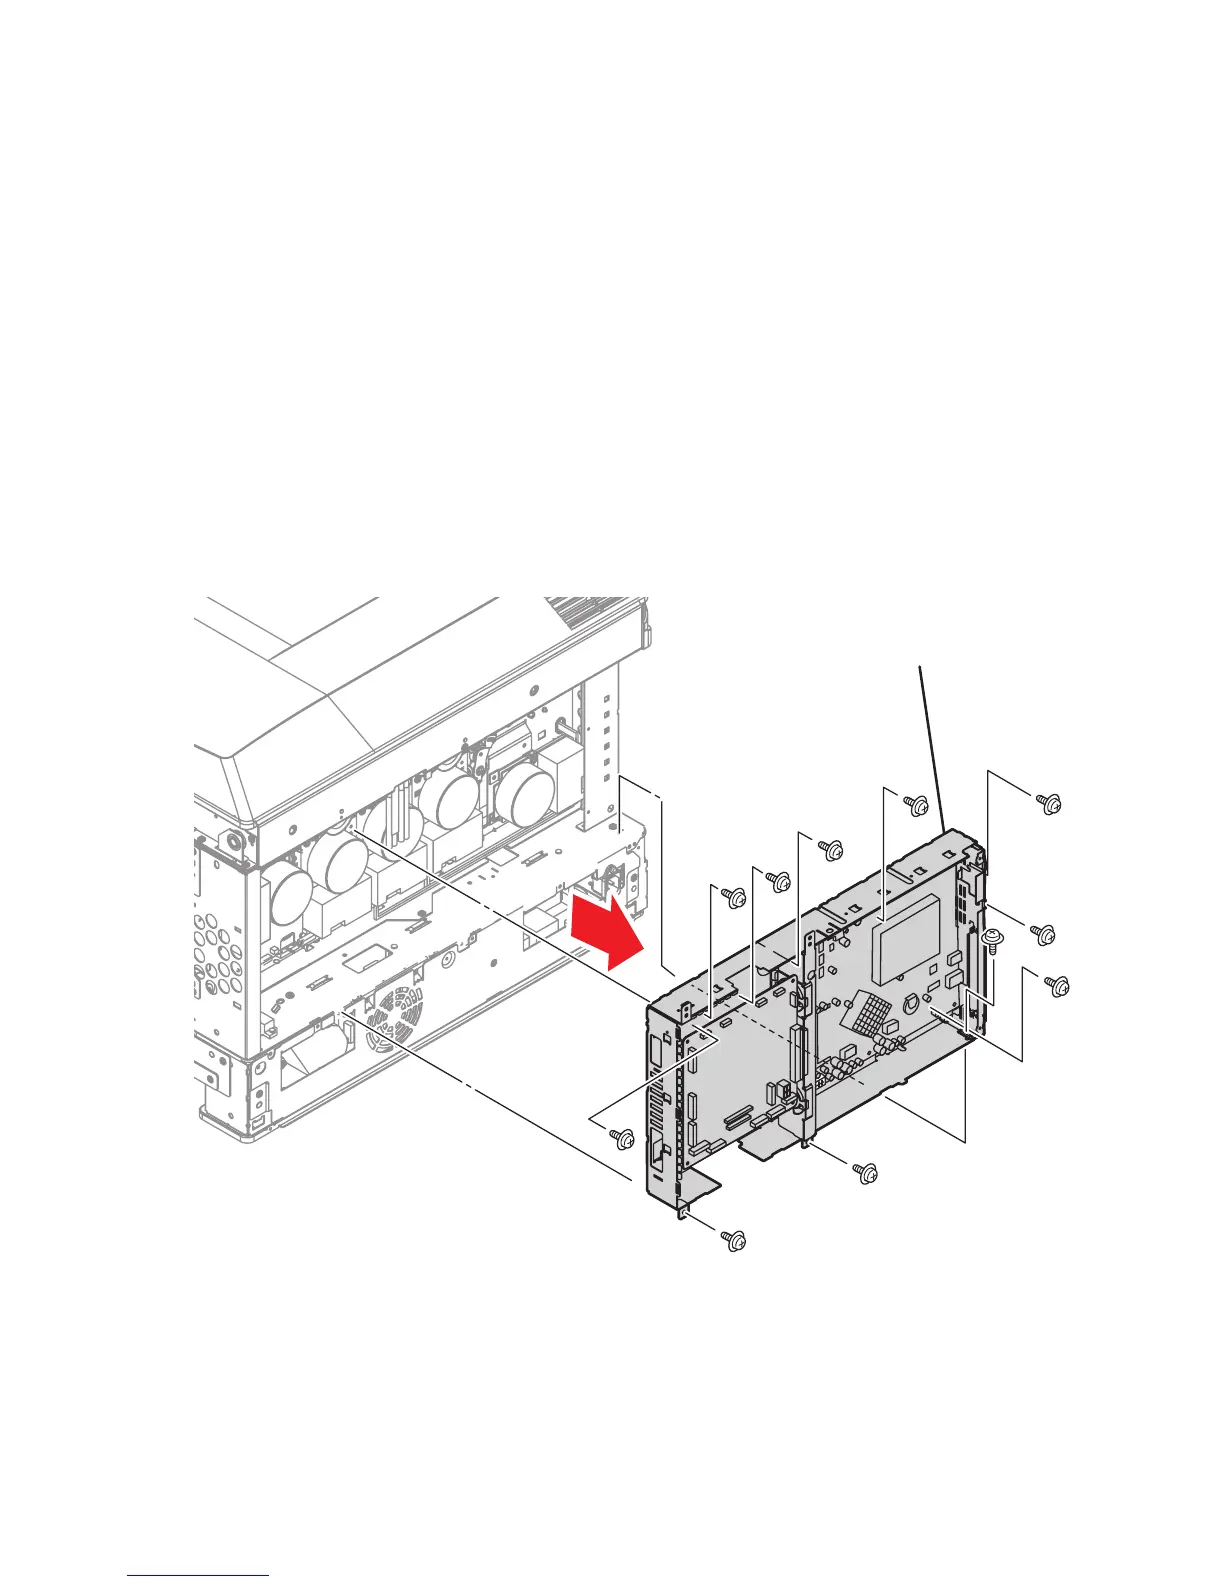
7. Remove 11 (metal, 6 mm) screws securing the card cage to the printer.
8. Remove 1 (metal, 6mm) screw that secures the LED Head cable clamp and guide
block.
9. Release the wiring harnesses from the card cage.
10. Slide the card cage out from the bottom first to protect the wiring.
s7400-189
Card Cage