GBC AdvancedPunch Pro 08/20/2015 Repairs/Adjustments
4-39
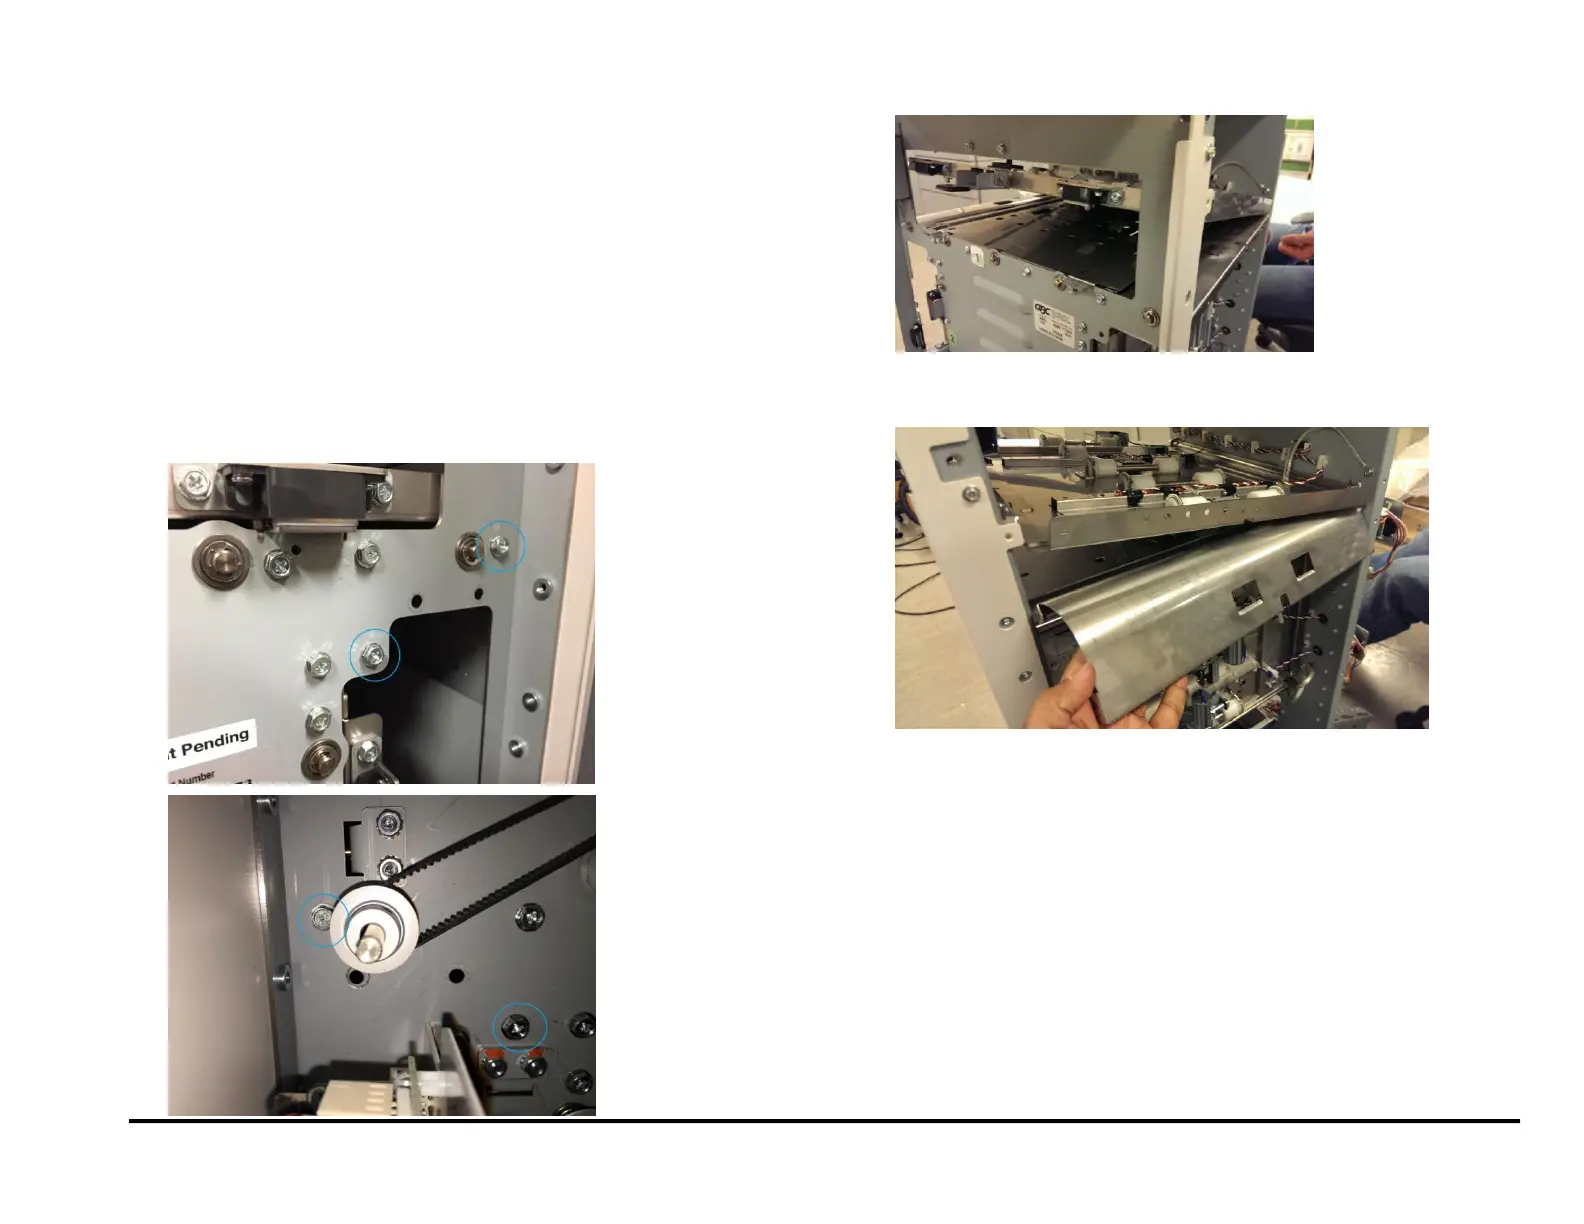
REP 2.8 Lower Exit Panel Replacement
PARTS LIST ON PL 3.1
Use this procedure to remove and install the Lower Exit Panel
Removal Procedure
1. Switch power OFF to entire printing system.
2. Disconnect the Power Cord.
3. Do GP 6.4 to undock the Punch from the upstream and downstream
equipment.
4. Do REP 1.6 Rear Cover Replacement to remove the Rear Cover.
5. Do REP 1.11 Downstream Side Frame Cover Replacement to
remove the upper and lower Downstream Side Frame Cover.
6. Remove the Screws (2) from the Front Frame and the Screws (2)
from the Rear Frame used to mount the Lower Exit Panel.
7. Open the Upper Bypass Assembly.
8. Remove the Lower Exit Panel.
Installation Procedure
1. Place the Lower Exit Panel in position.
2. Tighten the Screws (4) used to mount the Inner Entrance Panel.
3. Do REP 1.11 Downstream Side Frame Cover Replacement to install
the upper and lower Downstream Side Frame Cover.
4. Do REP 1.6 Rear Cover Replacement to install the Rear Cover.
5. Do GP 6.3 to dock the Punch to the upstream and downstream
equipment.
6. Connect the Power Cord.
7. Power ON the entire printing system.



 To Next Page