EasyManuals Logo

GBC AdvancedPunch Pro Service Manual

GBC AdvancedPunch Pro
400 pages
To Next Page IconTo Next Page
To Previous Page IconTo Previous Page
Page #148 background imageLoading...
Page #148 background image
Repairs/Adjustments 08/20/2015 GBC AdvancedPunch Pro
4-60
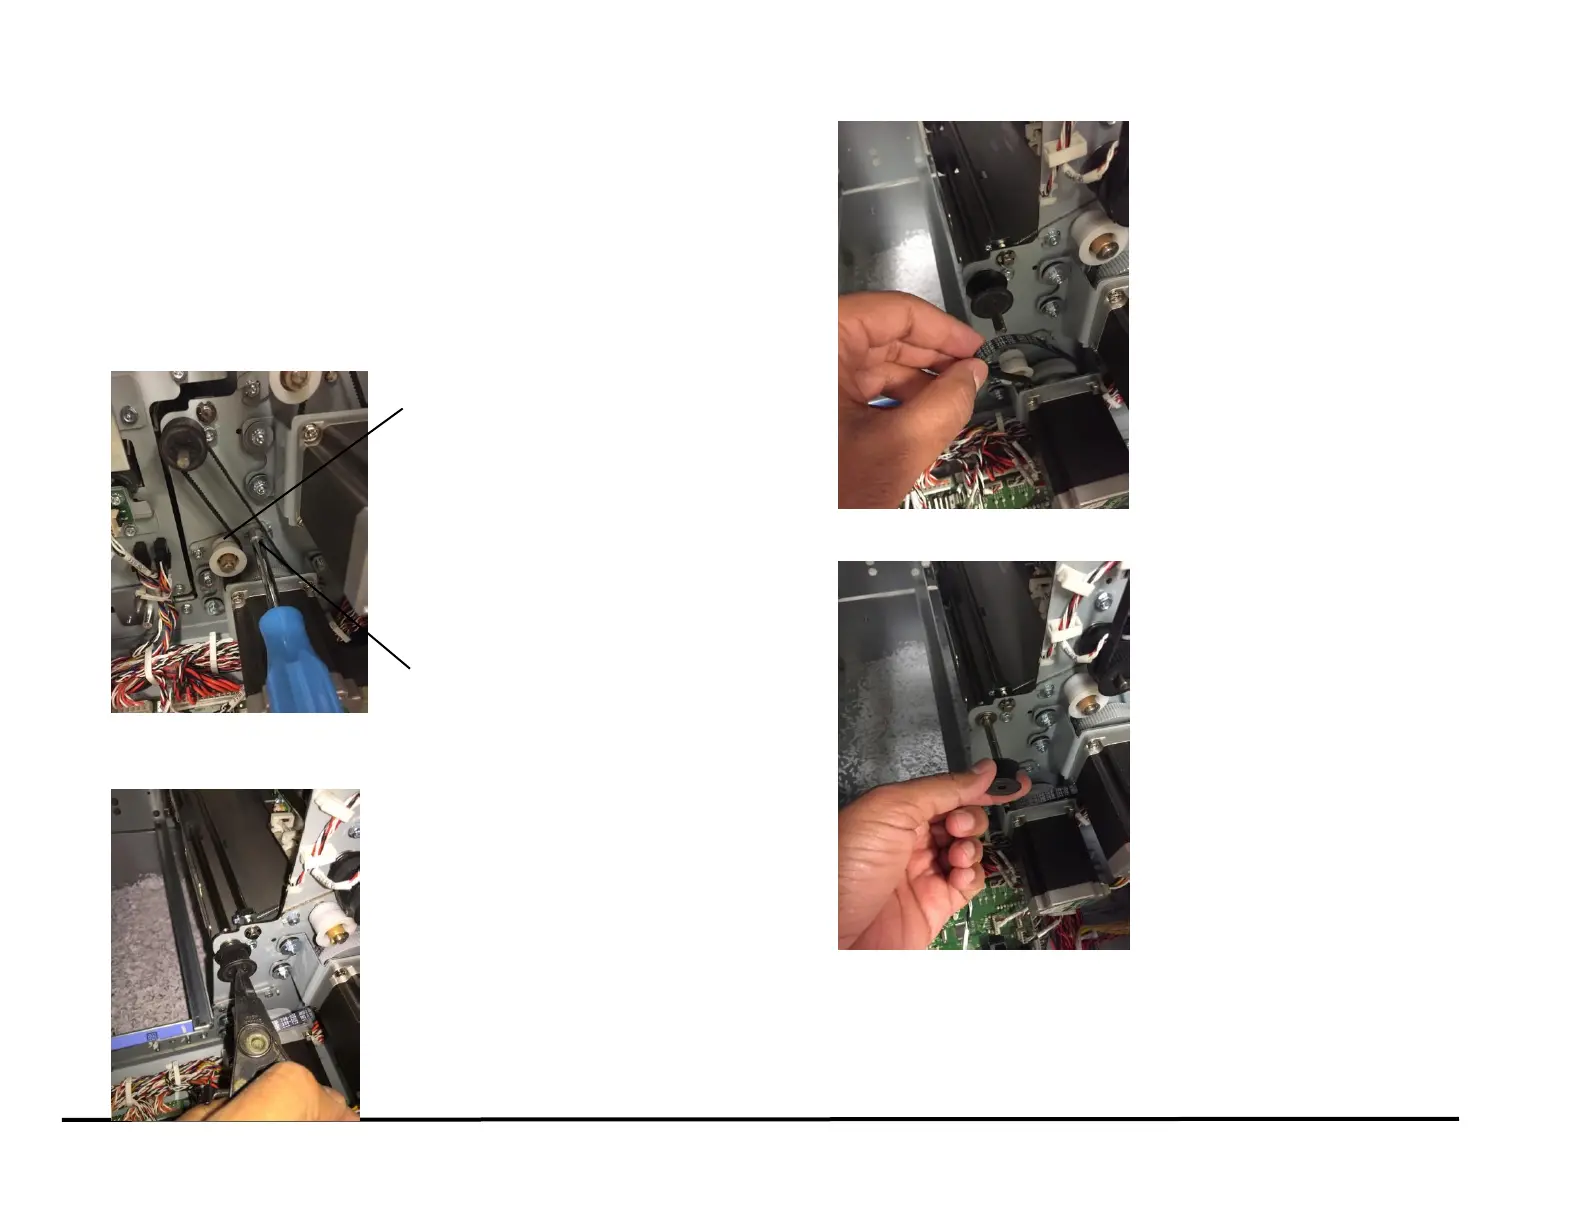
REP 2.22.1 Drive Roller N5 Replacement
Do the following to remove and replace the Drive Roller for Nip N5. (PL
3.4)
Removal Procedure
1. Switch power OFF to entire printing system.
2. Disconnect the Power Cord.
3. Do REP 1.6 to remove the Rear Cover.
4. Do REP 3.1 to remove the Punch Module.
5. Loosen the nuts (2) on the Tensioner of the M2 motor belt.
6. Remove the retaining ring from the shaft of roller N5.
7. Remove the Belt from the Motor Pulley
8. Slide the Pulley off the Roller Shaft.
Tensioner
Nuts (2)

Table of Contents

Other manuals for GBC AdvancedPunch Pro

Questions and Answers:

Question and Answer IconNeed help?

Do you have a question about the GBC AdvancedPunch Pro and is the answer not in the manual?

GBC AdvancedPunch Pro Specifications

General IconGeneral
BrandGBC
ModelAdvancedPunch Pro
CategoryPrinter Accessories
LanguageEnglish

Related product manuals