General Procedures and Information 09/11/2018 GBC AdvancedPunch Pro
6-12
GP 6.1.3 ALIGNMENT MODE Procedure
Do the following to change the Alignment (move the inboard/outboard
position of the punch holes). This setting applies to all paper sizes
1. From the top level screen, press either the up arrow button or the
down arrow button.
This displays the SETTINGS - INFORMATION screen
2. Press the ENTER button when the return symbol is next to the word
SETTINGS. To display the display the BACKGAGE/ ALIGNMENT
screen.
3. Press the down arrow button once so the return symbol is next to the
word ALIGNMENT.
4. Press the ENTER button when the return symbol is next to the word
Alignment to display the ALIGNMENT OFFSET screen.
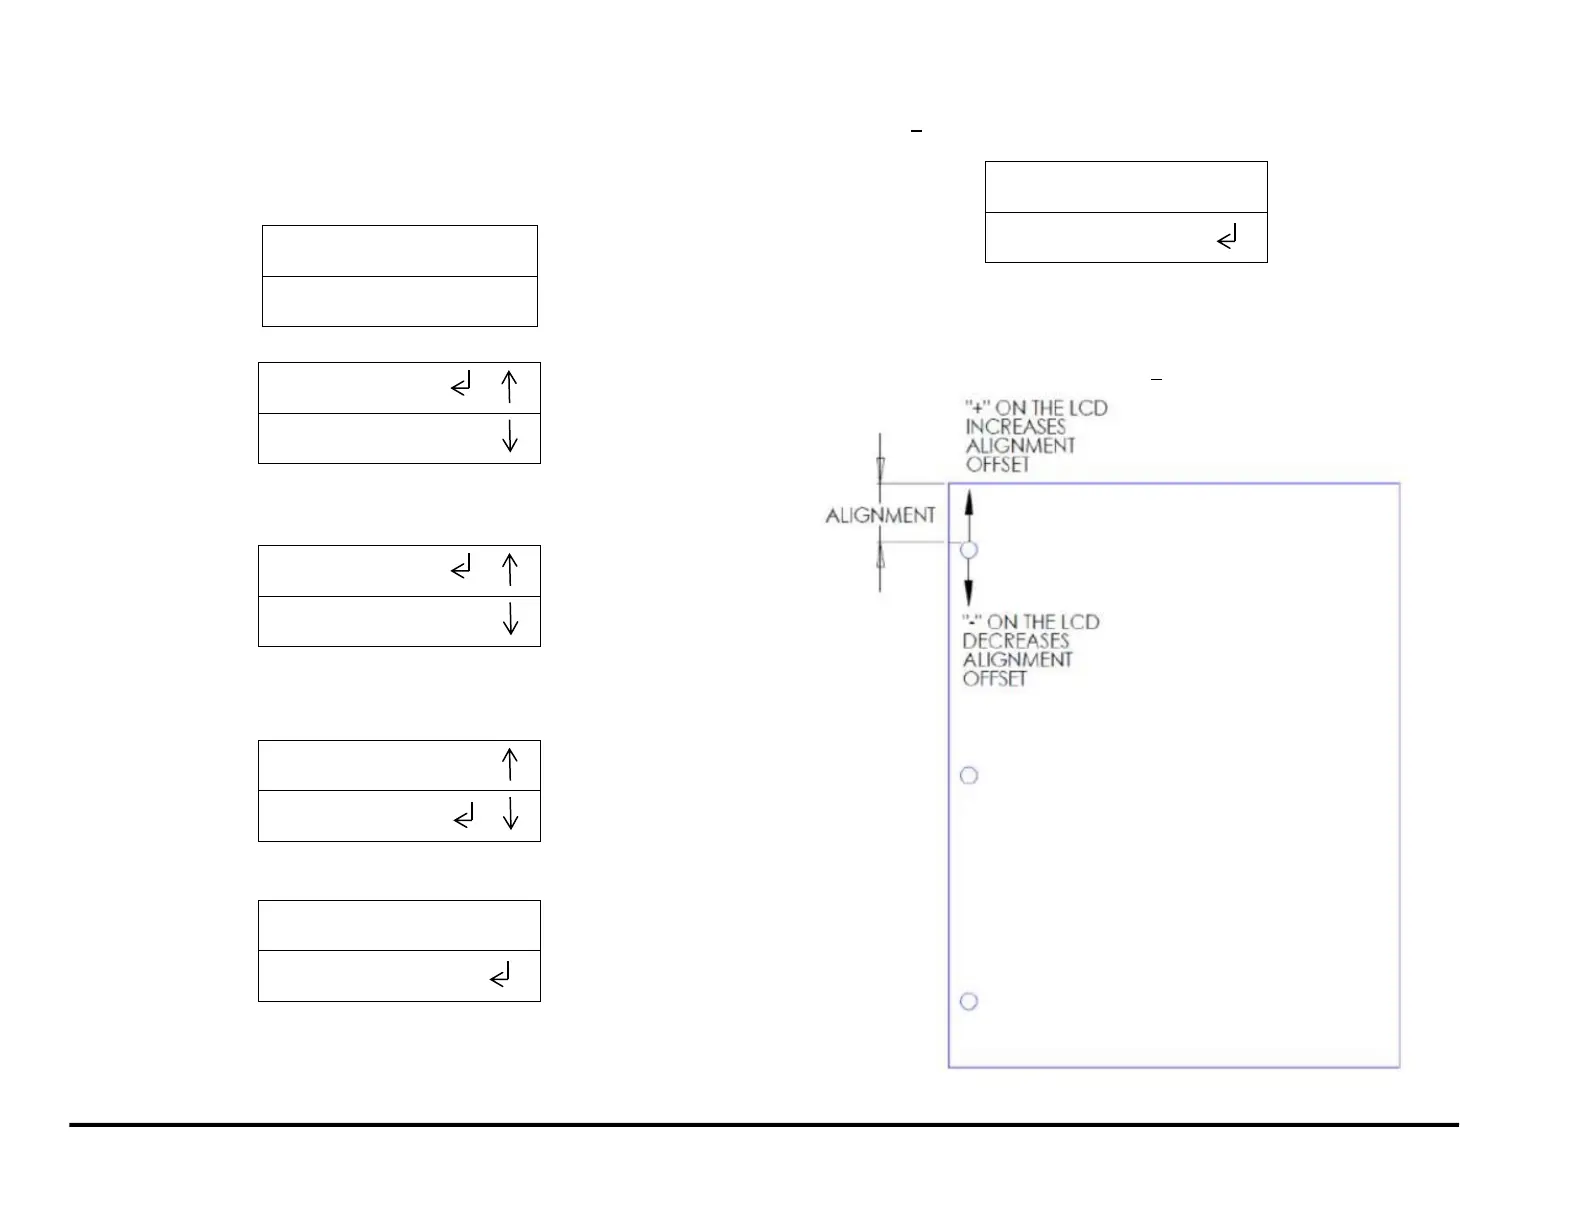
5. Press the up arrow button or the down arrow button to change the
offset by+ 0.1mm (screen will display in inch if UNITS are chosen as
INCH)
A + offset moves the position of the punch holes toward the rear
of the machine (shallower).
A - offset moves the position of the punch holes toward the front
of the machine (deeper)..
The maximum alignment change is + 2.0 mm