Installation Instructions- DFA 08/20/2015 GBC AdvancedPunch Pro
8-16
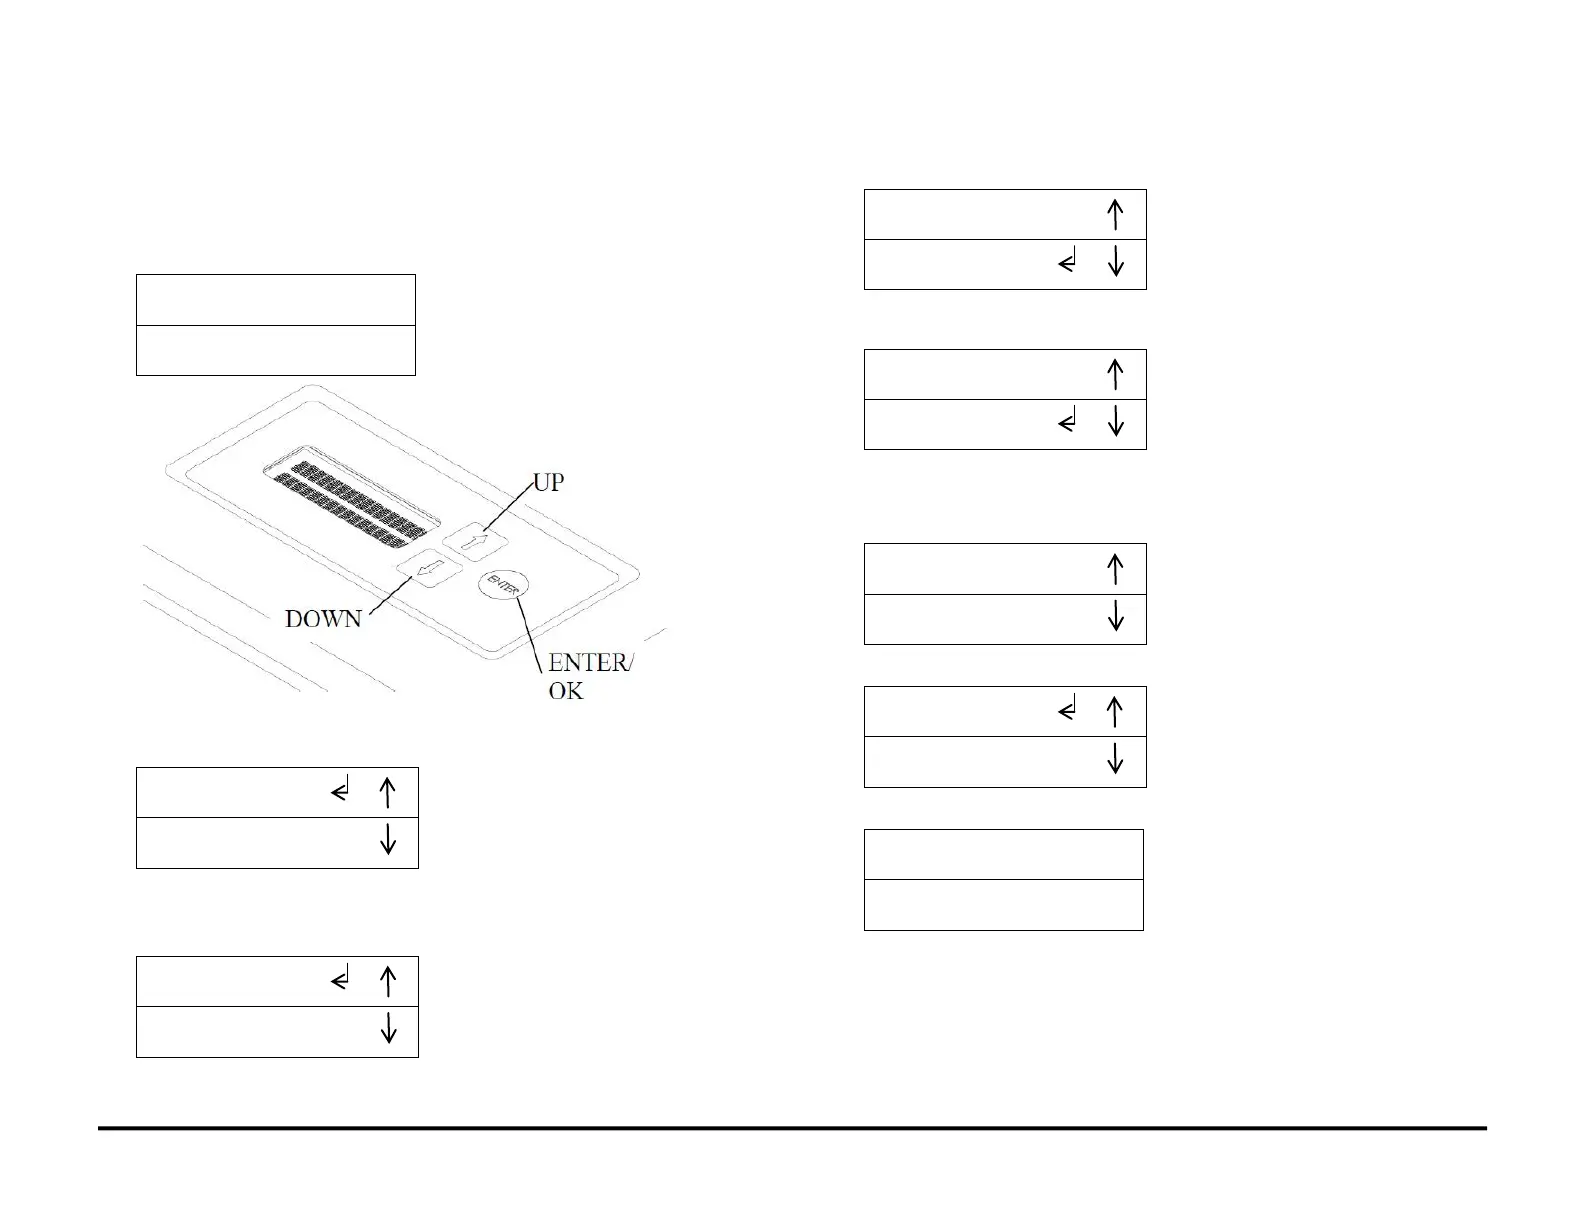
8.18. Run the Punch in Bypass Mode
Put the AdvancedPunch Pro into Bypass mode to allow paper to pass
through the AdvancedPunch Pro without being punched.
1. From the top level screen the LCD User Interface, press either the Up
Arrow Button or the Down Arrow Button.
2. This displays the SETTINGS - INFORMATION screen
3. Press the ENTER button when the bent arrow is next to the word
SETTINGS.
4. This displays the display the PUNCH MODE/ BACKAGE screen.
5. Press the ENTER button when the bent arrow is next to the words
PUNCH MODE to display the Punch Mode menu.
6. Press the Up Arrow Button until the bent arrow is next to the word
OFF.
7. Press the ENTER button to select OFF. This will enable Bypass
mode.
8. Press the Up Arrow Button to display the PREVIOUS MENU option.
9. Press the Up Arrow Button again to display the EXIT option.
10. Press the ENTER button to return to the main screen.
11. READY - BYPASS should appear on the LCD.
The AdvancedPunch Pro is now ready to function in Bypass mode.
12. Program the Nuvera to feed a diagnostics job into the
AdvancedPunch Pro in BYPASS mode, and check that the sheets
pass through the AdvancedPunch Pro properly.