Repairs/Adjustments 08/20/2015 GBC AdvancedPunch Pro
4-28
REP 2.3 Acceleration Roller Idler Assembly Replacement
PARTS LIST ON PL 3.1 and PL 4.4
Do the following to replace the Acceleration Idler Roller Assembly (or the
Accel Idler Panel Weldment).
Removal Procedure
1. Switch power OFF to entire printing system.
2. Disconnect the Power Cord.
3. Do GP 6.4 Undock the Punch to separate the Punch from the
upstream and downstream devices.
4. Open the Front Door.
5. Do REP 1.8 to remove the Upstream Side frame Cover.
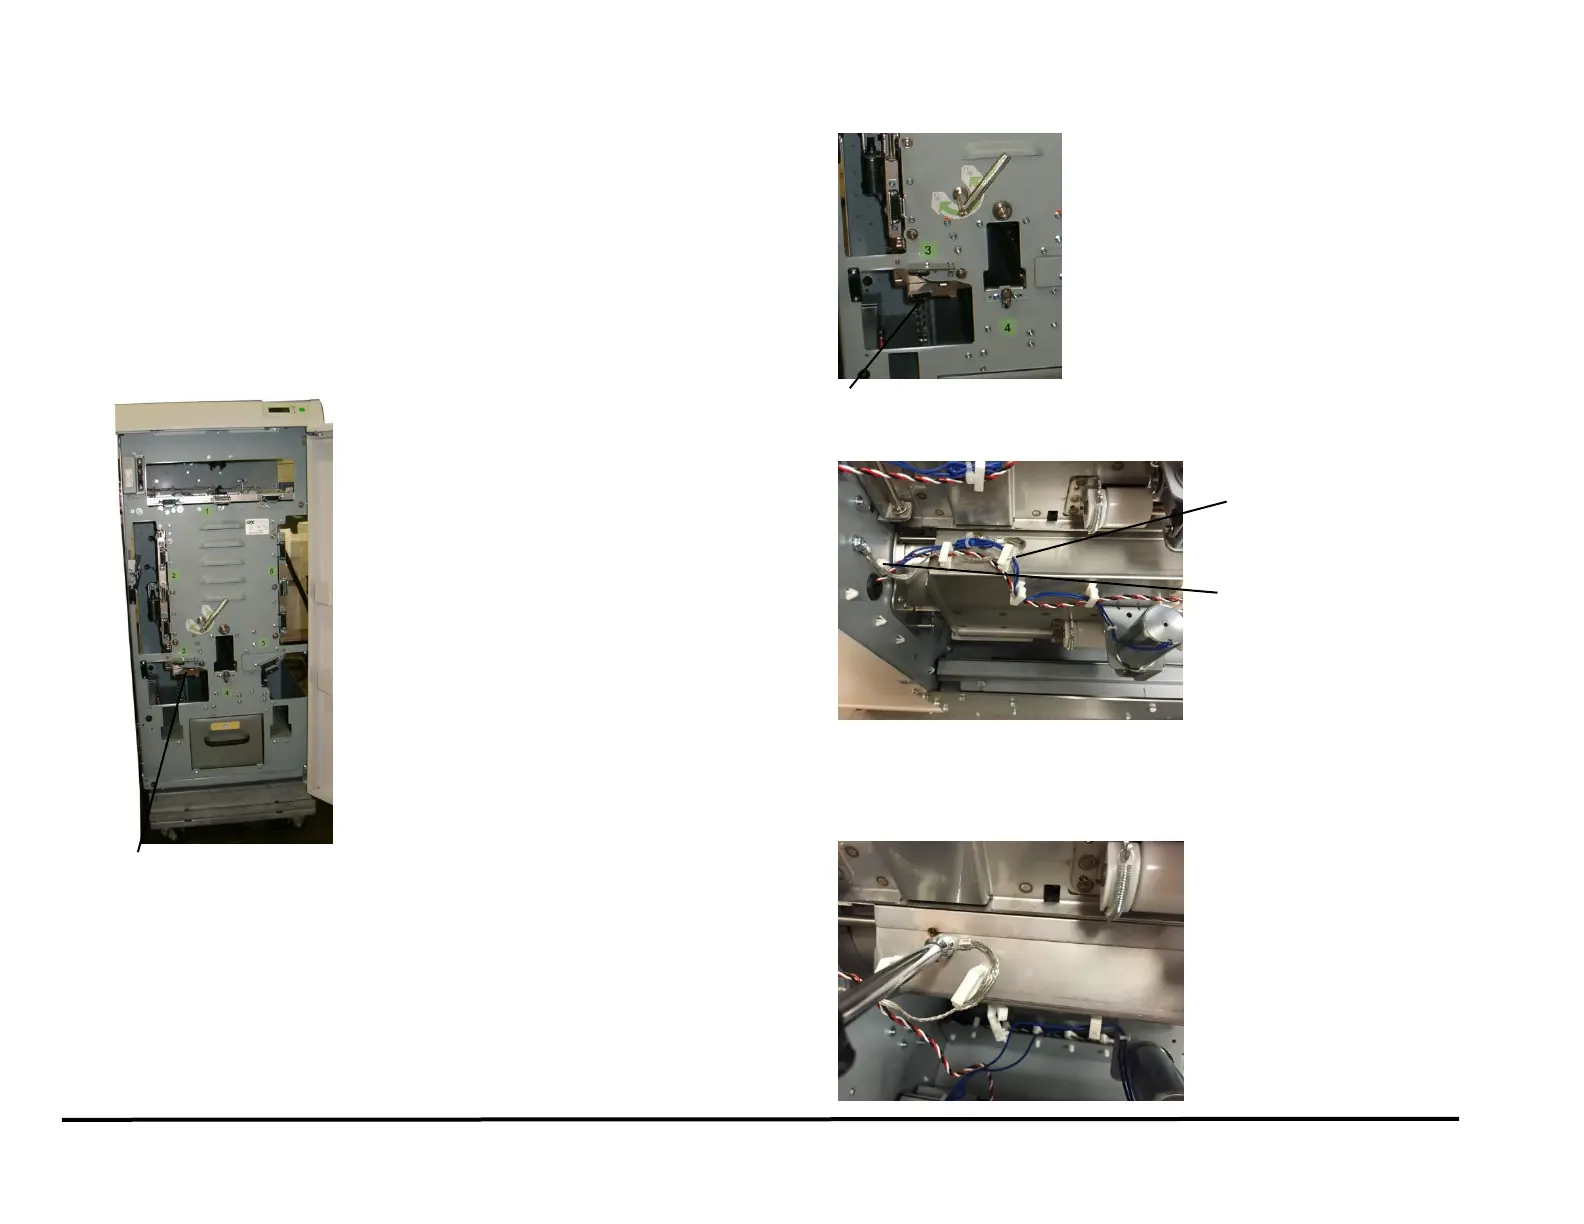
6. Grasp the Handle and open the Acceleration Idler Roller Panel.
7. Open the Cable Clamps to release the Sensor Cable.
8. Disconnect the Accel Sensor S5 Connector.
9. Disconnect the Acceleration Idler Roller Solenoid SOL5 Connector at
the sensor on the Acceleration Idler Roller Assembly.
10. Remove the screw for the Ground strap.
Acceleration Idler Roller Handle
Acceleration Idler Roller Handle